Dear Readers,
As mentioned in my previous post, starting from Oracle 21c, Oracle supports exporting data directly to Object Storage. This post outlines the overall procedure to implement this feature. If you attempt this method on Oracle 19c, it will fail with the error: “ORA-39208: Parameter KU$_FILE_TYPE_URIDUMP_FILE is invalid for EXPORT jobs.”
This method leverages the DBMS_CLOUD package. While DBMS_CLOUD comes pre-installed, configured, and managed in Oracle Autonomous Databases, it must be manually configured in other database editions to enable expdp exports to Object Storage.
As I am currently using Oracle 23.26 (26ai), we can make use of latest pearl (catcon.pl) script to get this package installed. In case you are on pre-23.7 versions, kindly follow “How To Setup And Use DBMS_CLOUD Package (Doc ID 2748362.1)“


Lets take a deep dive on actual process:
Step 1: Create a schema owning the DBMS_CLOUD package and install the DBMS_CLOUD package:
The DBMS_CLOUD package is owned by a dedicated schema, C##CLOUD$SERVICE. This step creates the user and assigns the necessary privileges. By default, the user account is locked to prevent any direct logins.
To create user:
$ORACLE_HOME/perl/bin/perl $ORACLE_HOME/rdbms/admin/catcon.pl \
-u sys/{password} \
--force_pdb_mode 'READ WRITE' \
-b dbms_cloud_install \
-d $ORACLE_HOME/rdbms/admin/ \
-l /tmp \
catclouduser.sql
To insall actual package:
$ORACLE_HOME/perl/bin/perl $ORACLE_HOME/rdbms/admin/catcon.pl \
-u sys/{password} \
--force_pdb_mode 'READ WRITE' \
-b dbms_cloud_install \
-d $ORACLE_HOME/rdbms/admin/ \
-l /tmp \
dbms_cloud_install.sql
Step 2: Create SSL Wallet with necessary certificates:
Currently Oracle does not ship the certificates as part of patches. You can download the necessary certificates from this link & keep it in /tmp.
Since all Object Storage access happens over HTTPS, the database must trust the certificates of the target locations. To achieve this, you’ll need to create a security wallet that stores these certificates.
mkdir -p /opt/oracle/dcs/commonstore/wallets/ssl
cd /opt/oracle/dcs/commonstore/wallets/ssl
tar -xvf /tmp/dbc_certs.tar
Now lets create a wallet and load the certificates. You can set the wallet password – something more secure for your installation.
orapki wallet create -wallet . -pwd {your wallet password} -auto_loginfor i in ls ./*cer
do
orapki wallet add -wallet . -trusted_cert -cert $i -pwd {your wallet password}
done
Verify if the certificates are correctly added as follows:
cd /opt/oracle/dcs/commonstore/wallets/ssl
orapki wallet display -wallet .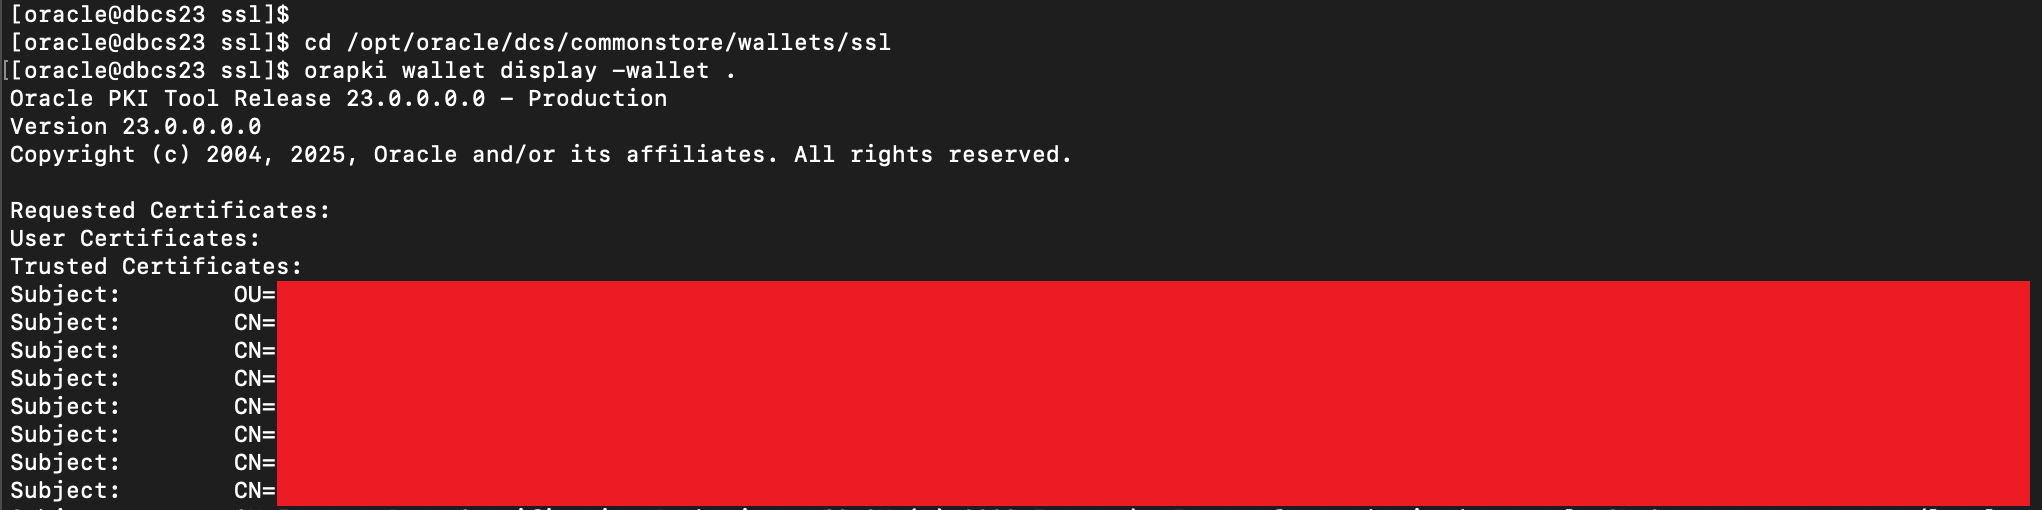
Step 3: Configure your sqlnet.ora wiht the new SSL wallet details:
To have your SSL wallet taken into effect you need to point to the newly created ssl wallet for your Oracle installation by adding it to your sqlnet.ora on the Server side. If you are on a RAC installation then you have to adjust this on all nodes.
You can add entry as given below. There is no need to restart the listener of the database.
WALLET_LOCATION=(SOURCE=(METHOD=FILE)(METHOD_DATA=(DIRECTORY=/opt/oracle/dcs/commonstore/wallets/ssl)))Step 4: Configure the Database with ACEs for DBMS_CLOUD:
Create Access Control Entries (ACEs) to allow communication with Object Stores through https. So this step is necessary so the C##CLOUD$SERVICE can access the cloud services.
Create a file called “/tmp/dbmscloud_ace.sql” with the following contents. Edit the sslwalletdir setting if you have altered the location.
@$ORACLE_HOME/rdbms/admin/sqlsessstart.sql

-- you must not change the owner of the functionality to avoid future issues
define clouduser=C##CLOUD$SERVICE

-- CUSTOMER SPECIFIC SETUP, NEEDS TO BE PROVIDED BY THE CUSTOMER
-- - SSL Wallet directory
define sslwalletdir=/opt/oracle/dcs/commonstore/wallets/ssl

-- Create New ACL / ACE s
begin
-- Allow all hosts for HTTP/HTTP_PROXY
dbms_network_acl_admin.append_host_ace(
host =>'*',
lower_port => 443,
upper_port => 443,
ace => xs$ace_type(
privilege_list => xs$name_list('http', 'http_proxy'),
principal_name => upper('&clouduser'),
principal_type => xs_acl.ptype_db));
--
-- Allow wallet access
dbms_network_acl_admin.append_wallet_ace(
wallet_path => 'file:&sslwalletdir',
ace => xs$ace_type(privilege_list =>
xs$name_list('use_client_certificates', 'use_passwords'),
principal_name => upper('&clouduser'),
principal_type => xs_acl.ptype_db));
end;
/

-- Setting SSL_WALLET database property
begin
if sys_context('userenv', 'con_name') = 'CDB$ROOT' then
execute immediate 'alter database property set ssl_wallet=''&sslwalletdir''';
end if;
end;
/

@$ORACLE_HOME/rdbms/admin/sqlsessend.sql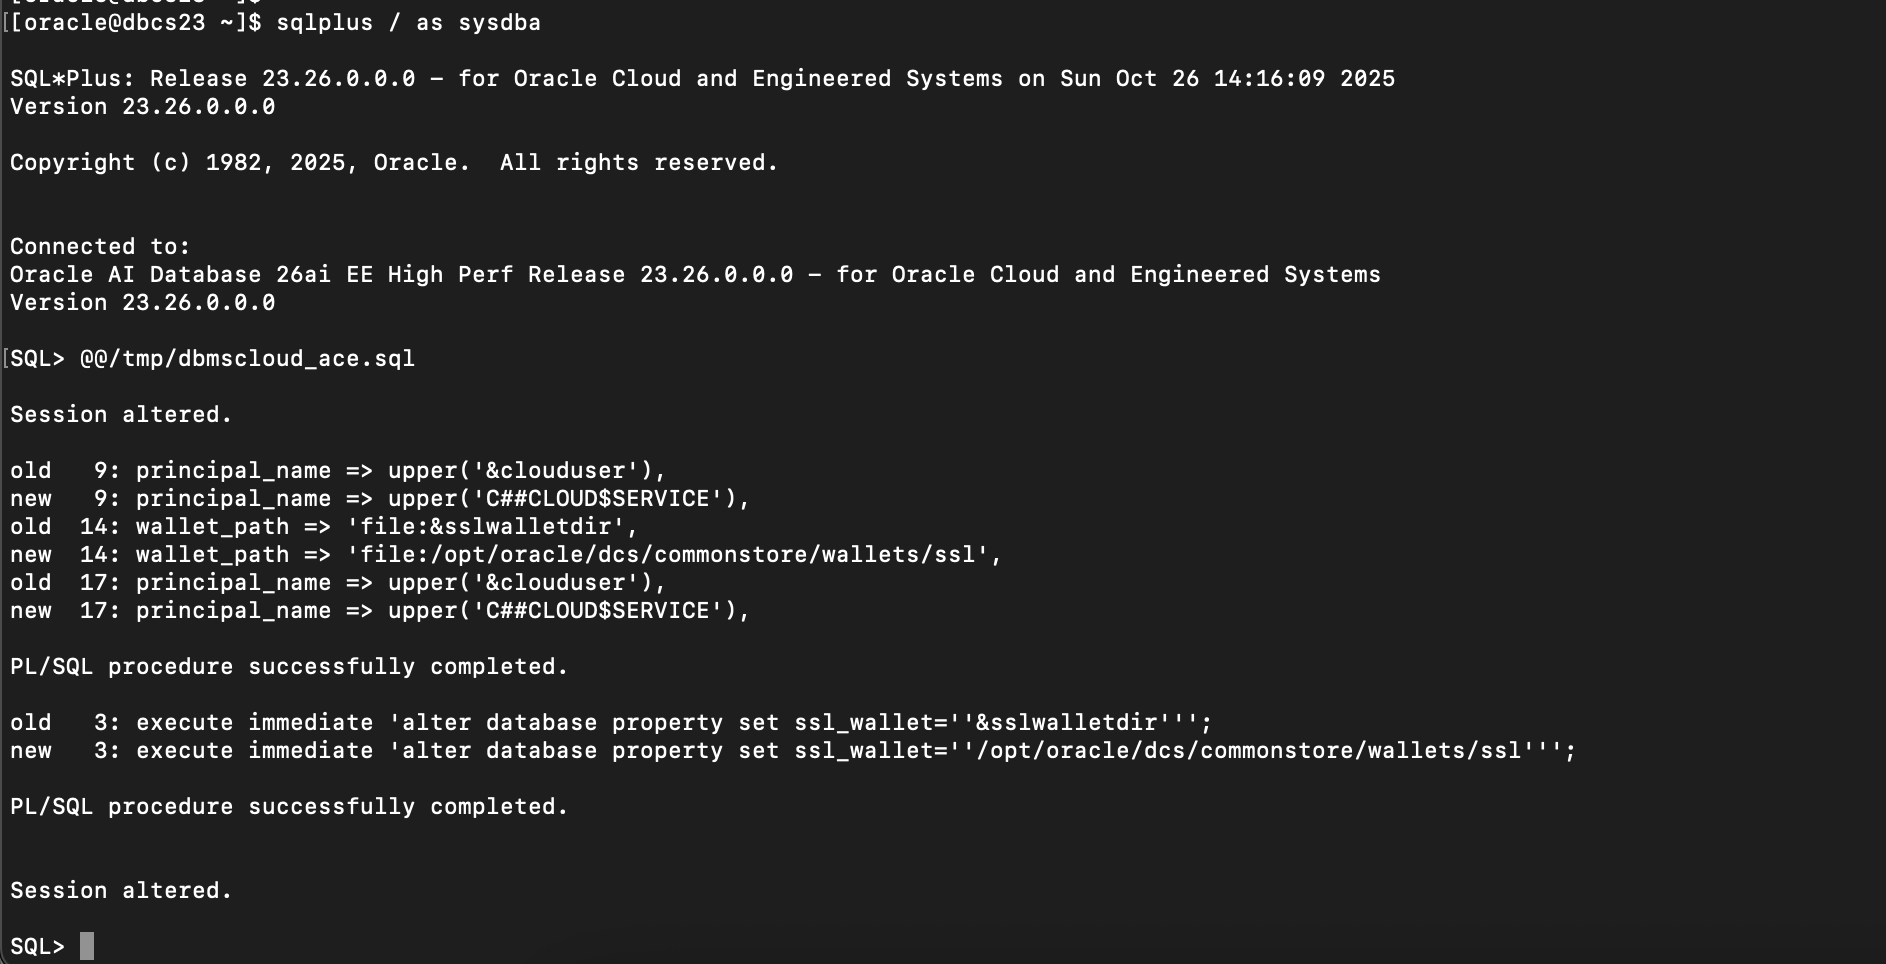
You can verify if the database properties is showing correct wallet location using command.
select * from database_properties where property_name in ('SSL_WALLET','HTTP_PROXY');
Step 5: Verify the configuration of DBMS_CLOUD:
Create a file called “/tmp/dbmscloud_verify.sql” with the following contents. Update the wallet path and password as required.
-- you must not change the owner of the functionality to avoid future issues
define clouduser=C##CLOUD$SERVICE
-- CUSTOMER SPECIFIC SETUP, NEEDS TO BE PROVIDED BY THE CUSTOMER
-- - SSL Wallet directory and password
define sslwalletdir=/opt/oracle/dcs/commonstore/wallets/ssl
define sslwalletpwd=<<your wallet password>>
-- In environments w/ a proxy, you need to set the proxy in the verification code
-- define proxy_uri=<your proxy URI address>
-- create and run this procedure as owner of the ACLs, which is the future owner
-- of DBMS_CLOUD
CREATE OR REPLACE PROCEDURE &clouduser..GET_PAGE(url IN VARCHAR2) AS
request_context UTL_HTTP.REQUEST_CONTEXT_KEY;
req UTL_HTTP.REQ;
resp UTL_HTTP.RESP;
data VARCHAR2(32767) default null;
err_num NUMBER default 0;
err_msg VARCHAR2(4000) default null;
BEGIN
-- Create a request context with its wallet and cookie table
request_context := UTL_HTTP.CREATE_REQUEST_CONTEXT(
wallet_path => 'file:&sslwalletdir',
wallet_password => '&sslwalletpwd');
-- Make a HTTP request using the private wallet and cookie
-- table in the request context
req := UTL_HTTP.BEGIN_REQUEST(
url => url,
request_context => request_context);
resp := UTL_HTTP.GET_RESPONSE(req);
DBMS_OUTPUT.PUT_LINE('valid response');
EXCEPTION
WHEN OTHERS THEN
err_num := SQLCODE;
err_msg := SUBSTR(SQLERRM, 1, 3800);
DBMS_OUTPUT.PUT_LINE('possibly raised PLSQL/SQL error: ' ||err_num||' - '||err_msg);
UTL_HTTP.END_RESPONSE(resp);
data := UTL_HTTP.GET_DETAILED_SQLERRM ;
IF data IS NOT NULL THEN
DBMS_OUTPUT.PUT_LINE('possibly raised HTML error: ' ||data);
END IF;
END;
/
set serveroutput on
BEGIN
&clouduser..GET_PAGE('https://objectstorage.us-phoenix-1.oraclecloud.com');
END;
/
set serveroutput off
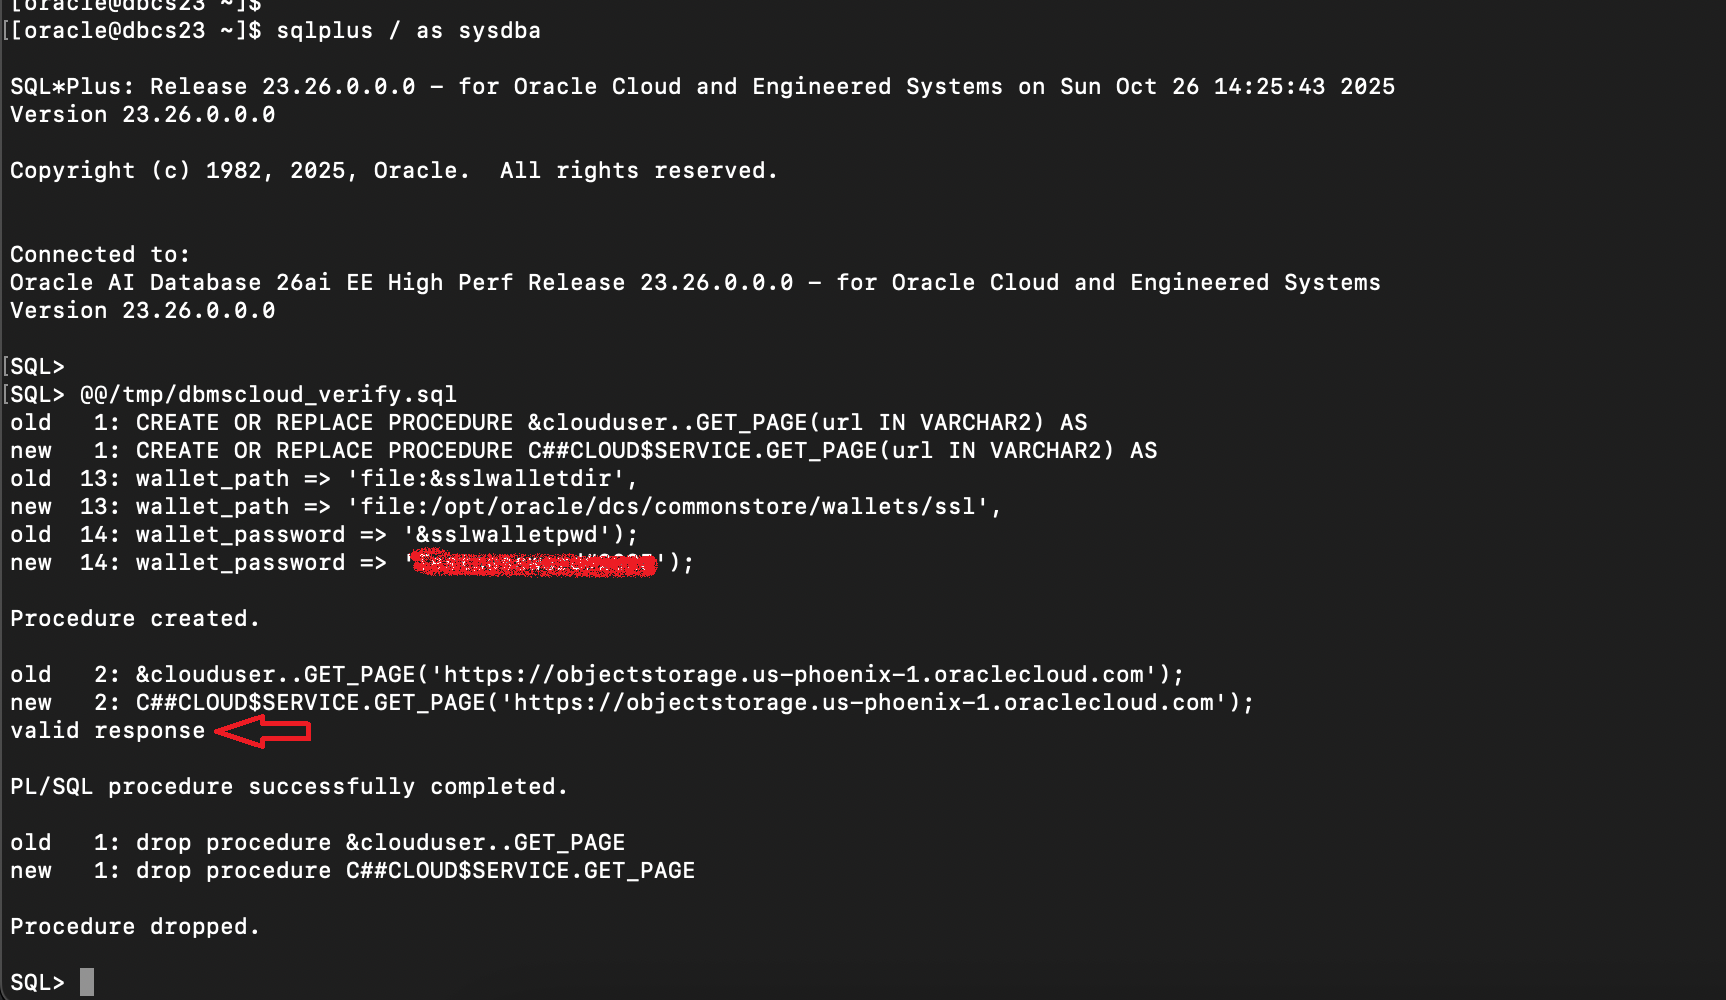
drop procedure &clouduser..GET_PAGE;If you have properly configured the SSL wallet and set up your database environment, the script will return “valid response” when you can successfully reach out to Oracle Object Store.
Step 6: Configuring users or roles to use DBMS_CLOUD
I have already created schema named DATAPUMPTEST for testing EXPDP backups. Now lets grant necessary privileges to use DBMS_CLOUD:
grant connect, resource to DATAPUMPTEST;
grant unlimited tablespace to DATAPUMPTEST;
grant create credential to DATAPUMPTEST;
grant execute on dbms_cloud to DATAPUMPTEST;
Now lets create credentials using DATAPUMPTEST to access object storage. For more information on creating auth token, kindly check this link:
begin
dbms_cloud.create_credential(
credential_name => 'datapump_cred',
username => 'OracleIdentityCloudService/{OCI user}',
password => '{Auth Token}');
end;
/
And then verify if I am able to list current contents of object storage bucket:
select object_name from   dbms_cloud.list_objects(
         'datapump_cred',
         'https://objectstorage.us-phoenix-1.oraclecloud.com/n/{my-namespace}/b/{bucket_name}/o/');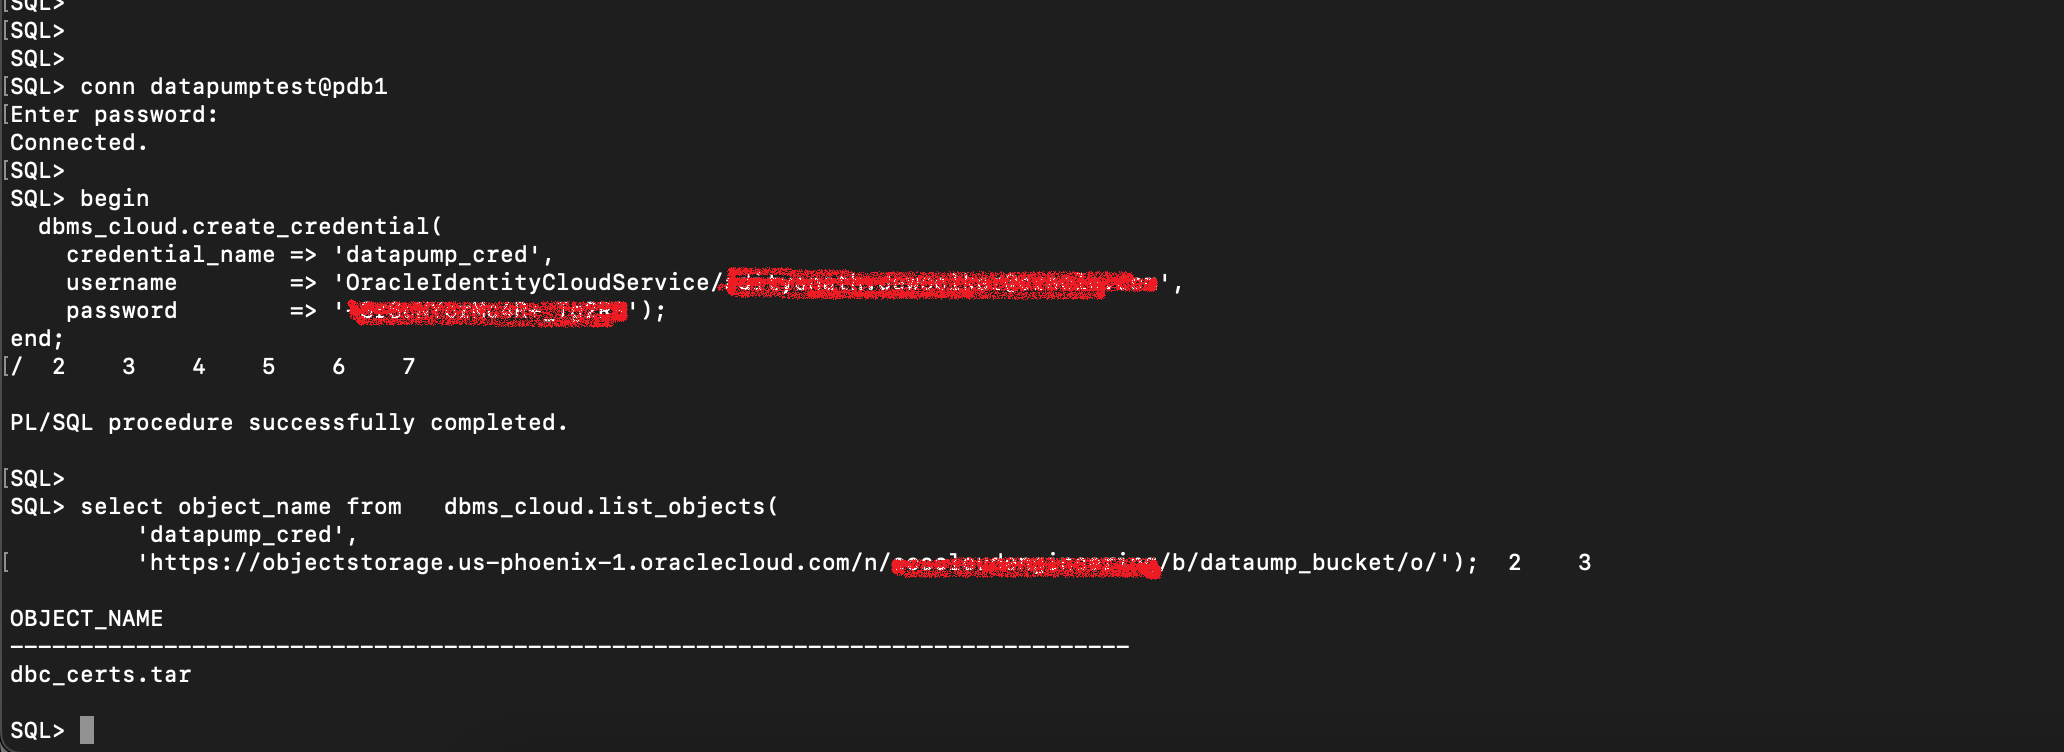
Step 7: Test EXPDP
Now we are ready to check if we are able to take EXPDP backup directly on object storage bucket. Following is the sample command. Kindly note you will need to create DB directory to store logfile while taking export. You can then transfer it to object storage manually.
expdp {username}/{password}@pdb1 \
schemas={schema_name} \
credential={credential name} \
dumpfile=https://acscloudengineering.objectstorage.{region name}.oraclecloud.com/n/{namespace}/b/{bucket name}/o/datapumptest%u.dmp \
parallel=4 \
logfile={directory_name}:datapumptest_261025.log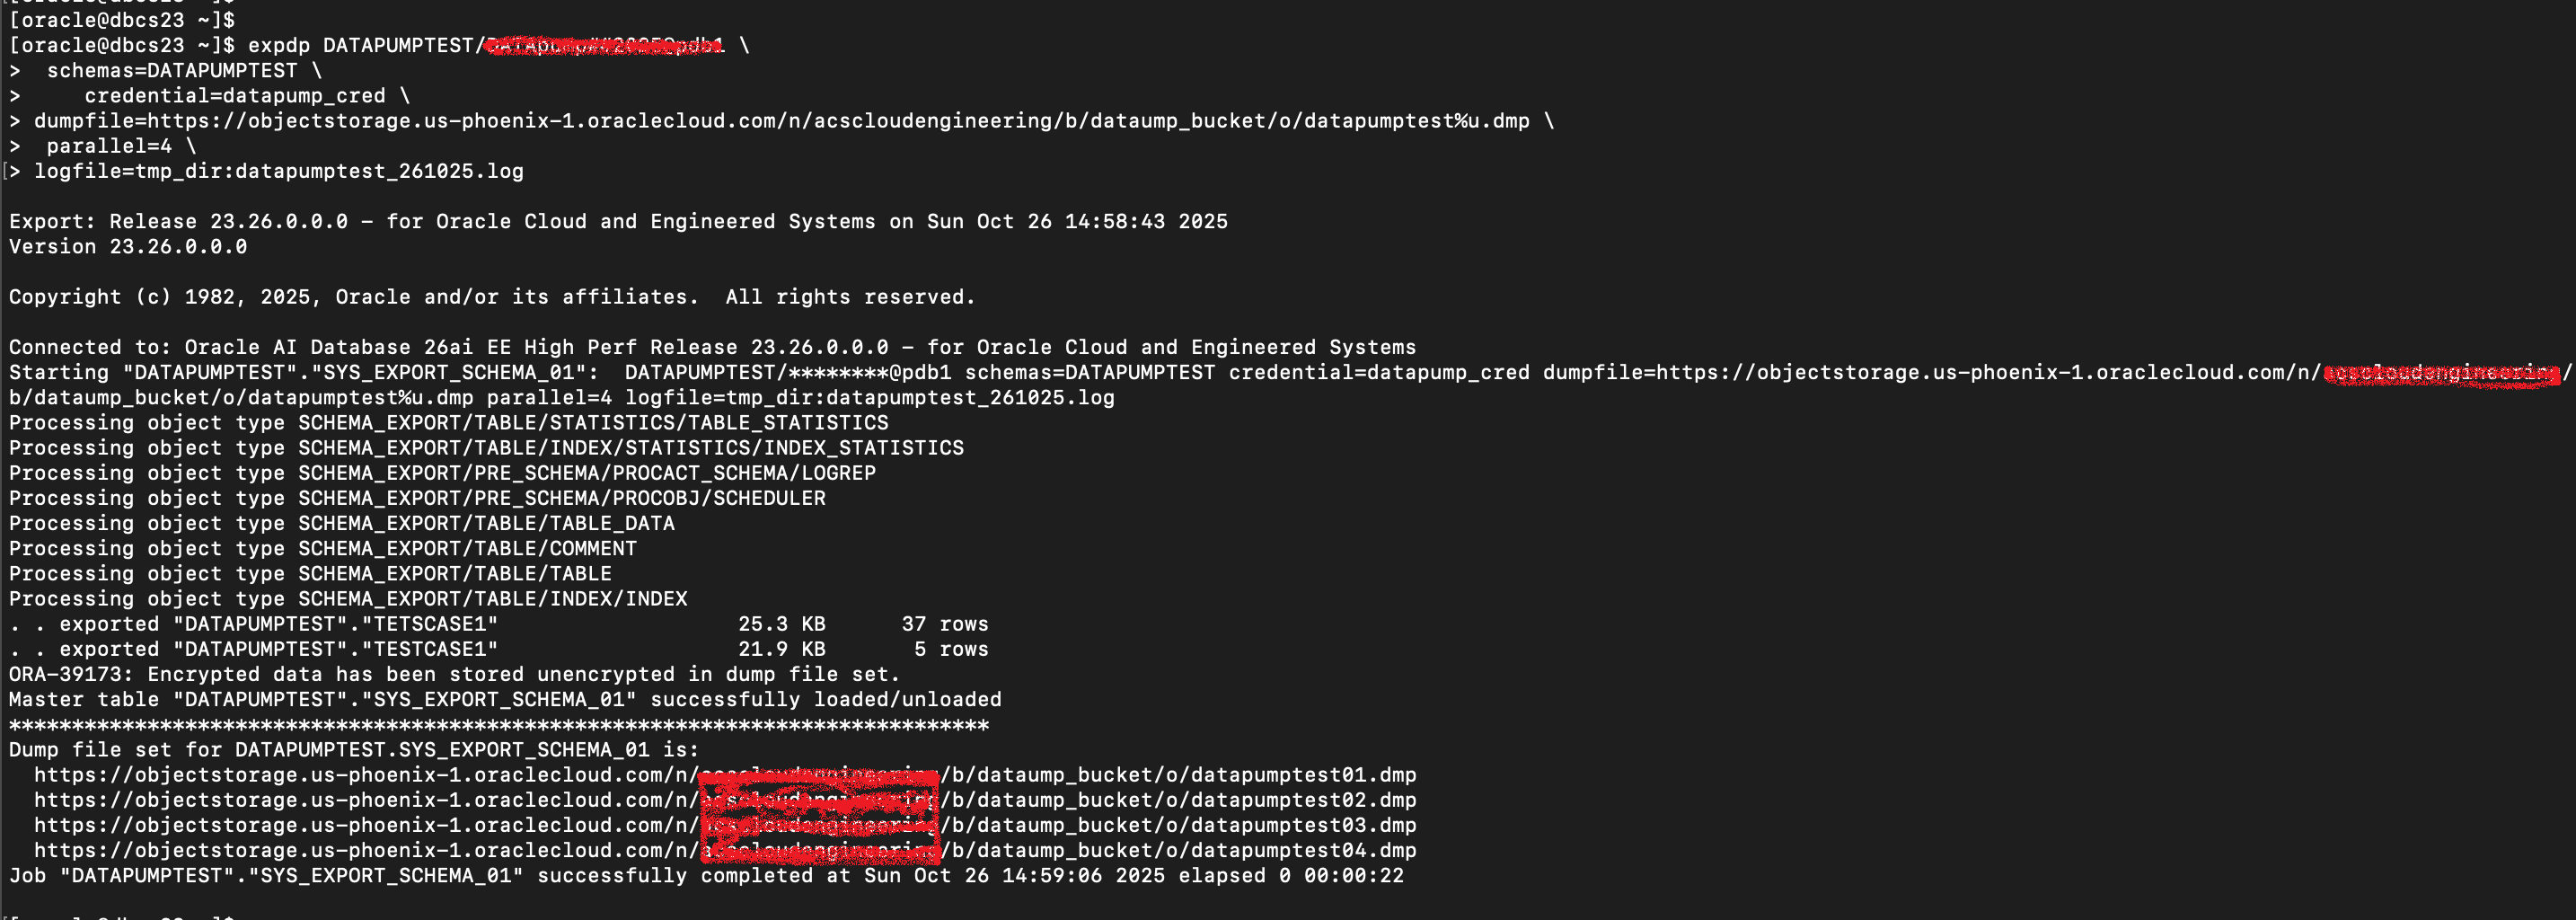
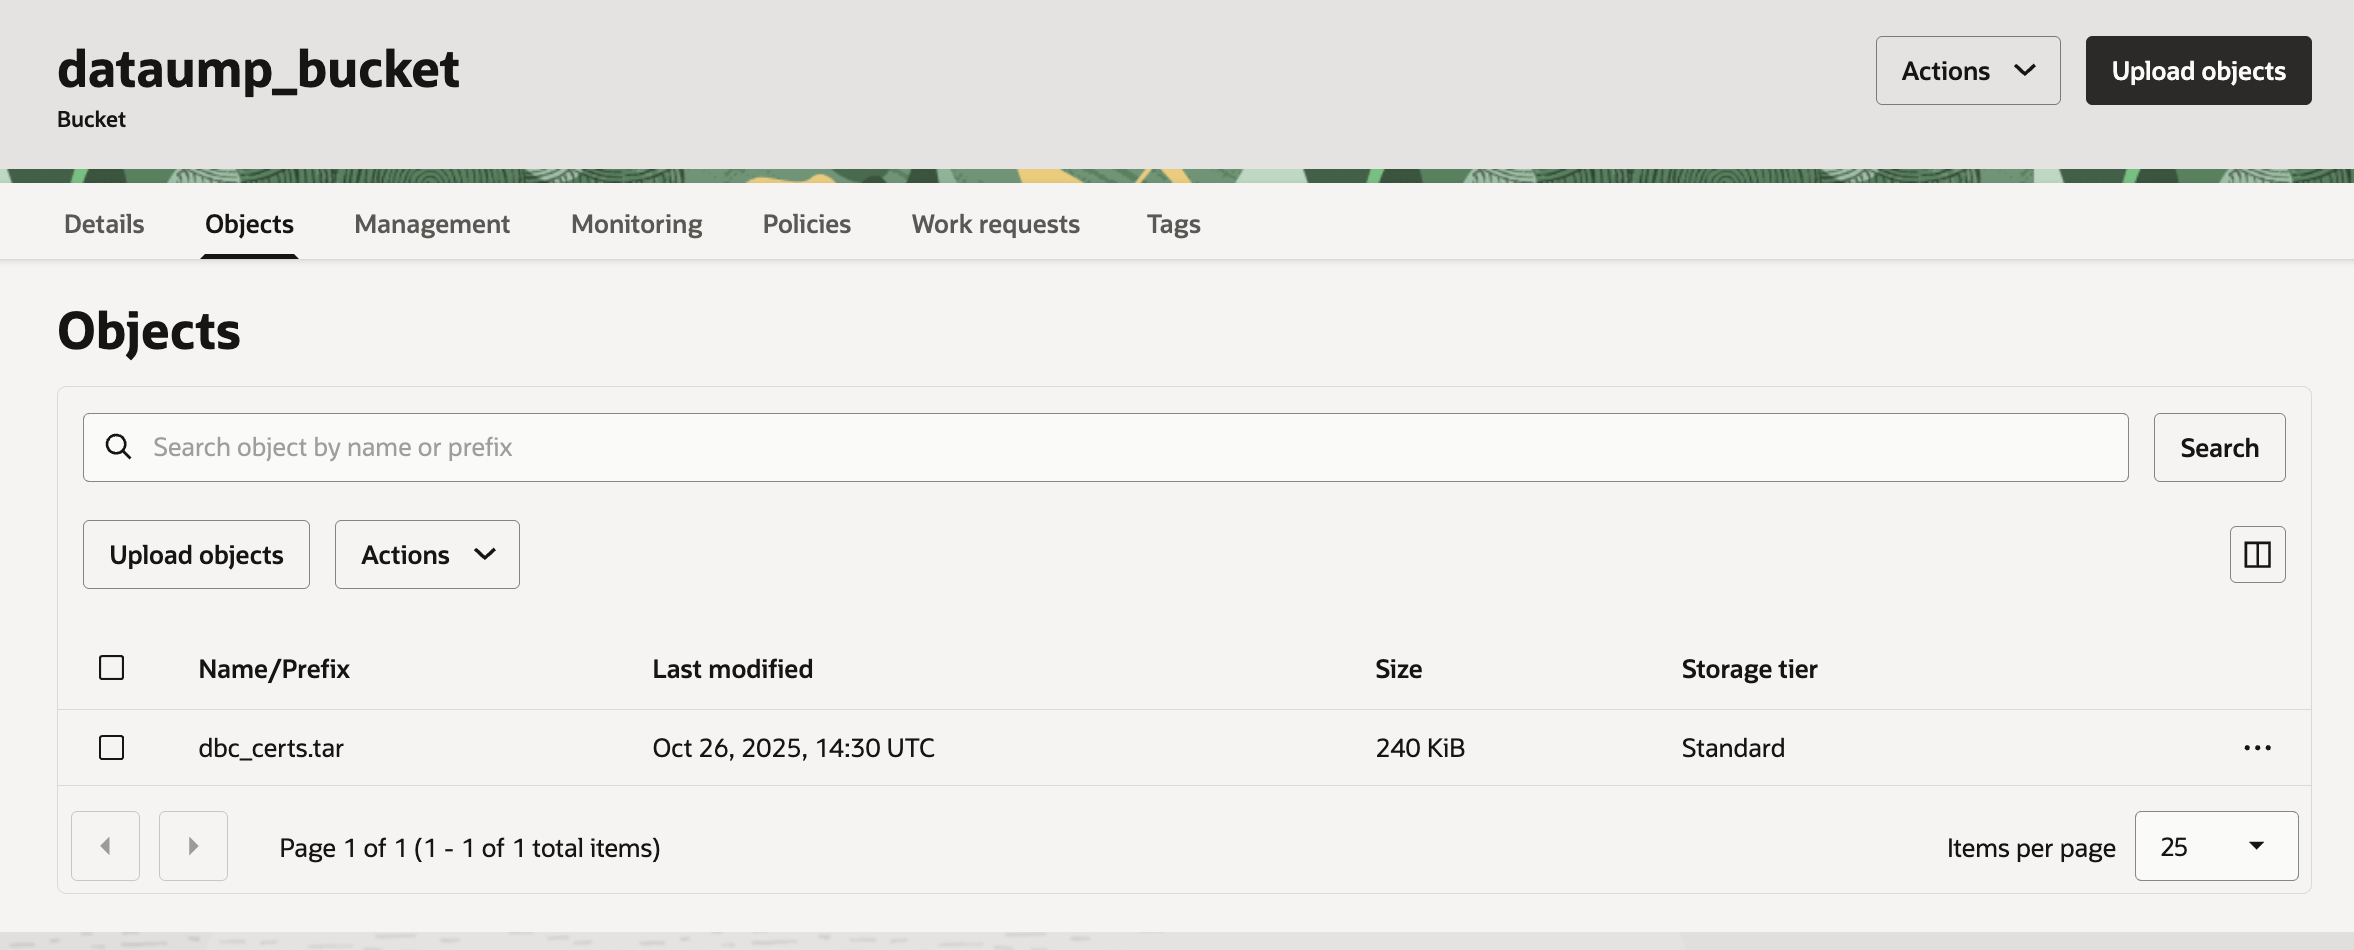
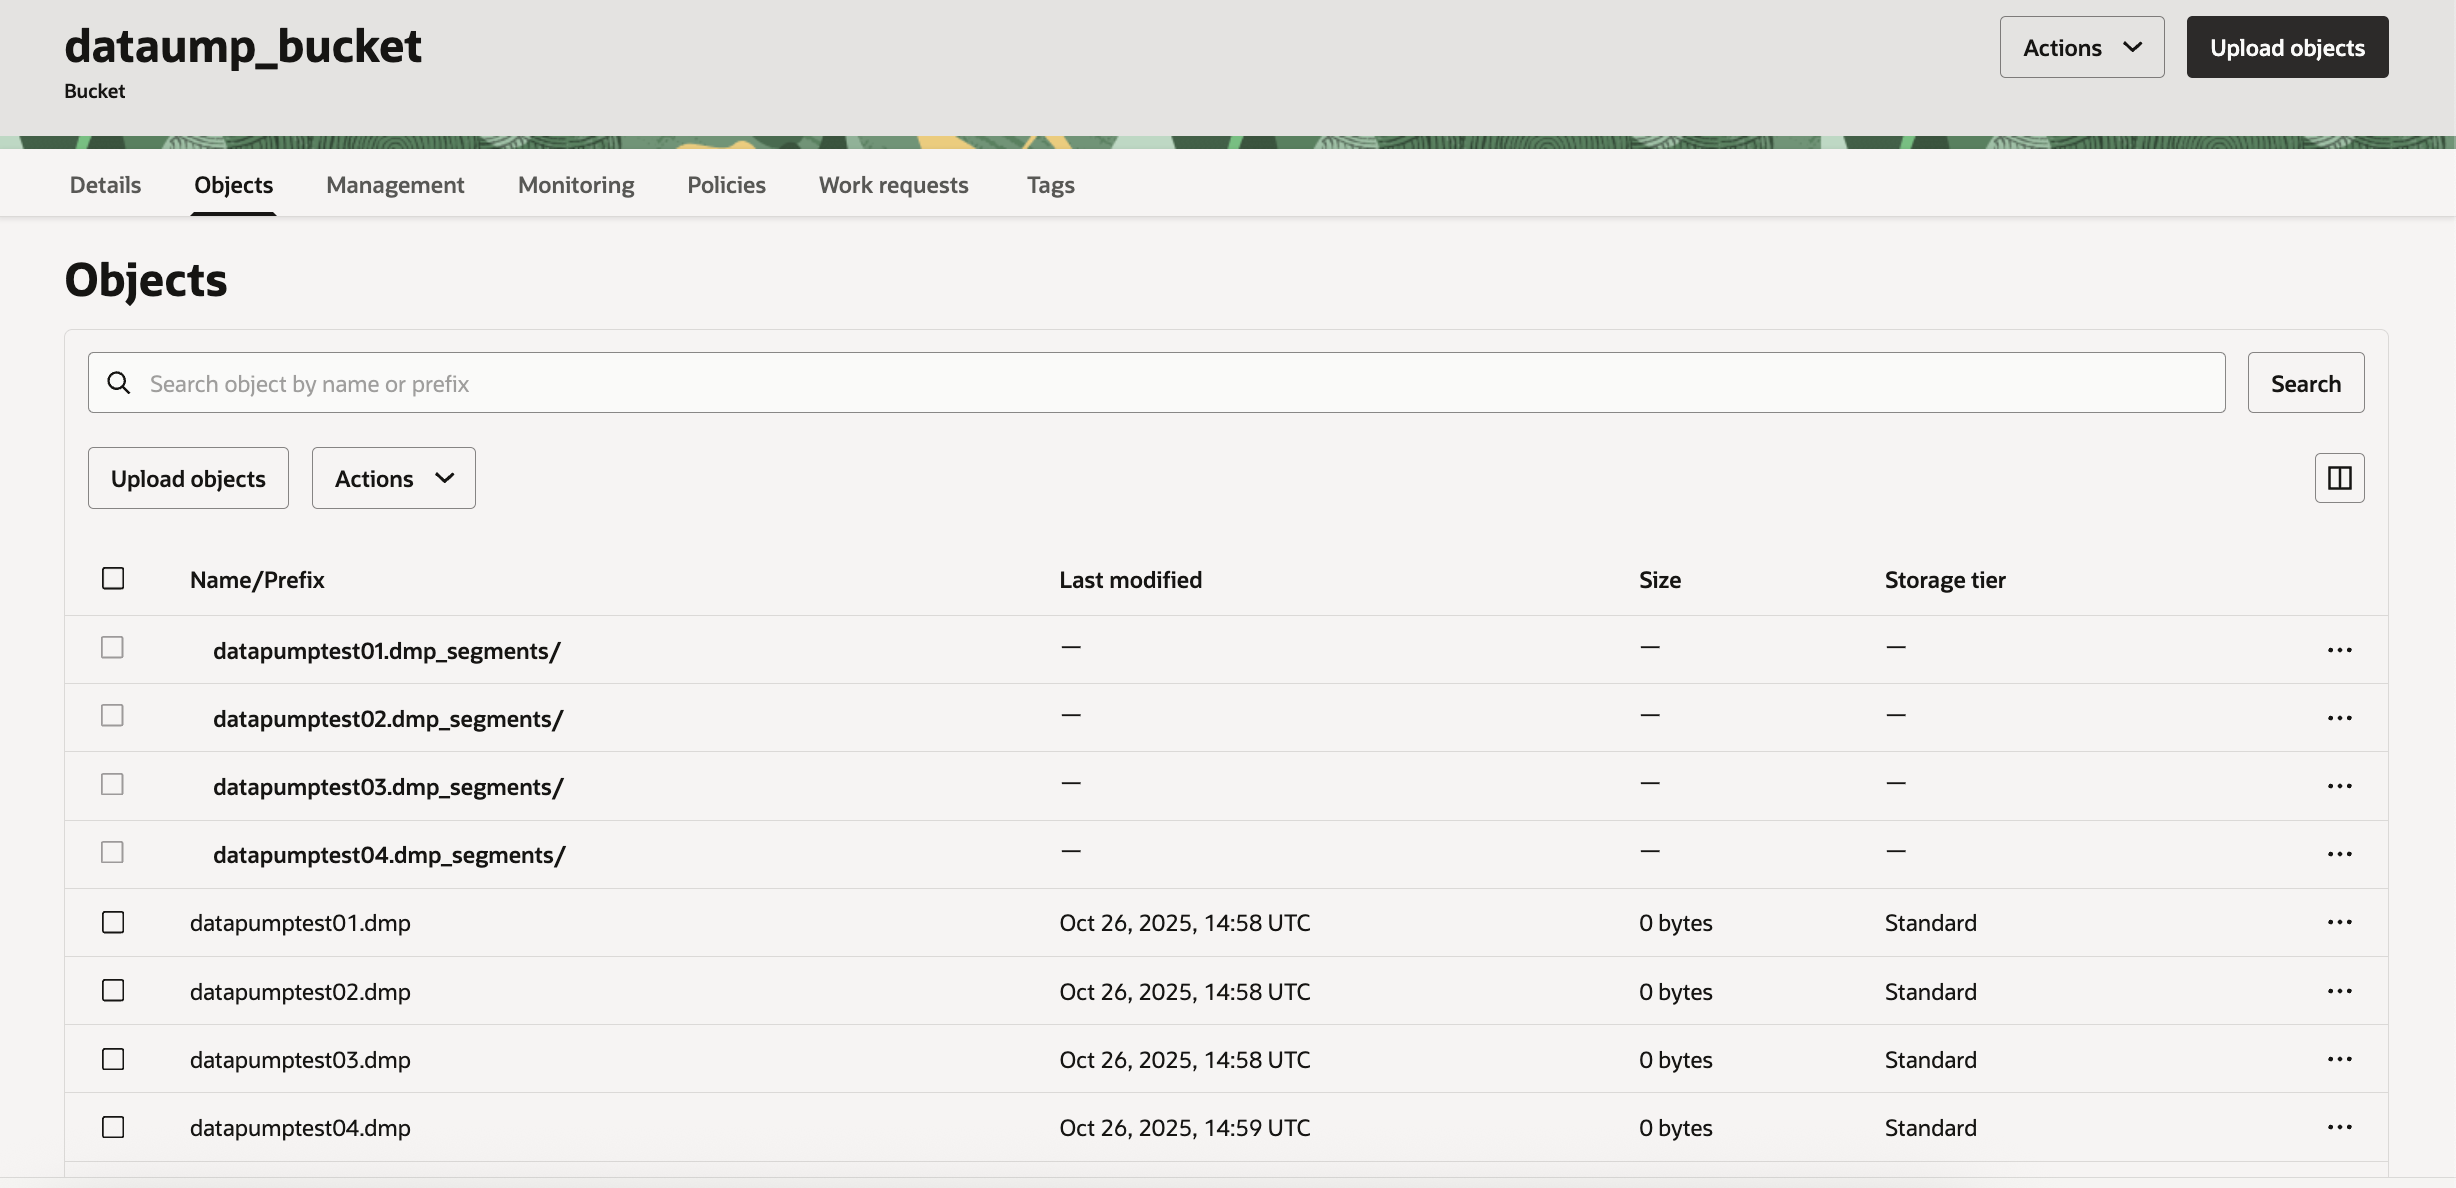
Yes we can see EXPDP has now taken data export directoy on object storage bucket & we can see the files from console as well.
Hope you will find this post very useful!!
Let me know for any questions and any further information in comments or LinkedIn.


Leave a reply to Mou Pal Cancel reply