Dear Readers,
In this post, I’ll walk you through the entire process on how to set up Oracle Data Guard (Disaster Recovery) for an OCI Database Cloud Service (DBCS) system across regions, using Data Guard Association — the Oracle-recommended approach for high availability and disaster recovery.

Below the high-level diagram of the proposed architecture to get this solution implemented.

Following architecture components are already created.
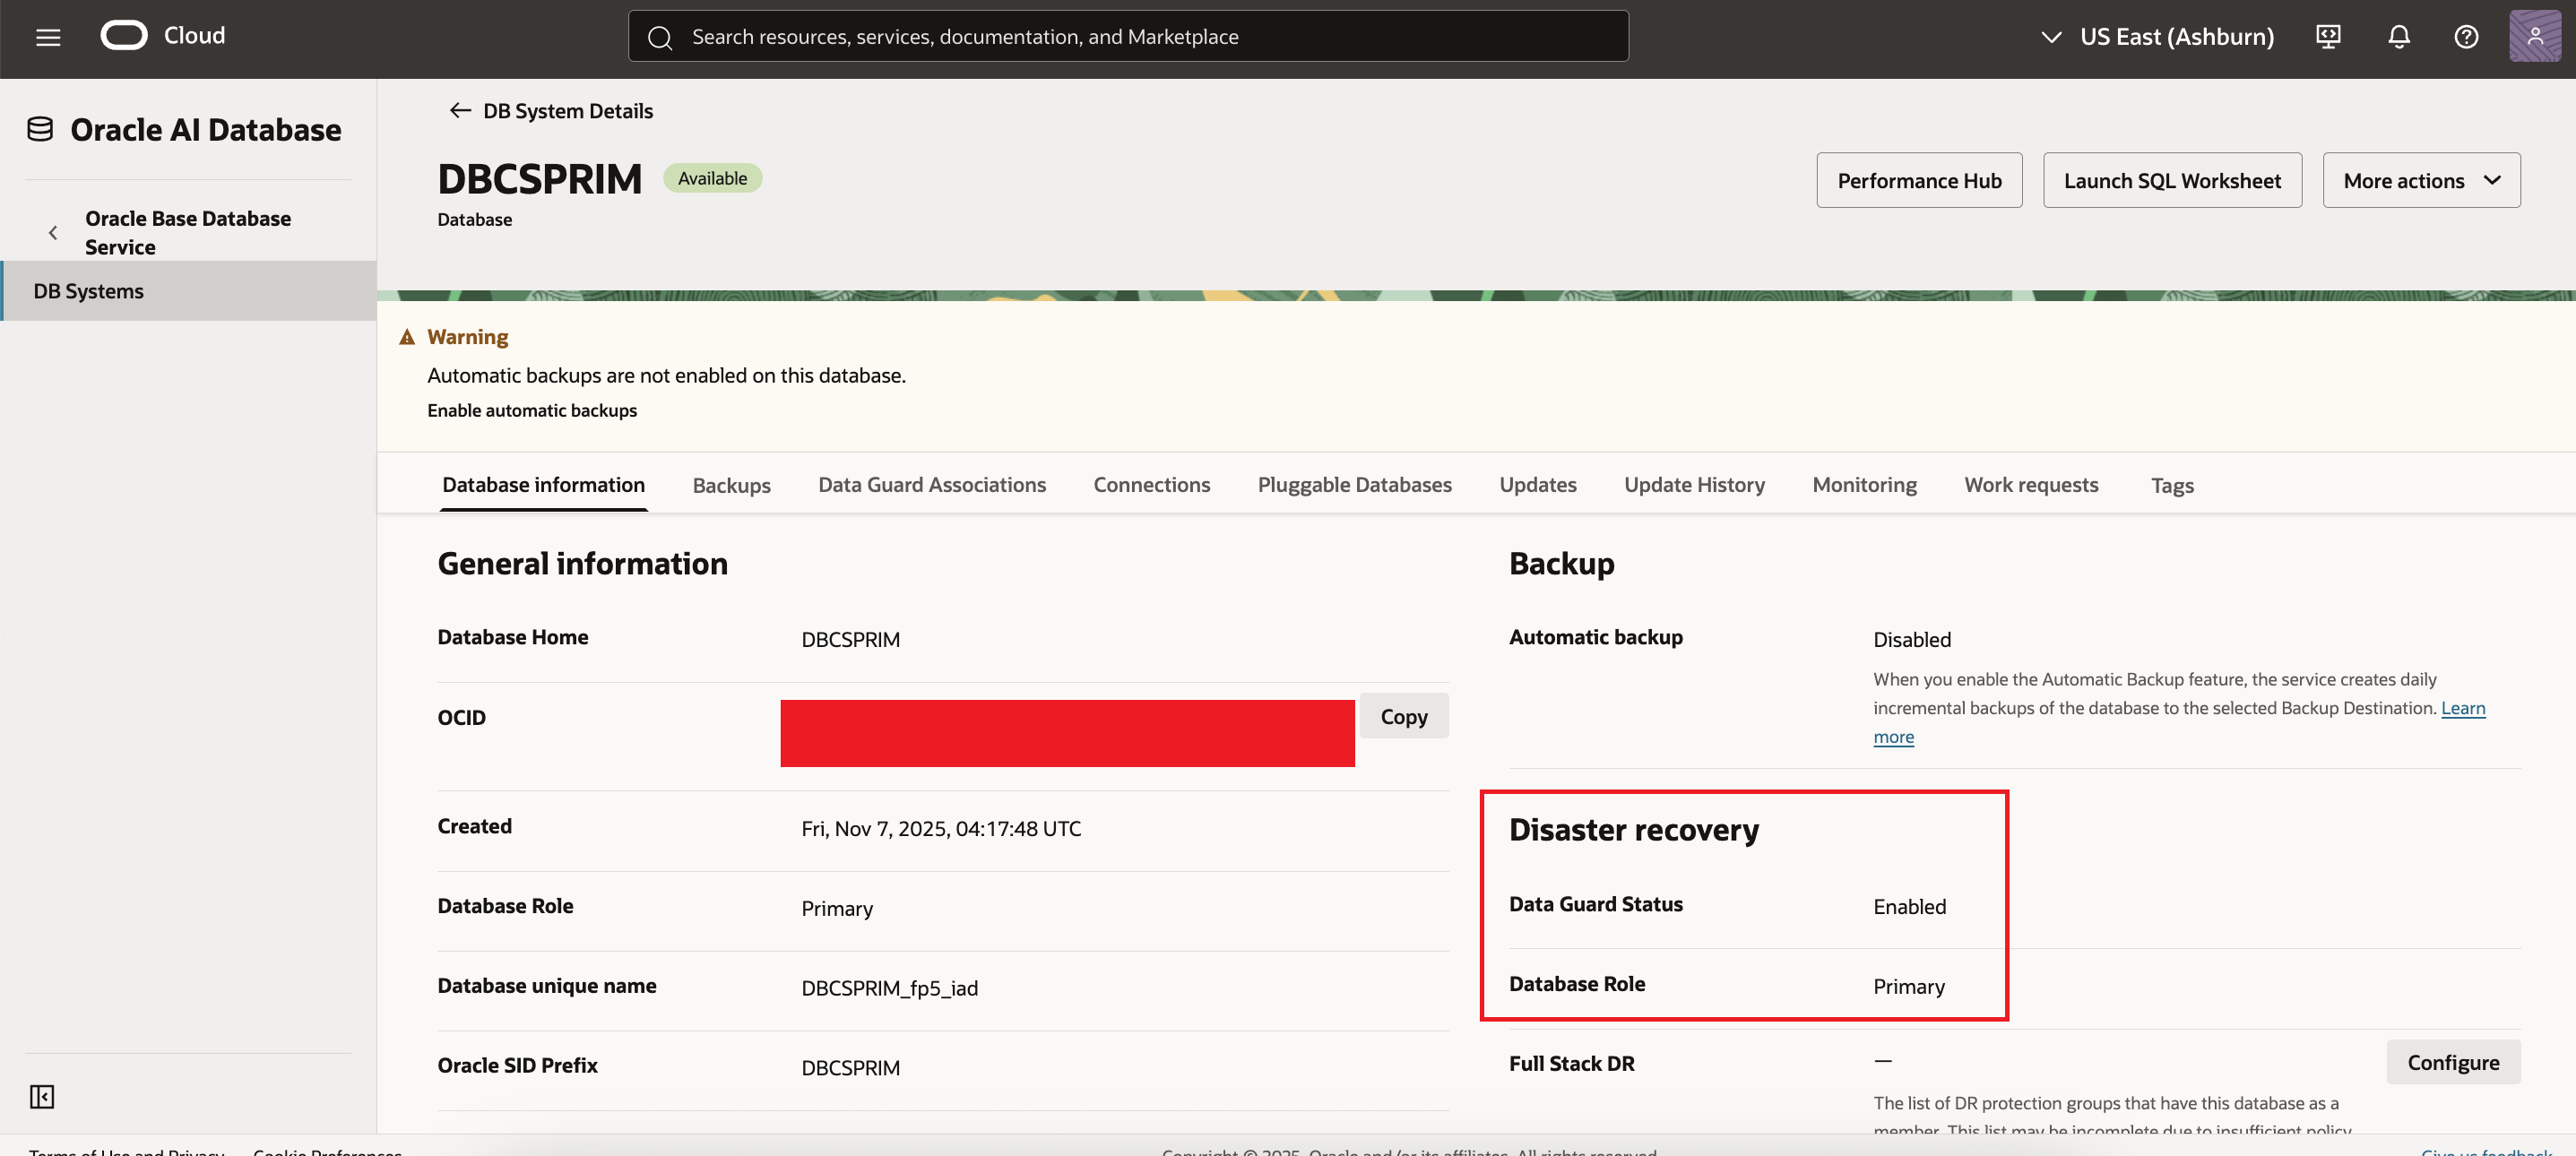
- DBCS system – DBCSPRIM – is our primary setup in Ashburn region.
- DBCSPRIM is using private subnet for VCN – DBCS-VCN-ASH.
- DB unique name – DBCSPRIM_fp5_iad – Single Node DB
- DB version – 19.29.0.0.0
We will use Phoenix region as standby site for this demo.
Lets first complete the networking prerequisites for the setup which includes following steps:
- Create VCN in the stanby/peer region in designated compartment.
- Create the Dynamic Routing Gateways in both VCN’s.
- After creating the DRG, you must attach it to your VCN in both regions.
- Create the Remote Peering Connections in both VCNs.
- Establish connection between RPC created in both VCN’s.
- Setup the route table and rules for both VCN’s.
- Configure the security list for both VCN’s.
Lets see how to complete each of above steps using console.
Create VCN in the stanby/peer region in designated compartment.
This is straightforward. Kindly follow this link to get VCN setup for the standby/peer region. We have created new VCN named DBCS-VCN-PHNX for the standby/peer region.
Create the Dynamic Routing Gateways in both VCN’s.
This is straightforward too. Kindly follow this link to get DRG created for both the regions.
We have created 2 new DRG – DRG-ASH for Ashburn (Primary) region & DRG-PHNX for Phoenix (Standby/peer) region.
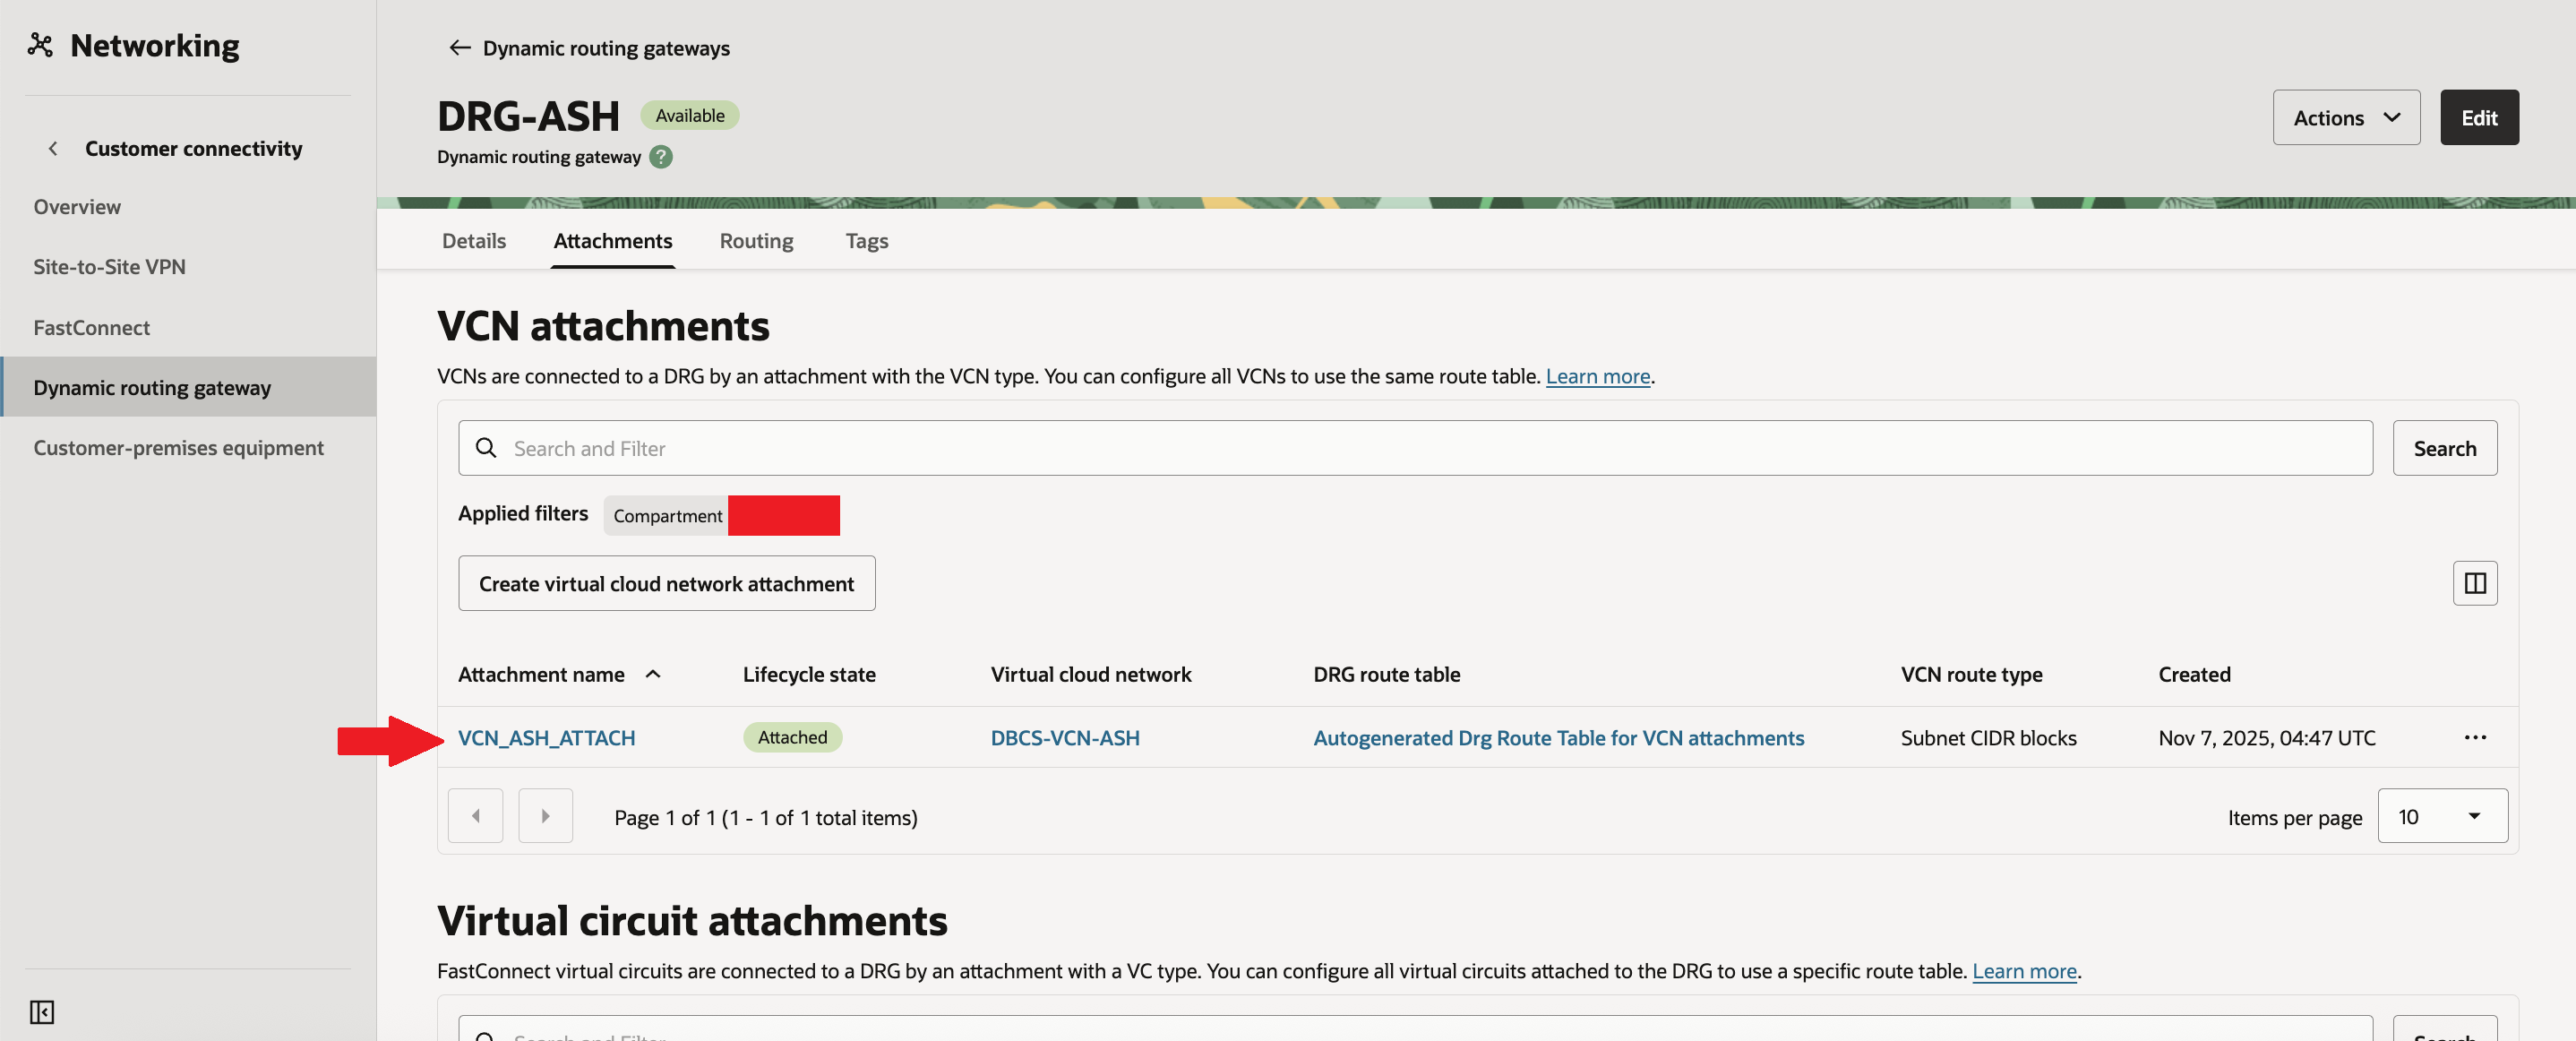
After creating the DRG, you must attach it to your VCN in both regions.
First select DRG for specific compartment at Ashburn (Primary) region and click on attachment. Then click “Create virtual cloud network attachment“.

Then provide suitable attachment name, select your VCN in drop down & create VCN attachment.

Now you can confirm your new attachment is visible under “Create virtual cloud network attachment”.
Follow the same steps for Phoenix (Standby/peer) region as well.
Create the Remote Peering Connections in both VCNs.
Now once again select DRG for specific compartment at Ashburn (Primary) region and click on attachment. Then in section “Remote peering connection attachments” click on “Create remote peering connection”
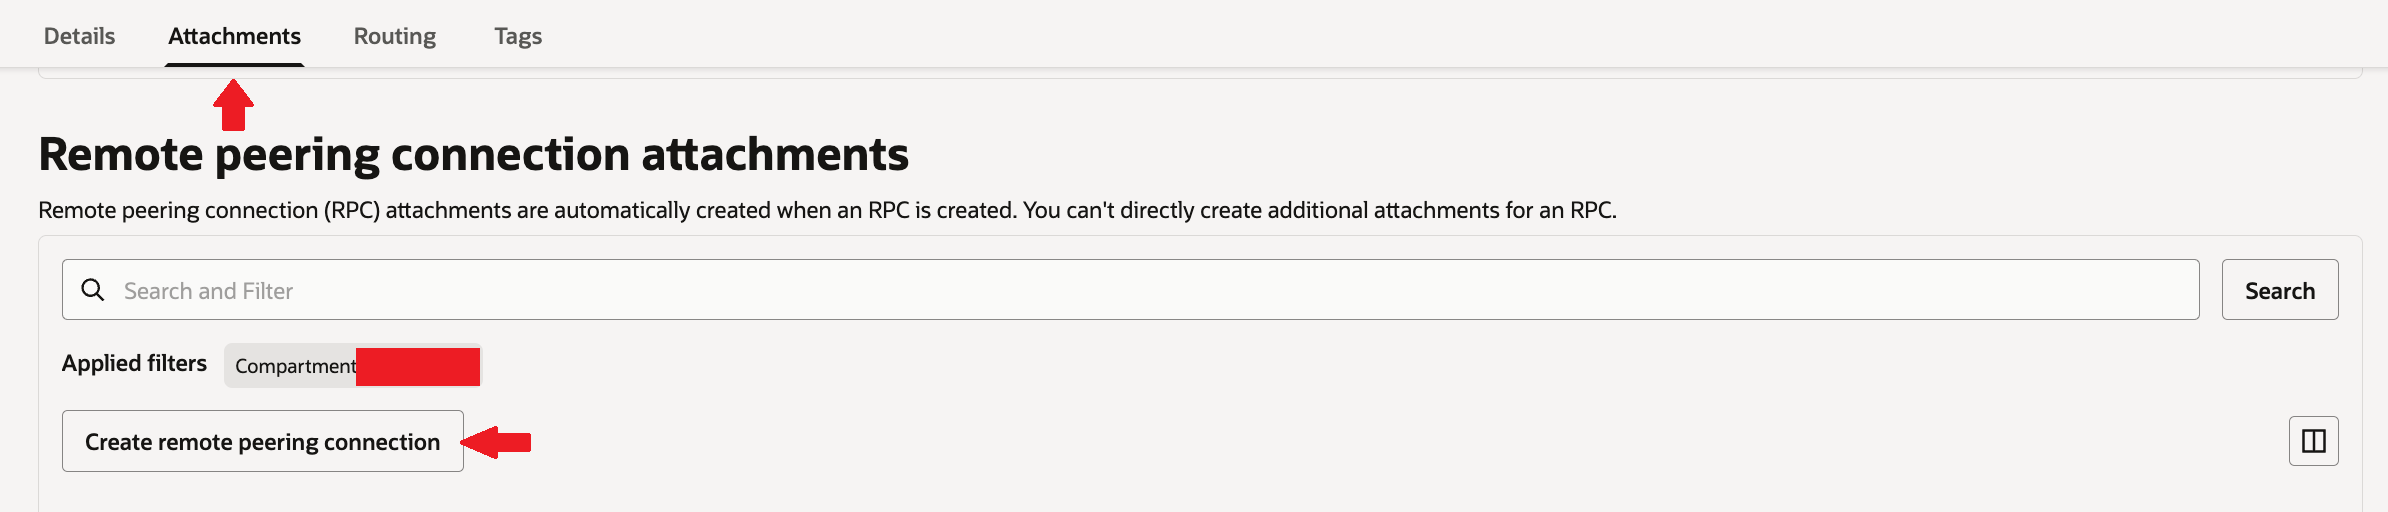
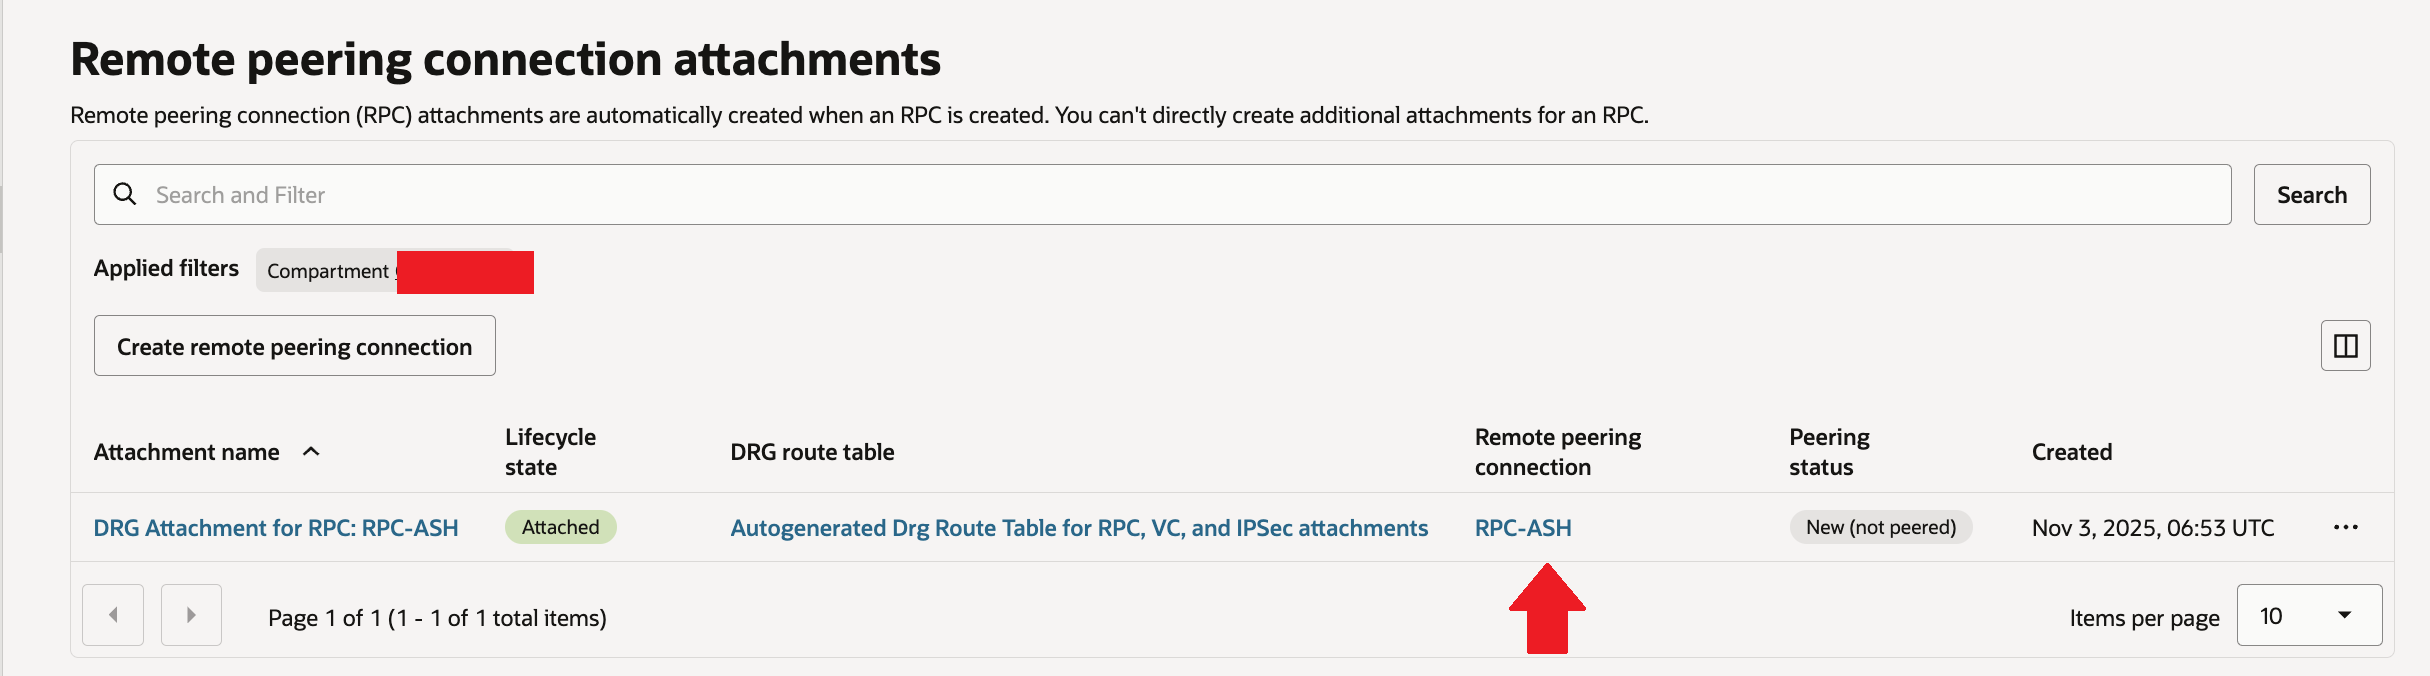
Then provide RPC name “RPC-ASH”, select your compartment & create remote peering connection.

Now you can confirm your new RPC is visible under “Create remote peering connection”.
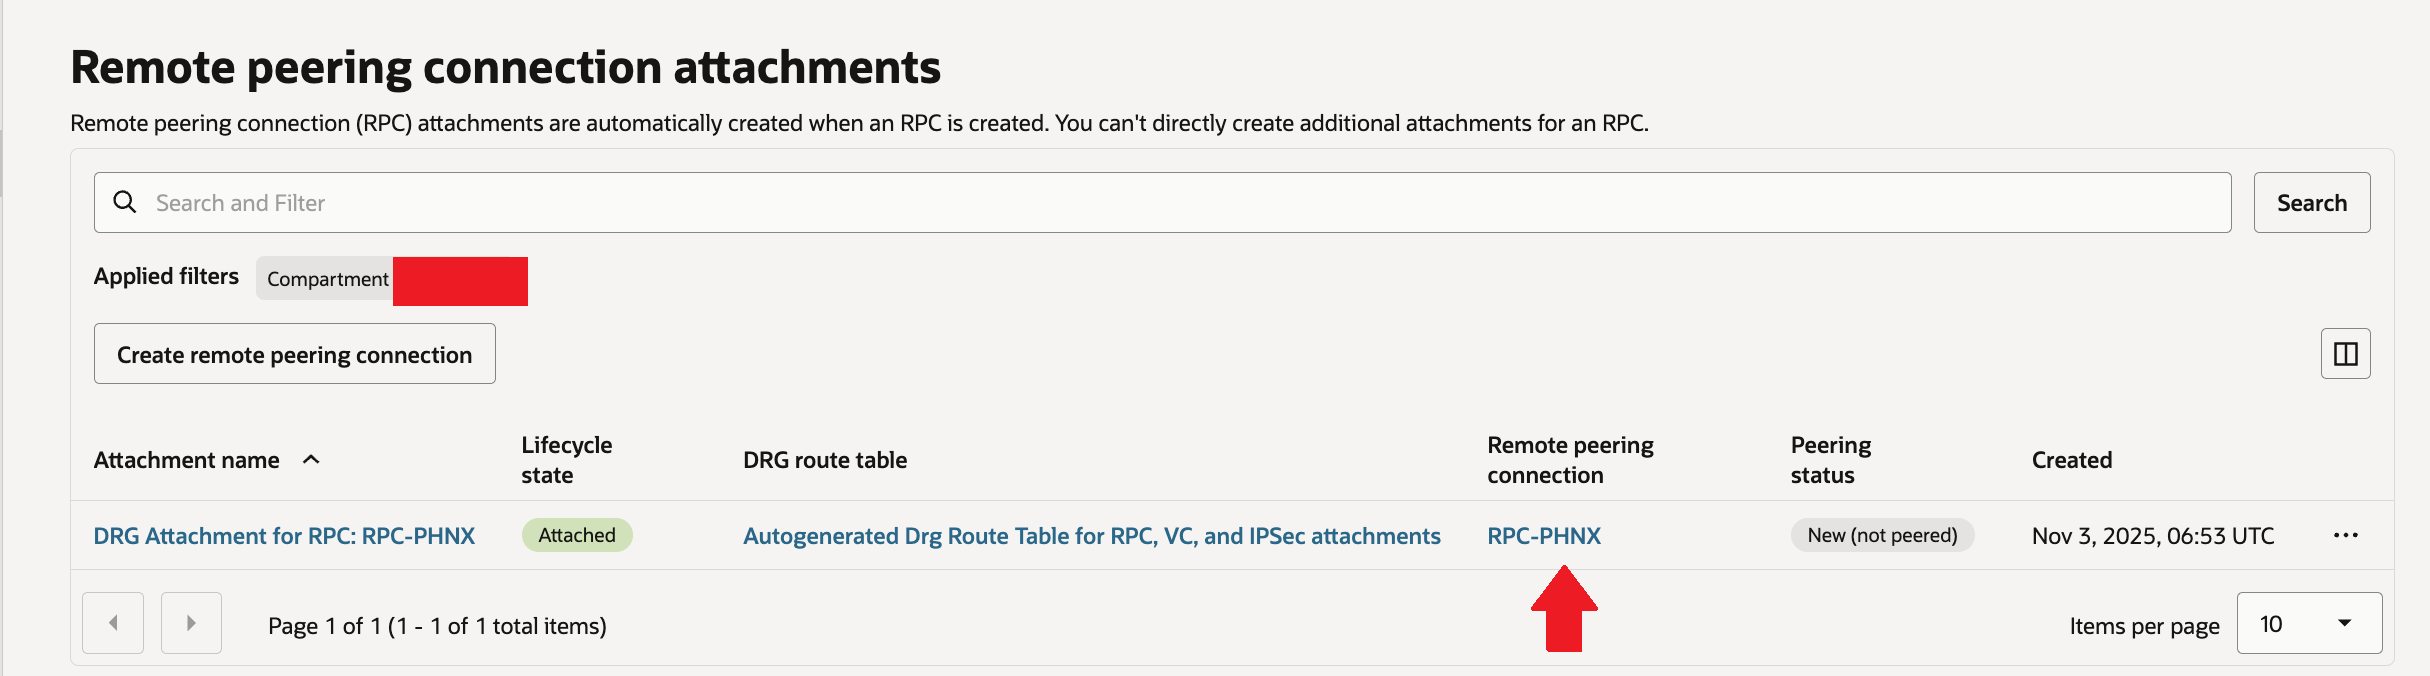
Follow the same steps for Phoenix (Standby/peer) region as well. You can confirm your new RPC is visible under “Create remote peering connection”. Here name of RPC is “RPC-PHNX”
Establish connection between RPC created in both VCN’s.
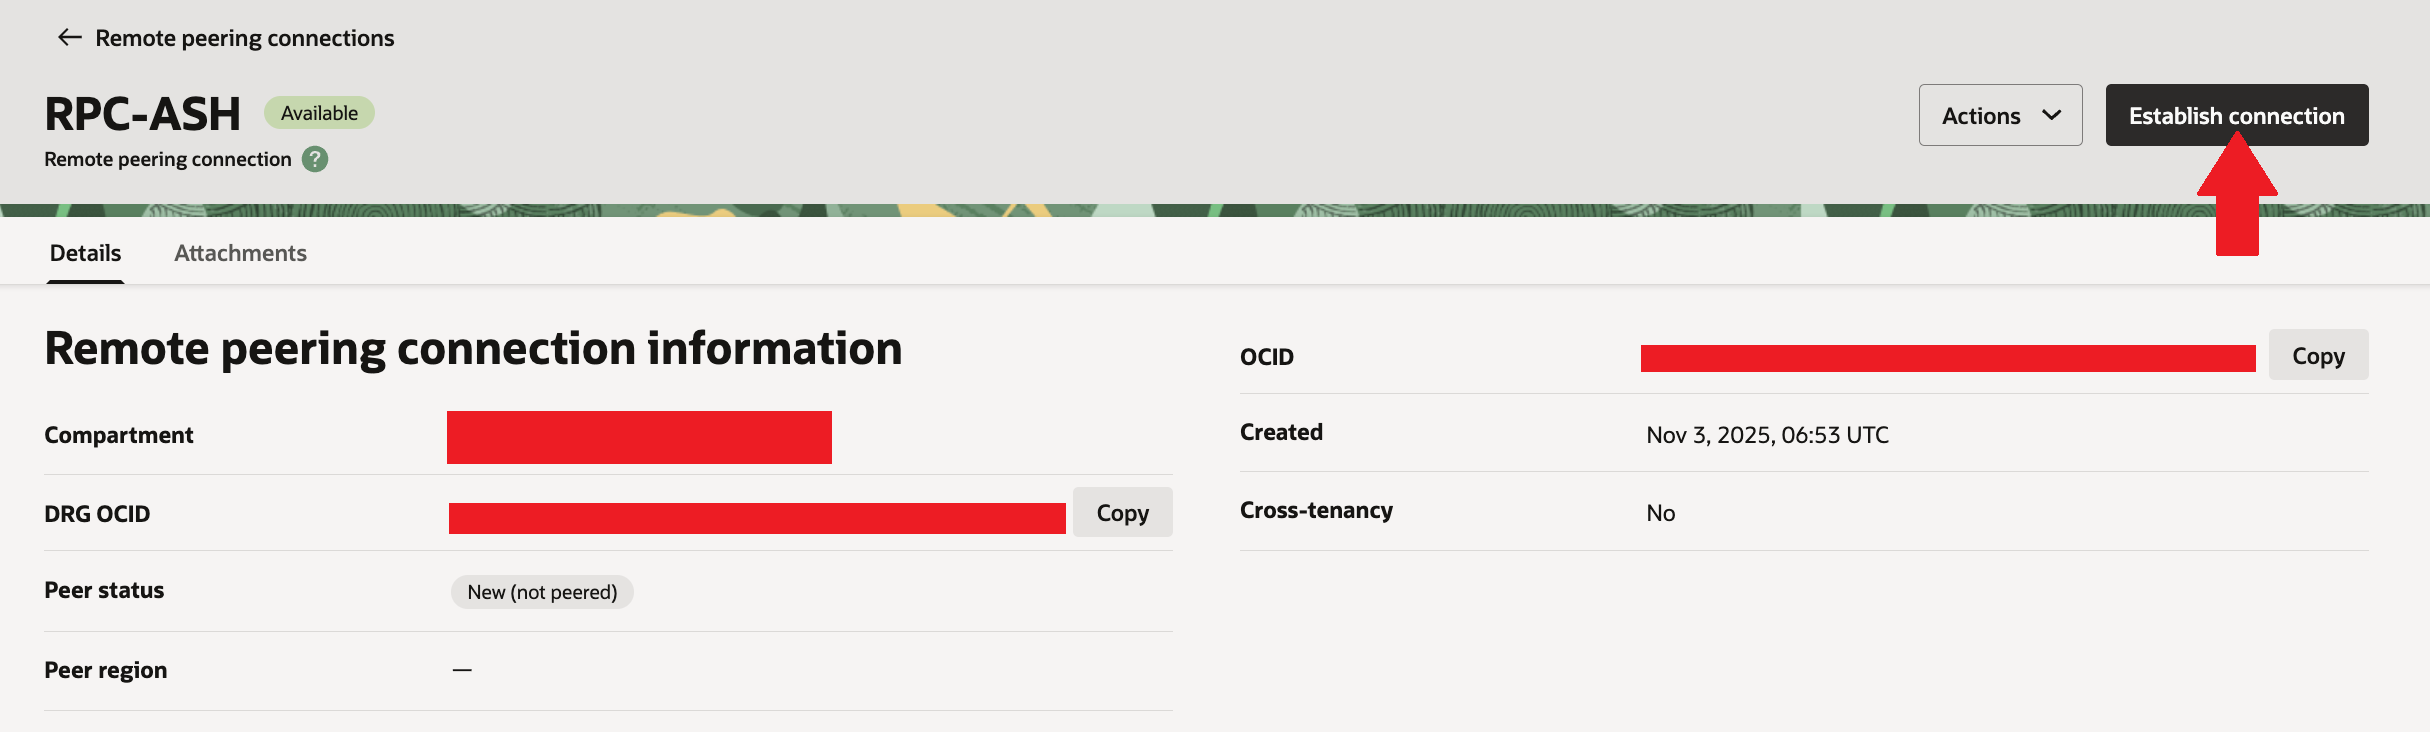
Lets click on Remote peering connection name “RPC-ASH” under section “Remote peering connection attachments” in DRG – DRG-ASH for Ashburn (Primary) region.

You will see connection is in available state but peer status as “New (not peered)”

Similary you will see connection is in available state but peer status as “New (not peered)” in RPC-PHNX for Phoenix (Standby/peer) region. Copy OCID for “RPC-PHNX” which needs to provided in next step

Now go to “RPC-ASH” again and click on “Establish connection”.
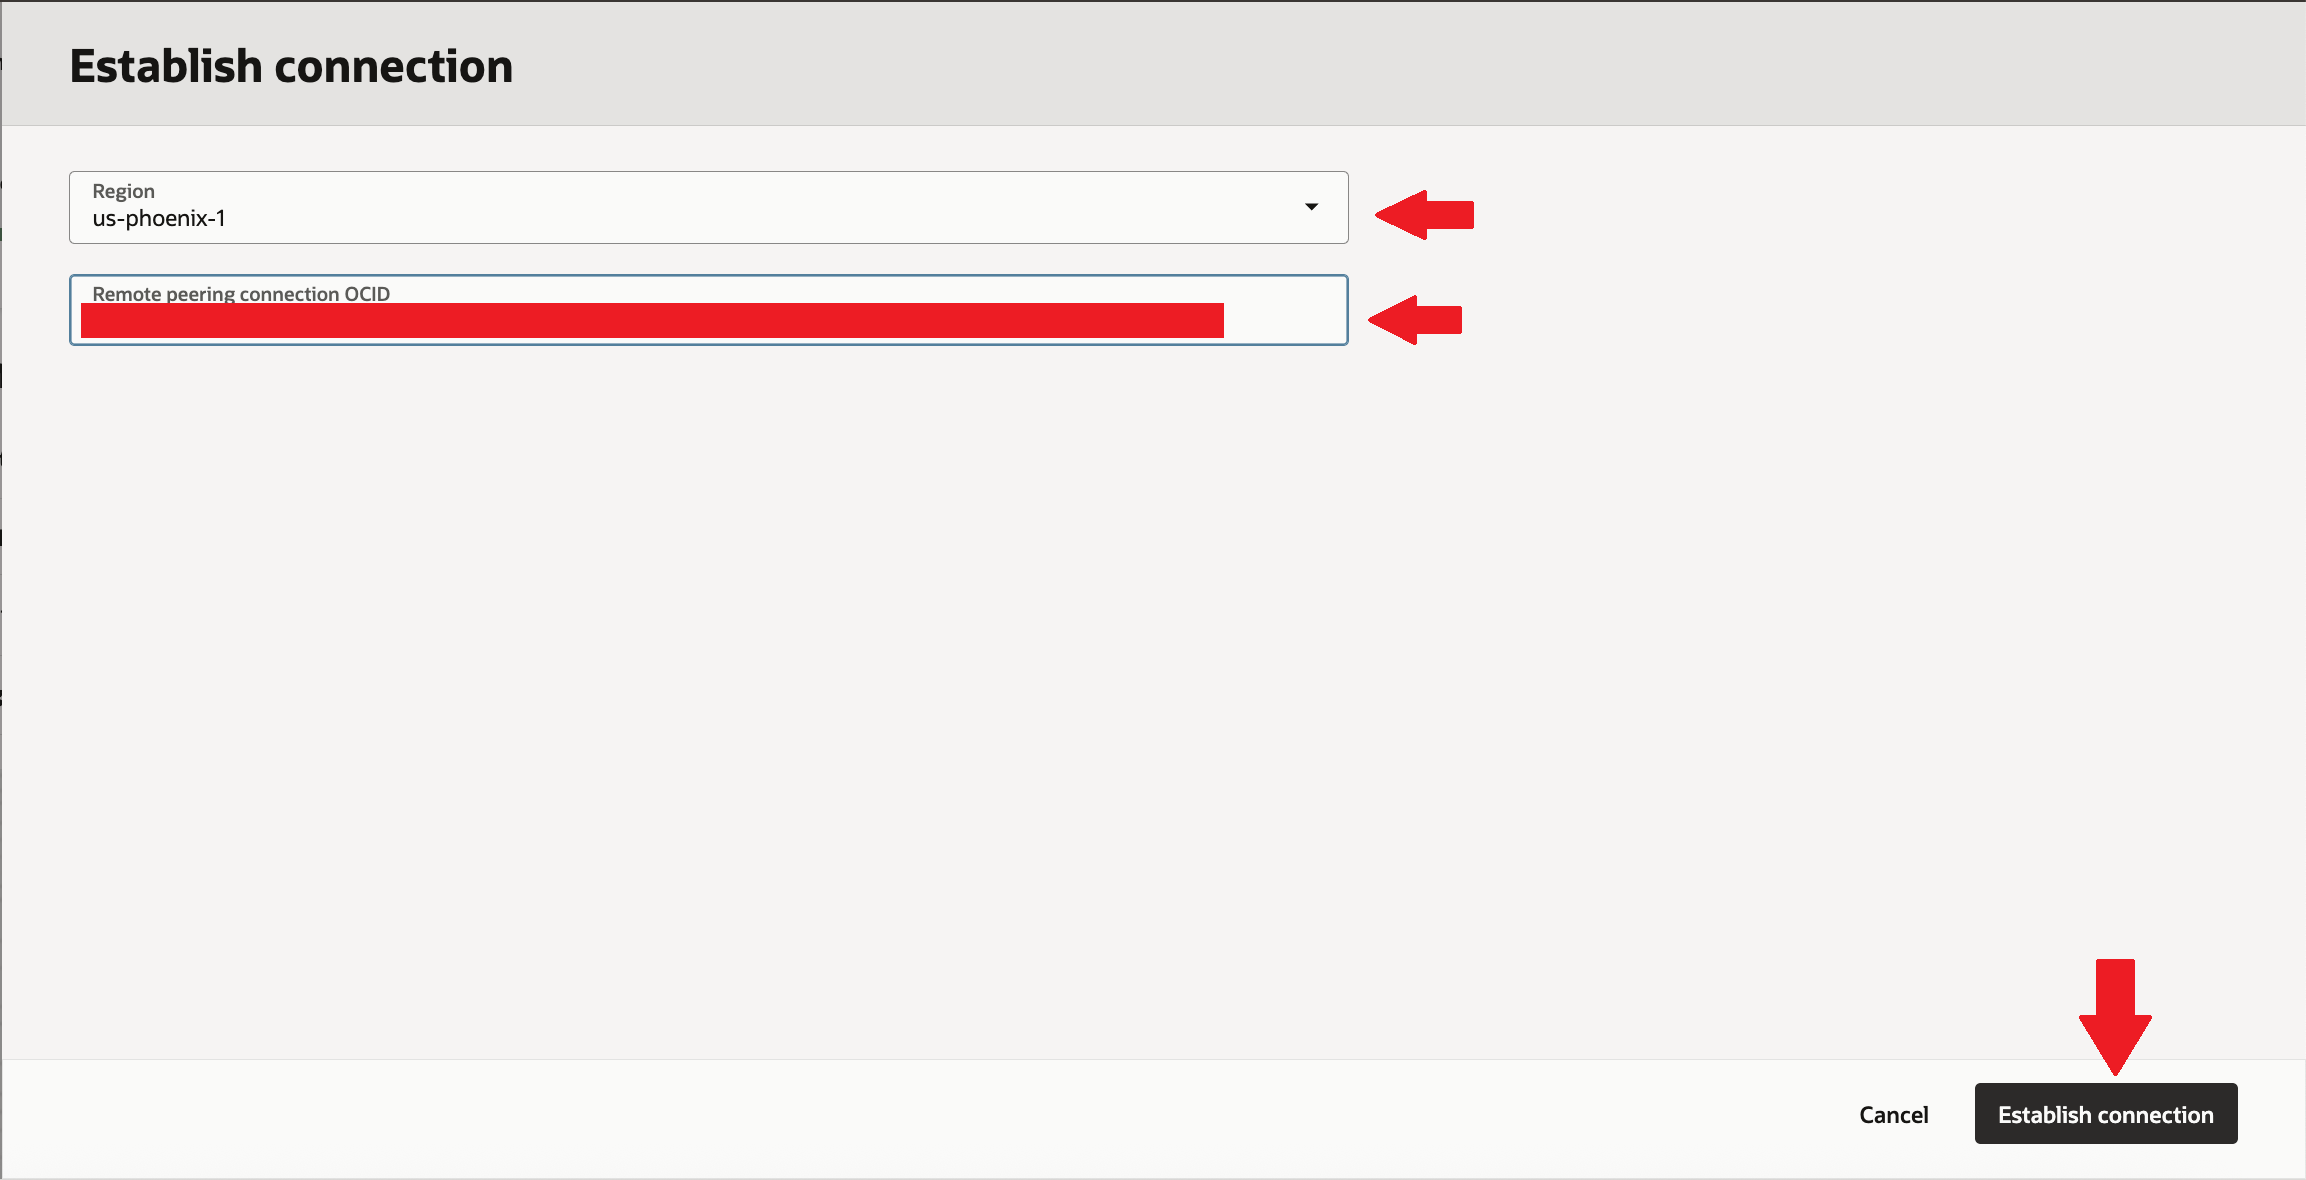
Select peer region “us-phoenix-1” and paste OCID for “RPC-PHNX” & then click on establish connection.
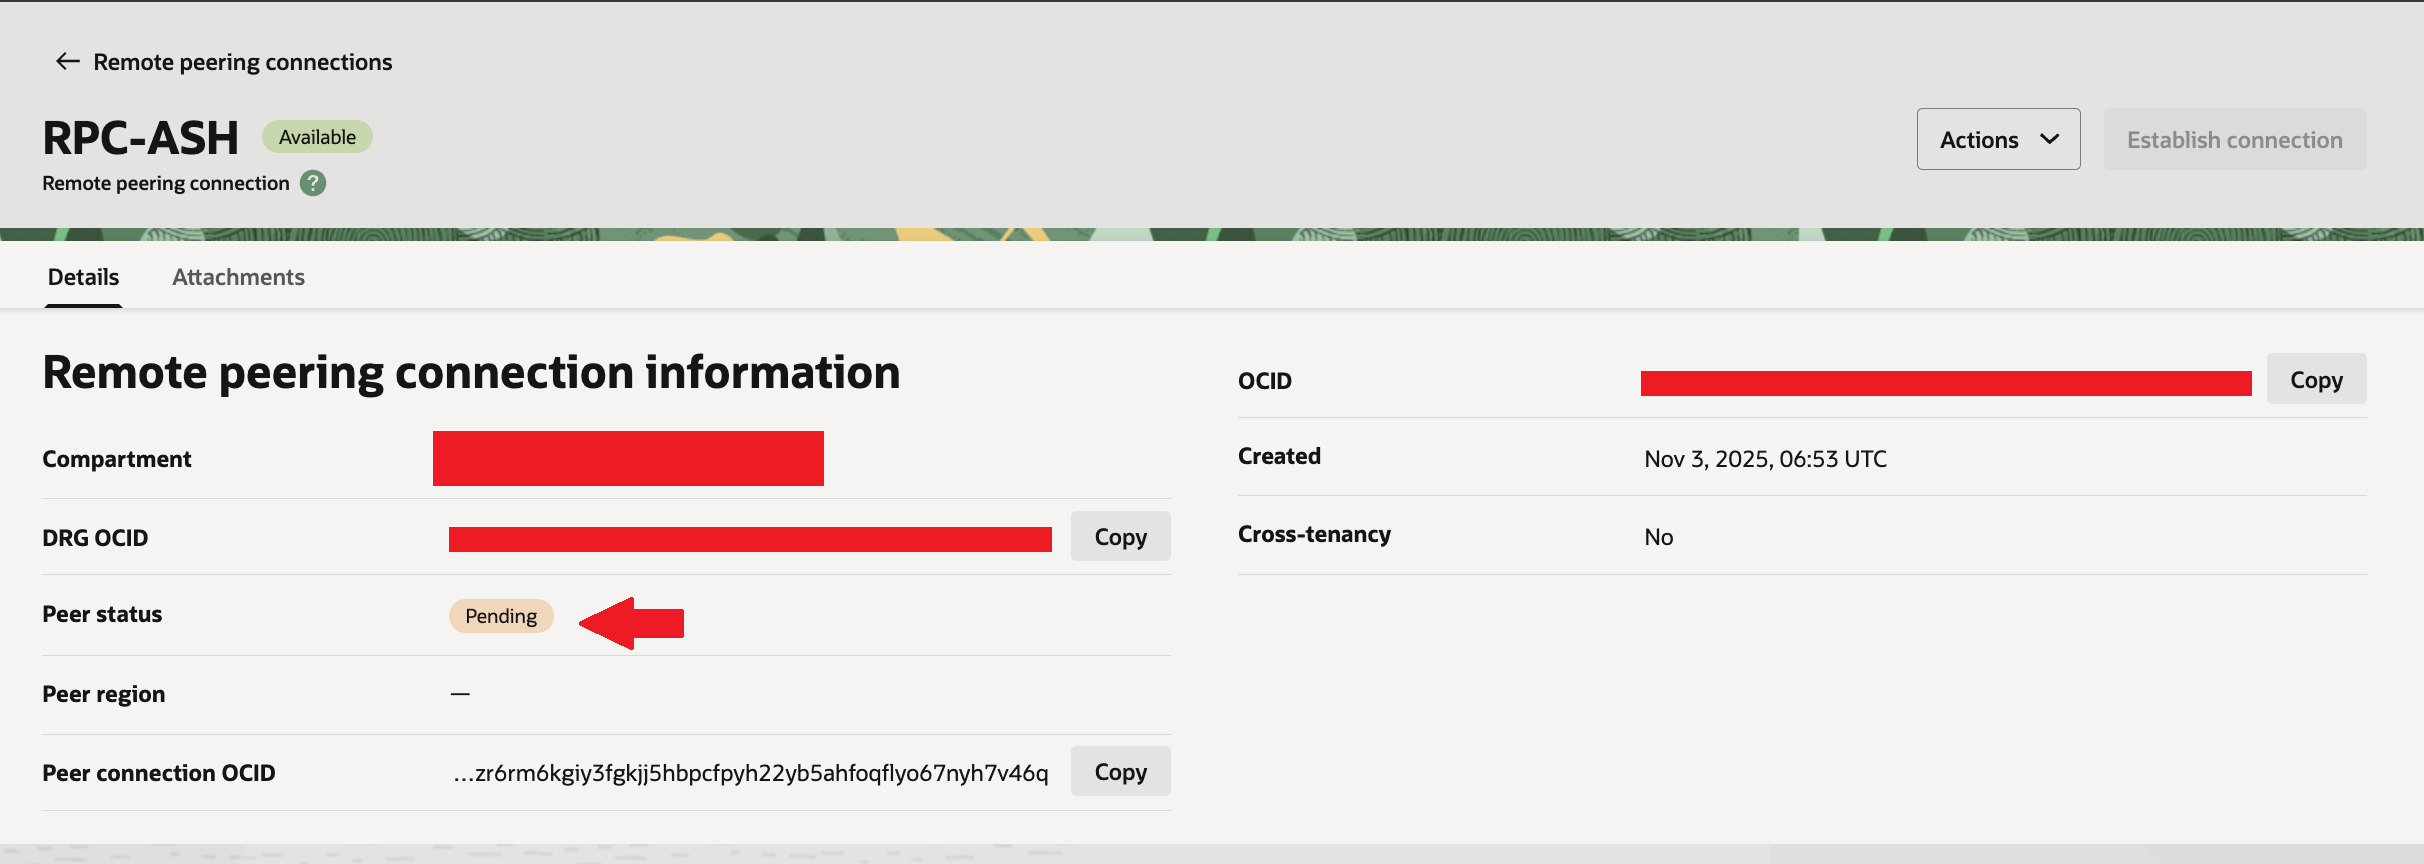
Now you will see “RPC-ASH” peer status is changed from “New (not peered)” to “Pending”.
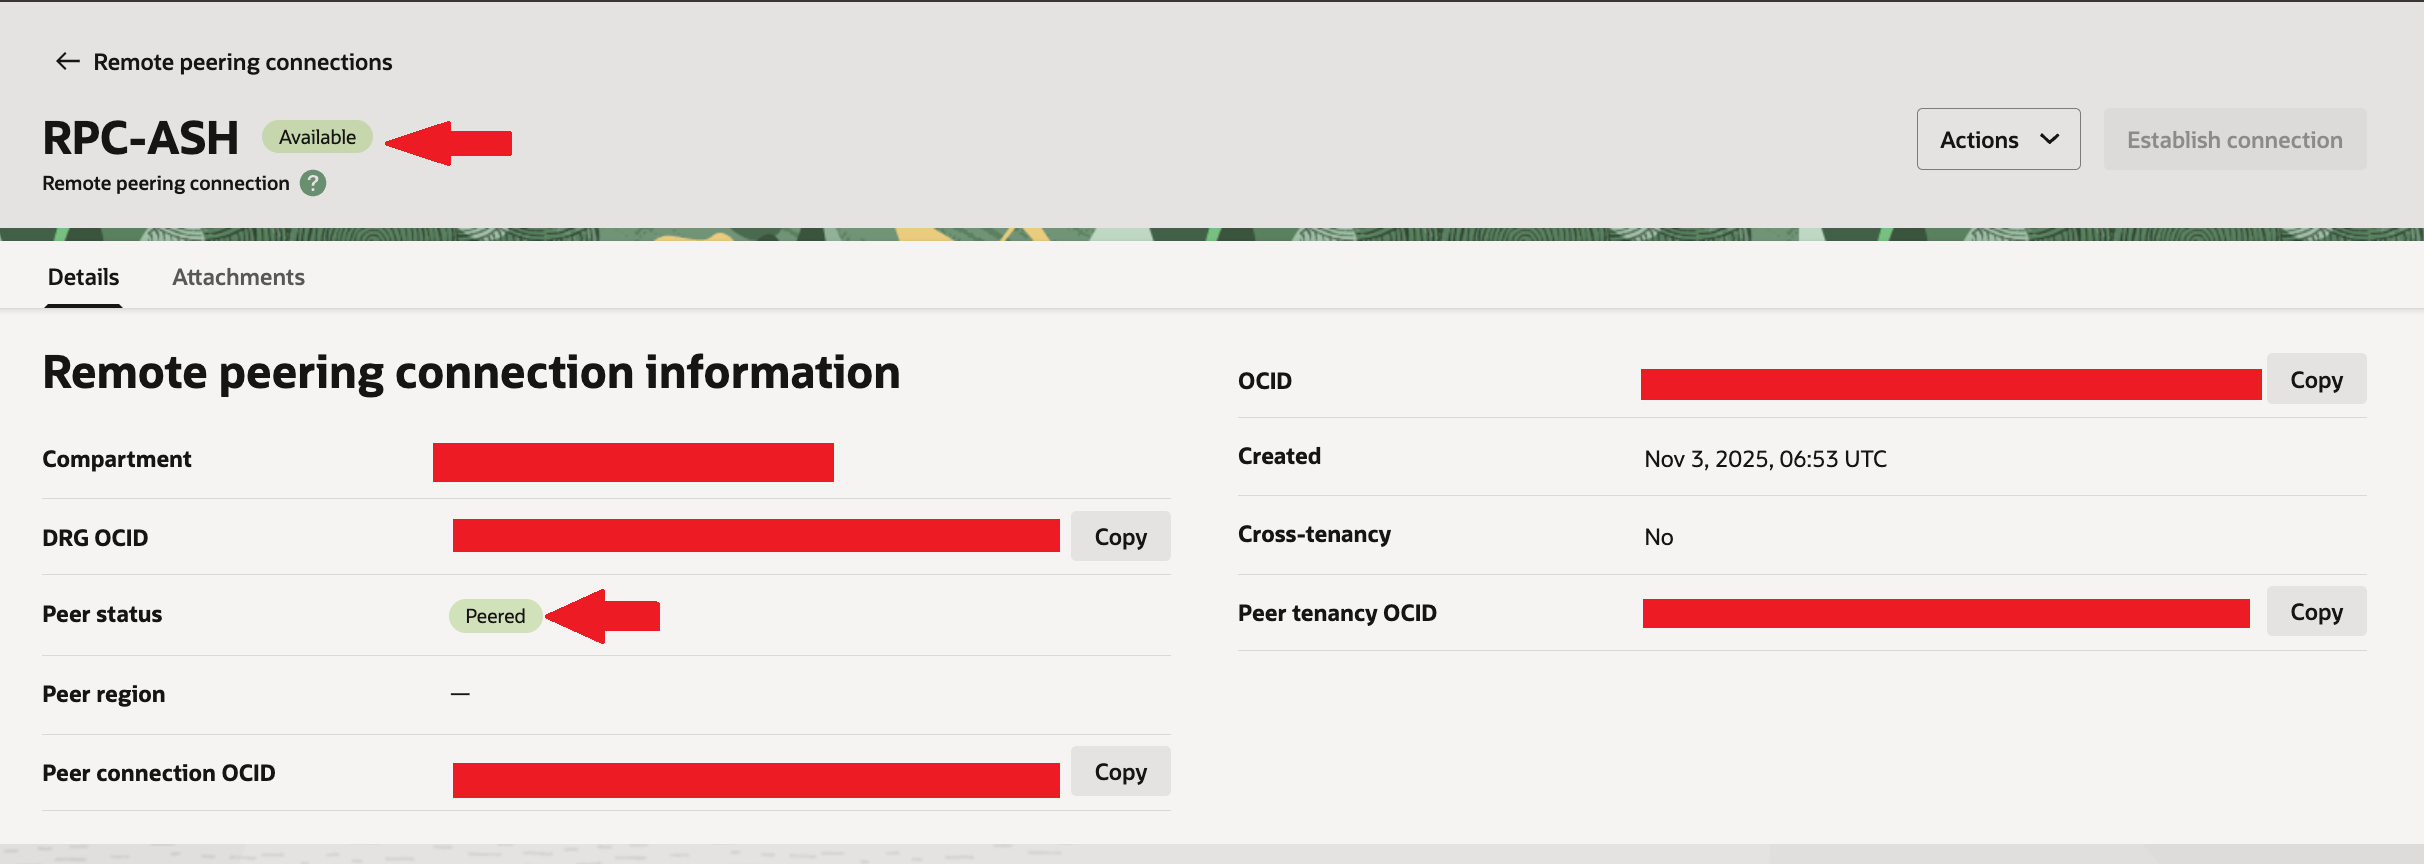
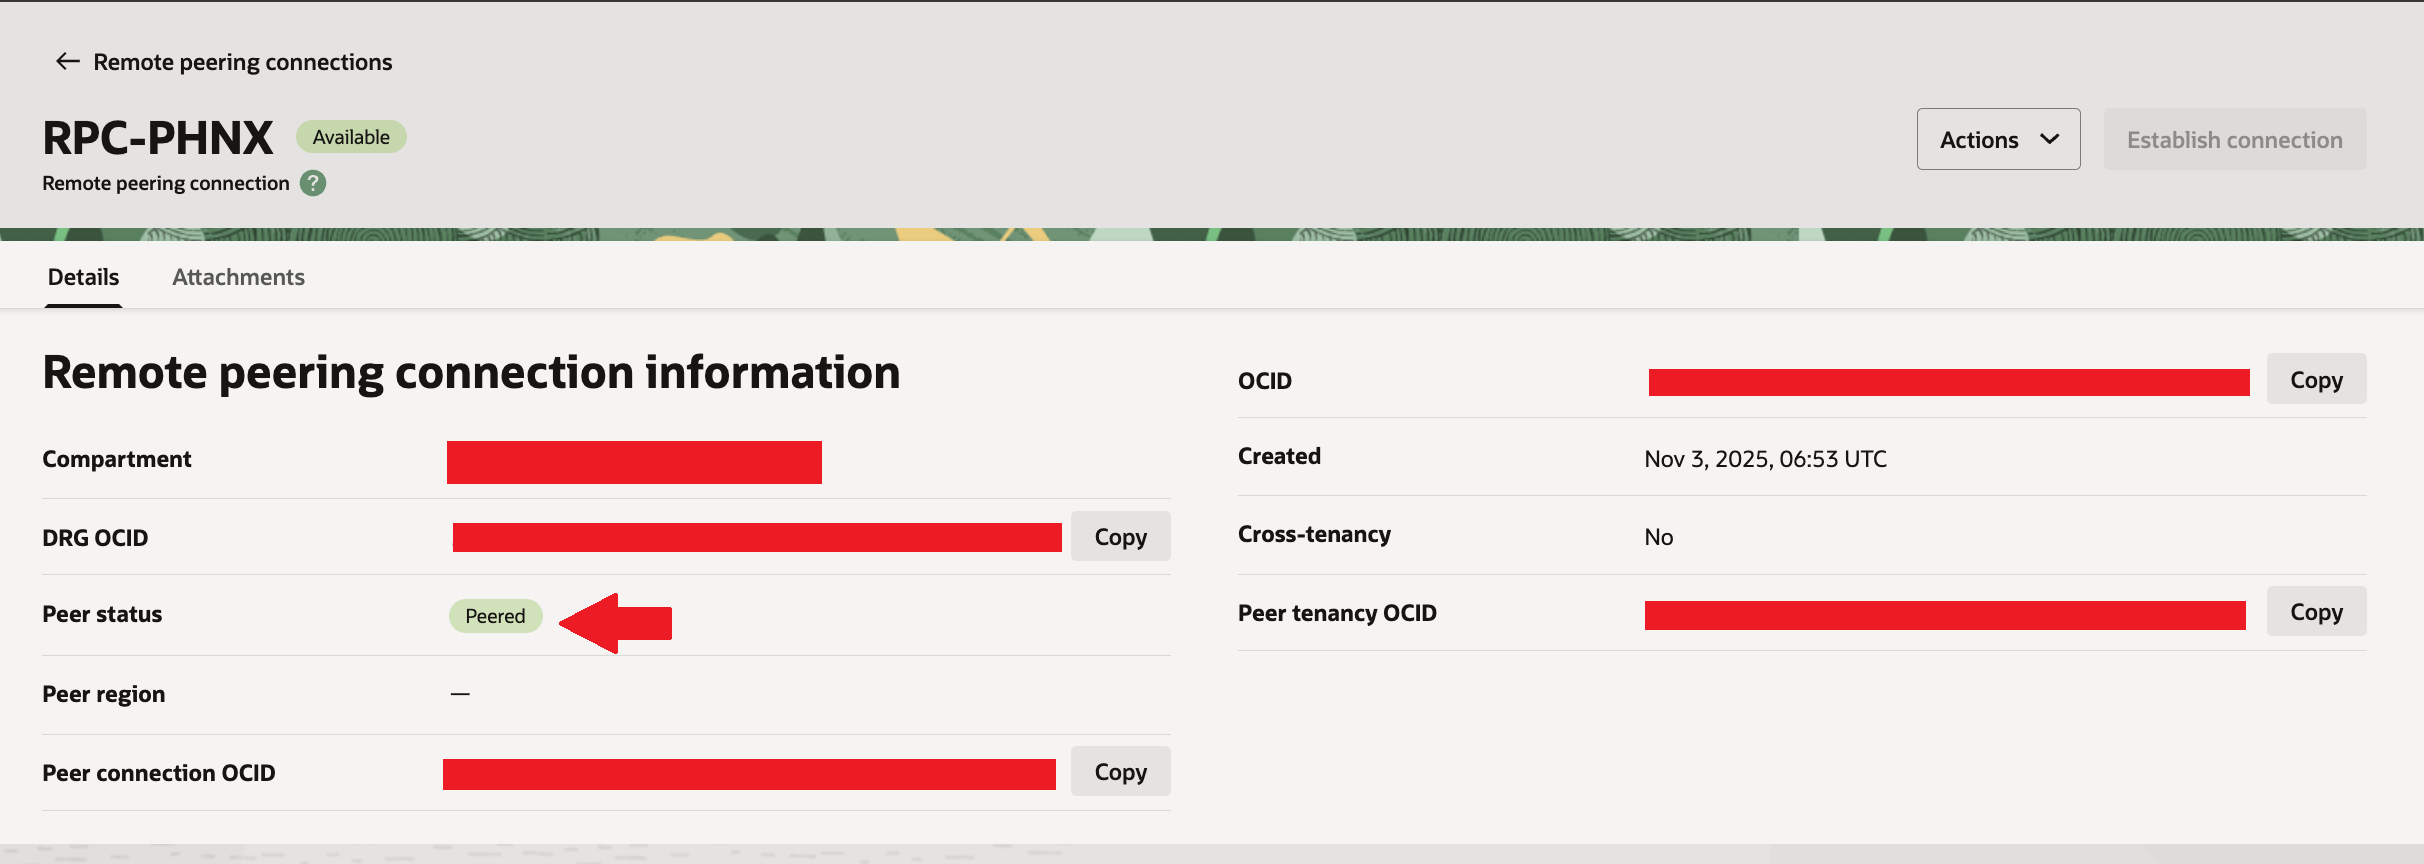
After a minute you will see peer status of both “RPC-ASH” Remote peering connection of Ashburn (Primary) region & “RPC-PHNX” of Phoenix (Standby/peer) region is showing as “Peered”
Setup the route table and rules for both VCN’s.
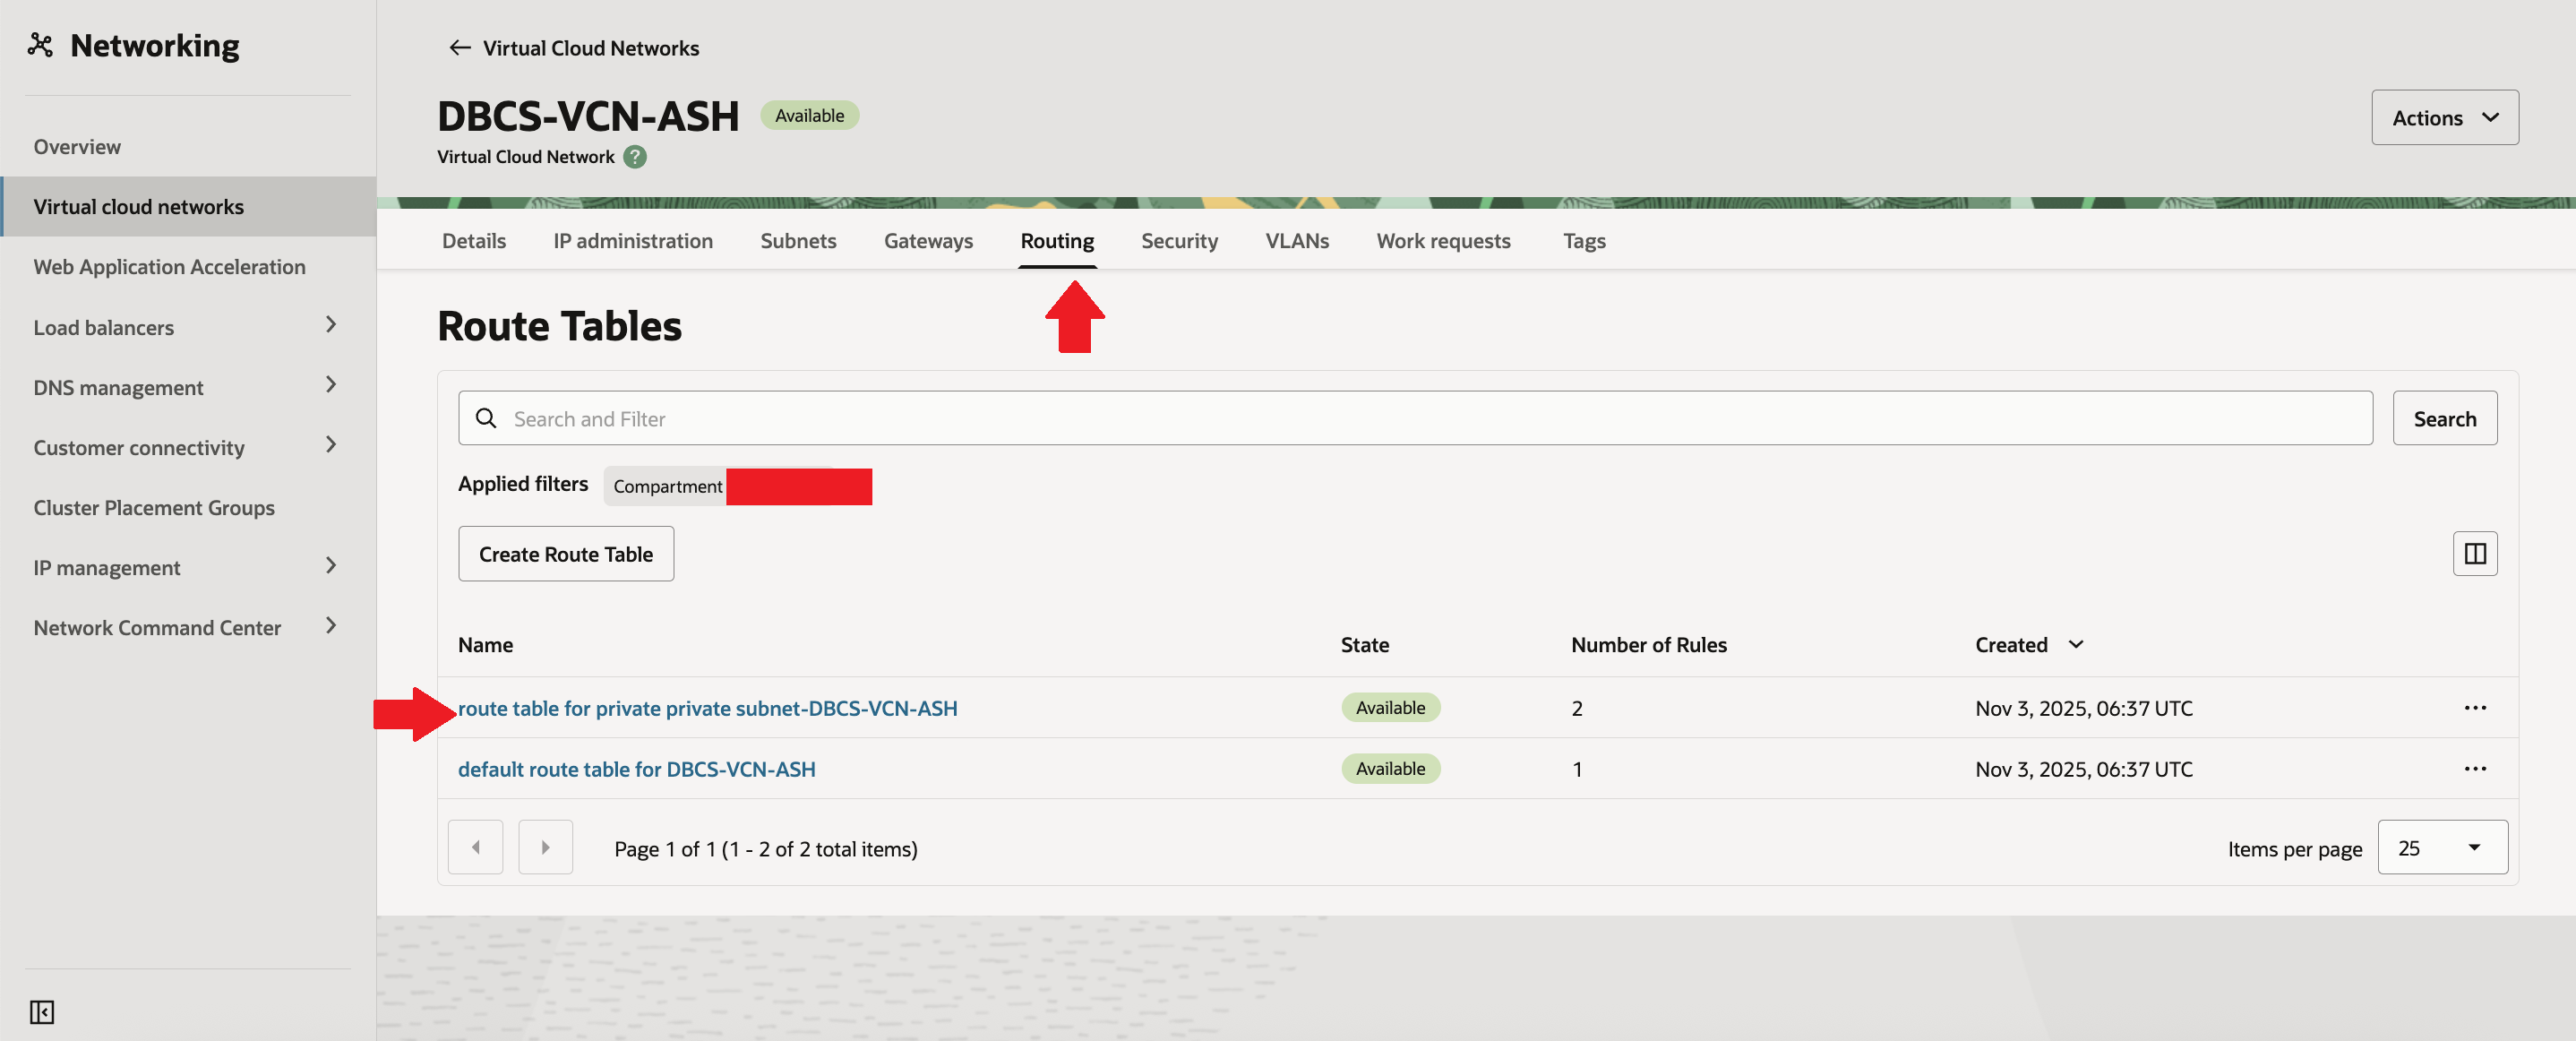
First go to VCN – DBCS-VCN-ASH of Ashburn (Primary) region. Go to Routing & click on route table of private subnet.
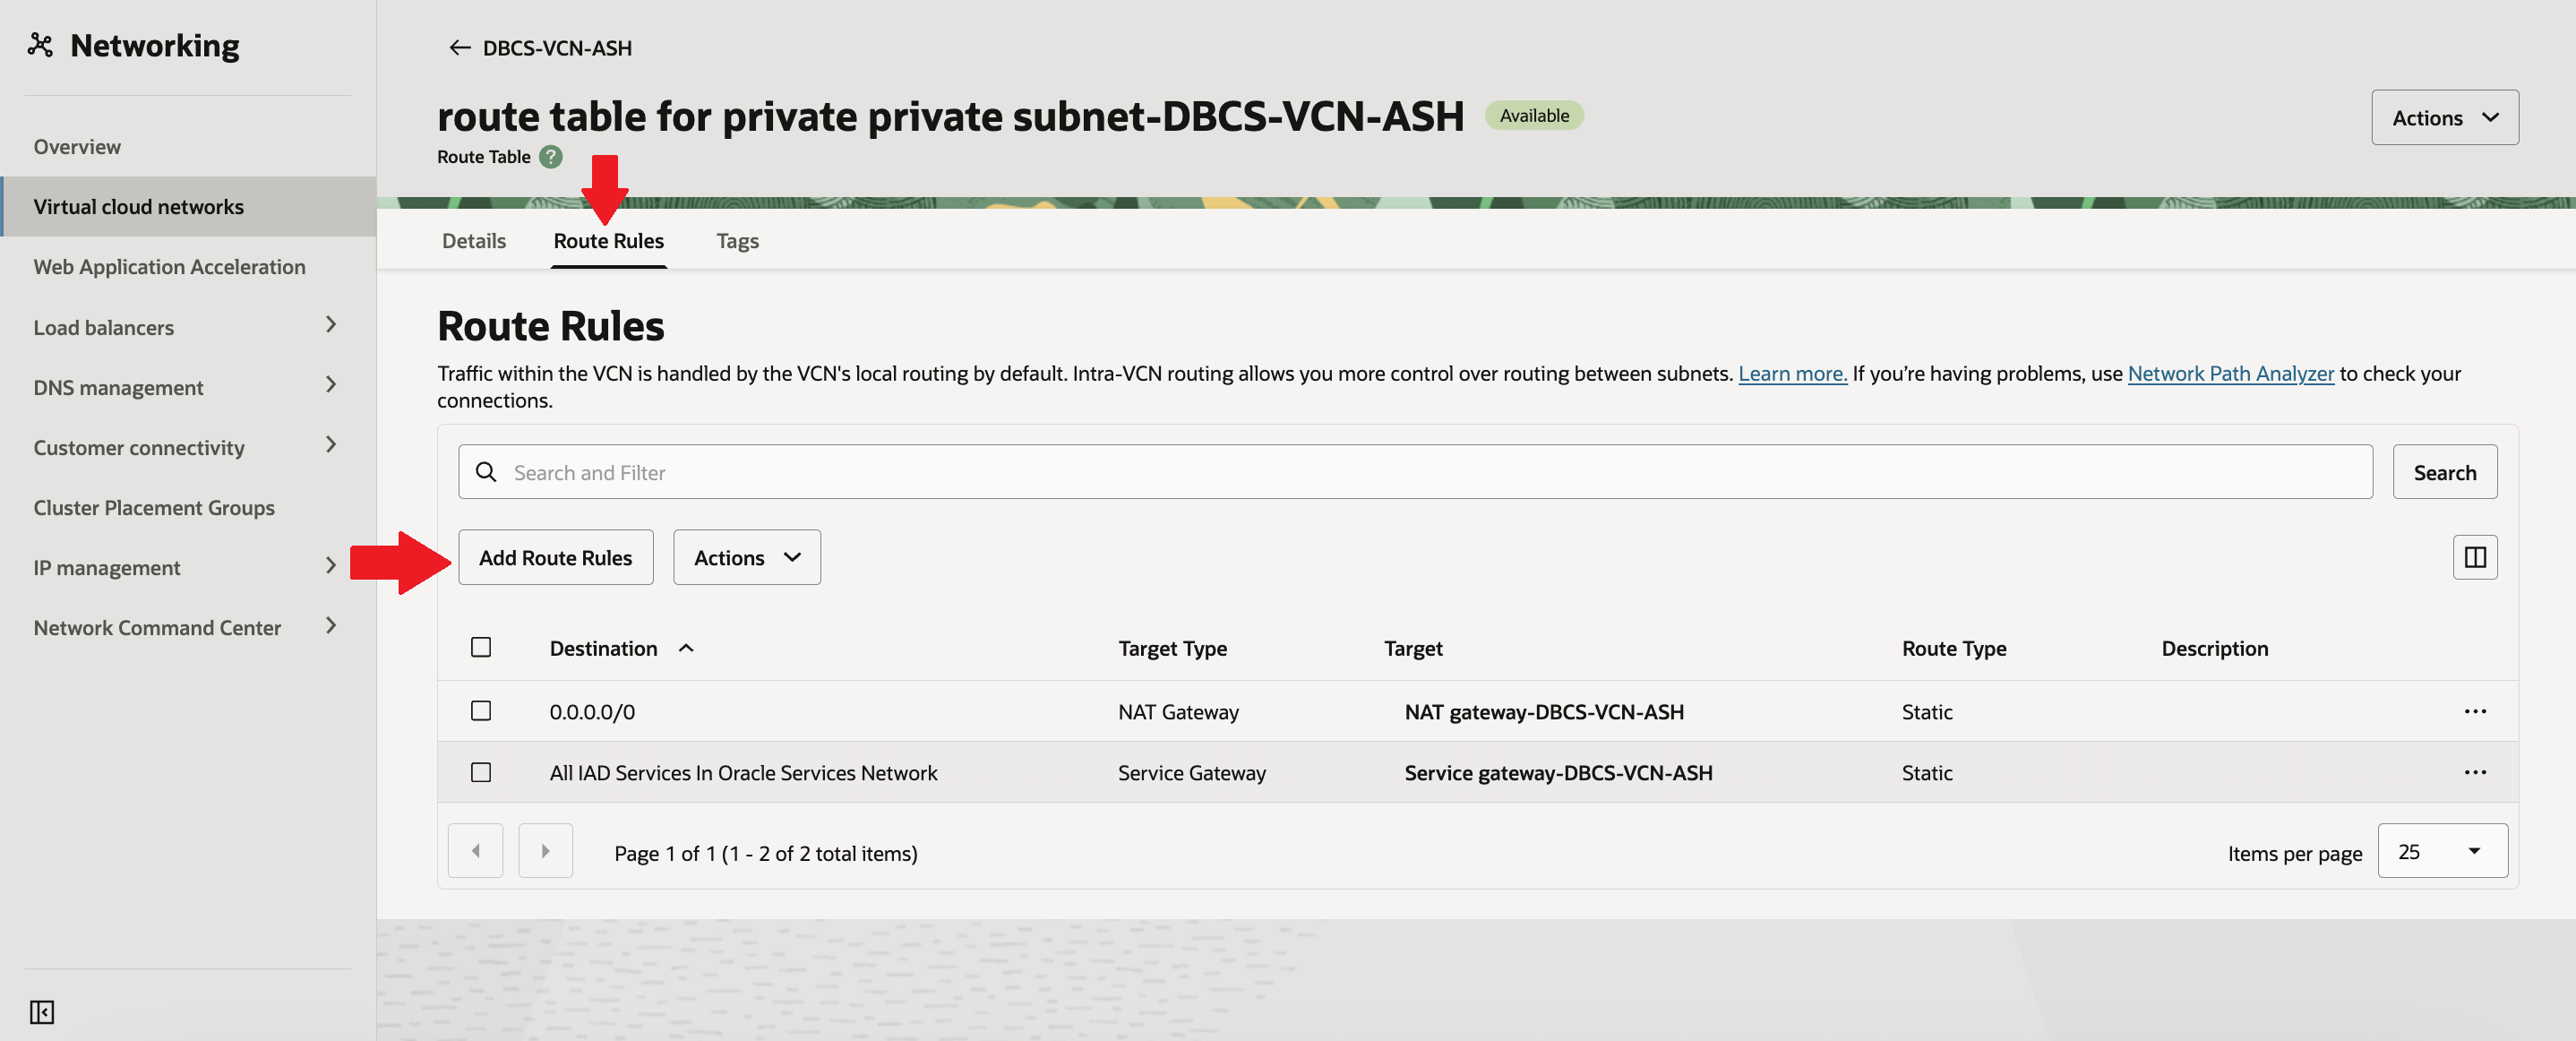
You will see default route rules. then click on “Add Route Rules”.
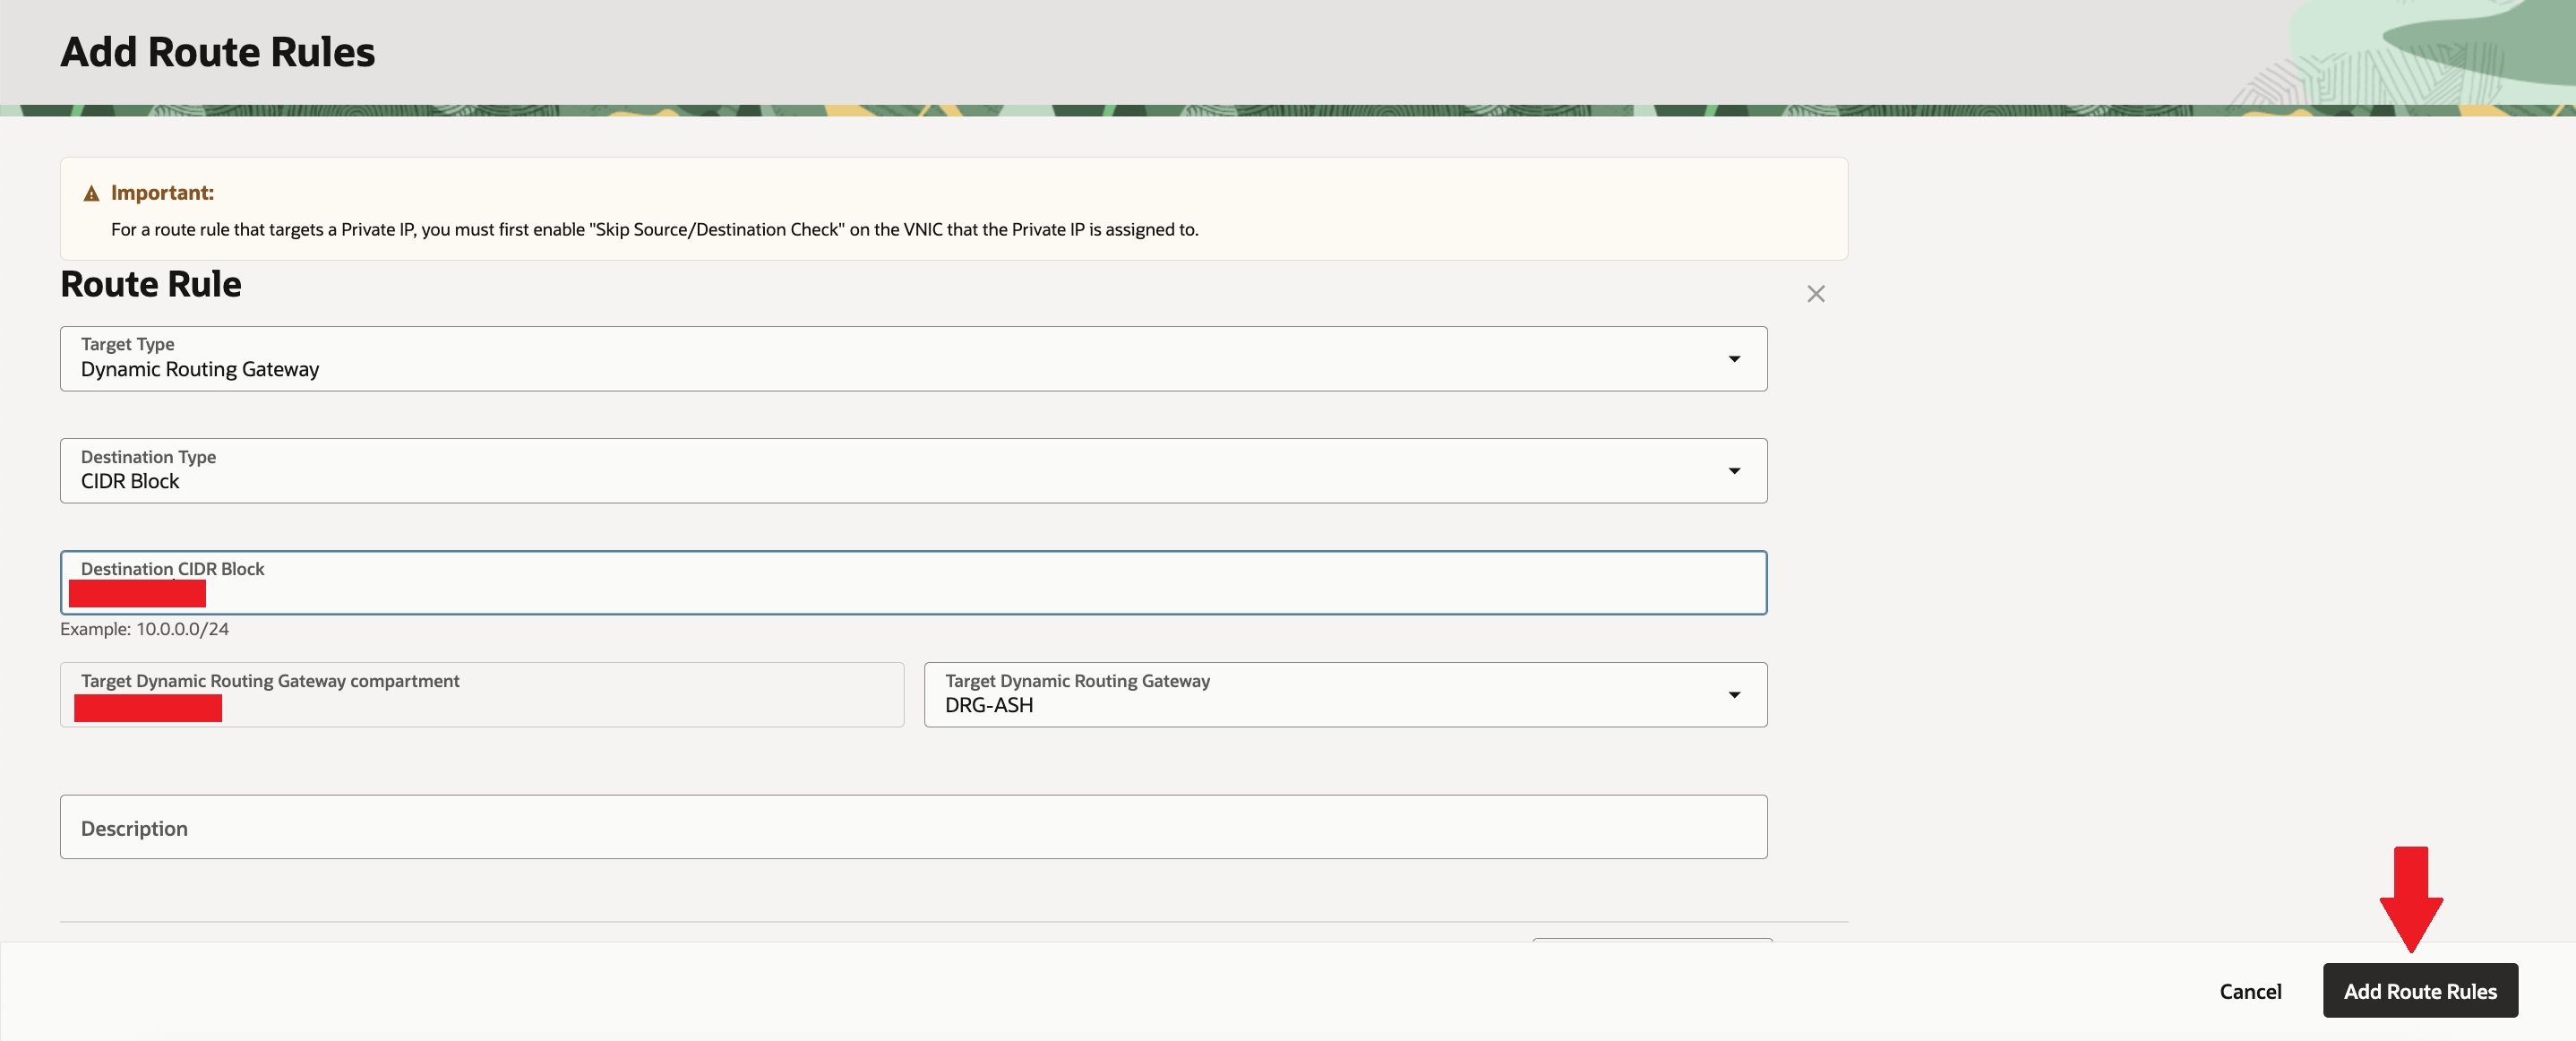
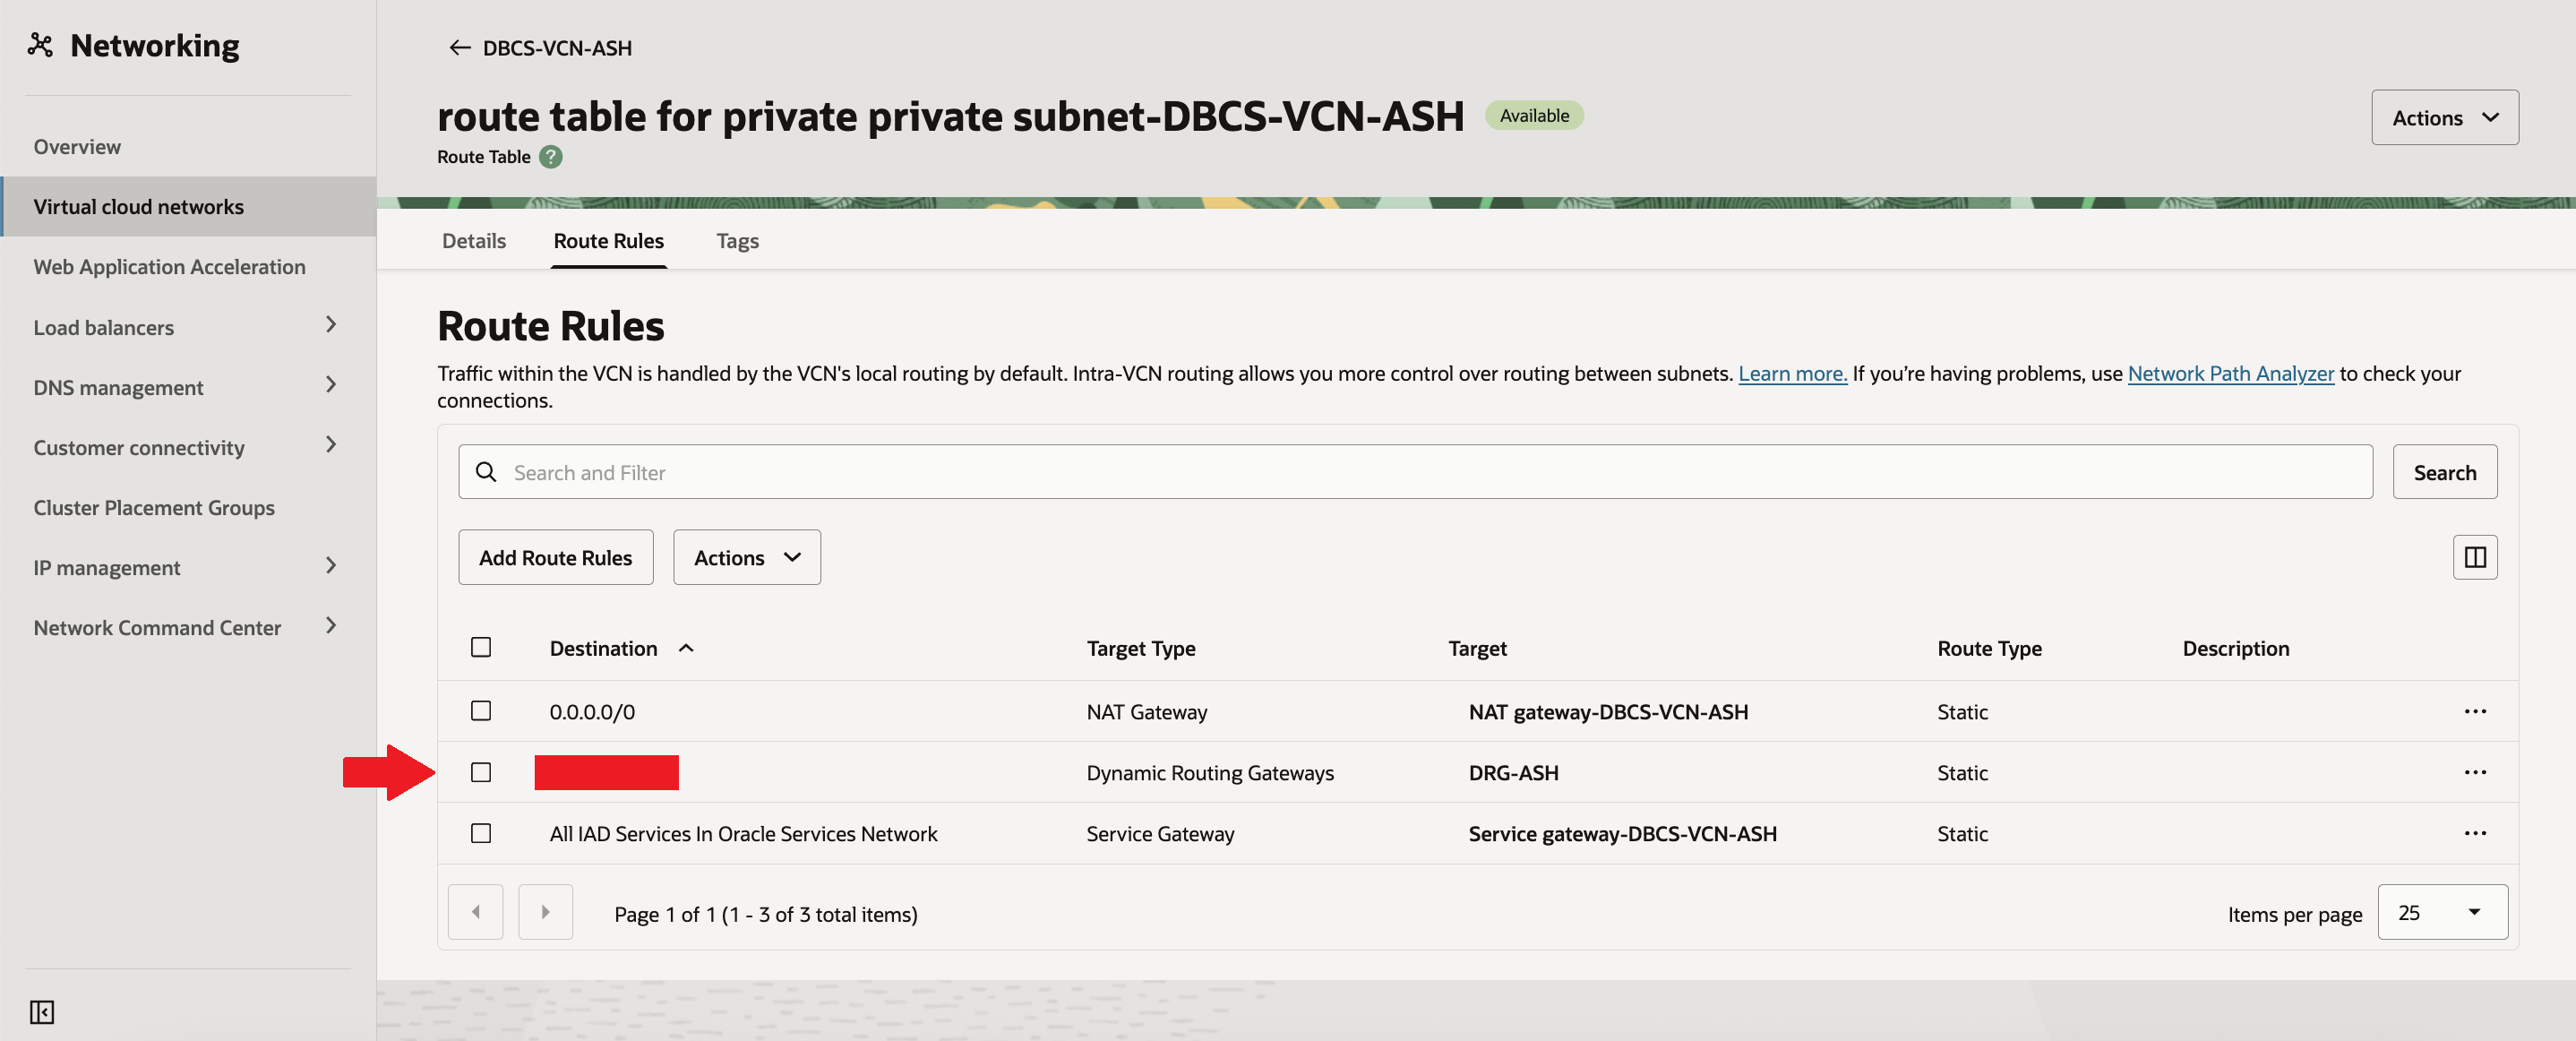
Select Target type as “Dynamic Routing Gateway”, destination type as “CIDR Block”, put your CIDR range of standby/peer region VCN – “DBCS-VCN-PHNX“. Select Target DRG as “DRG-ASH”. Then click on “Add Route Rules”
Now you will new route added as “DRG-ASH” when destination is CIDR range of standby/peer region VCN – “DBCS-VCN-PHNX”.
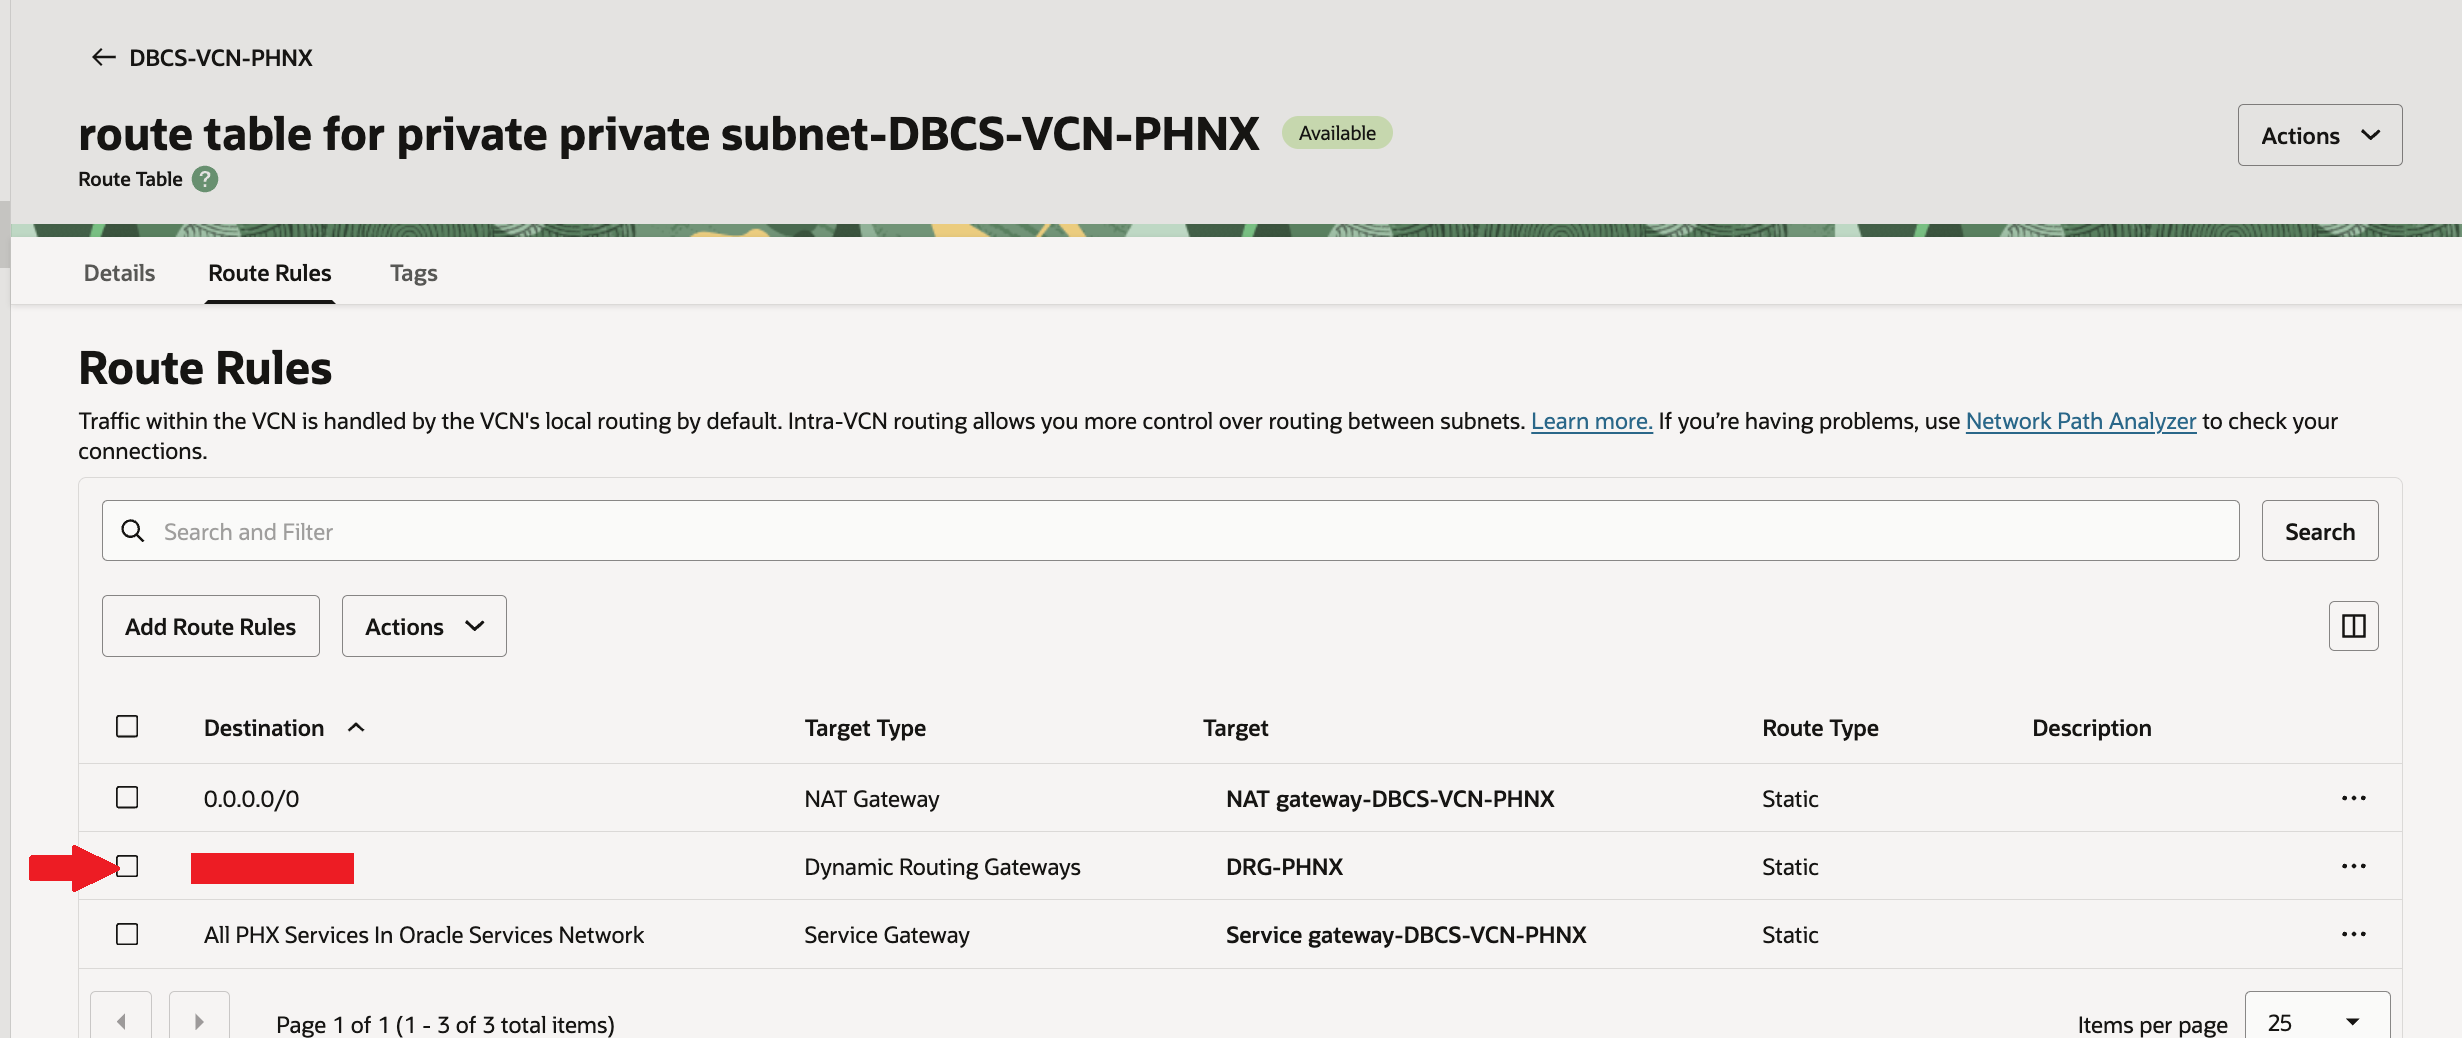
Similarly add route rule for standby/peer region VCN as well. You will new route added as “DRG-PHNX” when destination is CIDR range of primary region VCN – “DBCS-VCN-ASH”.
Configure the security list for both VCN’s.
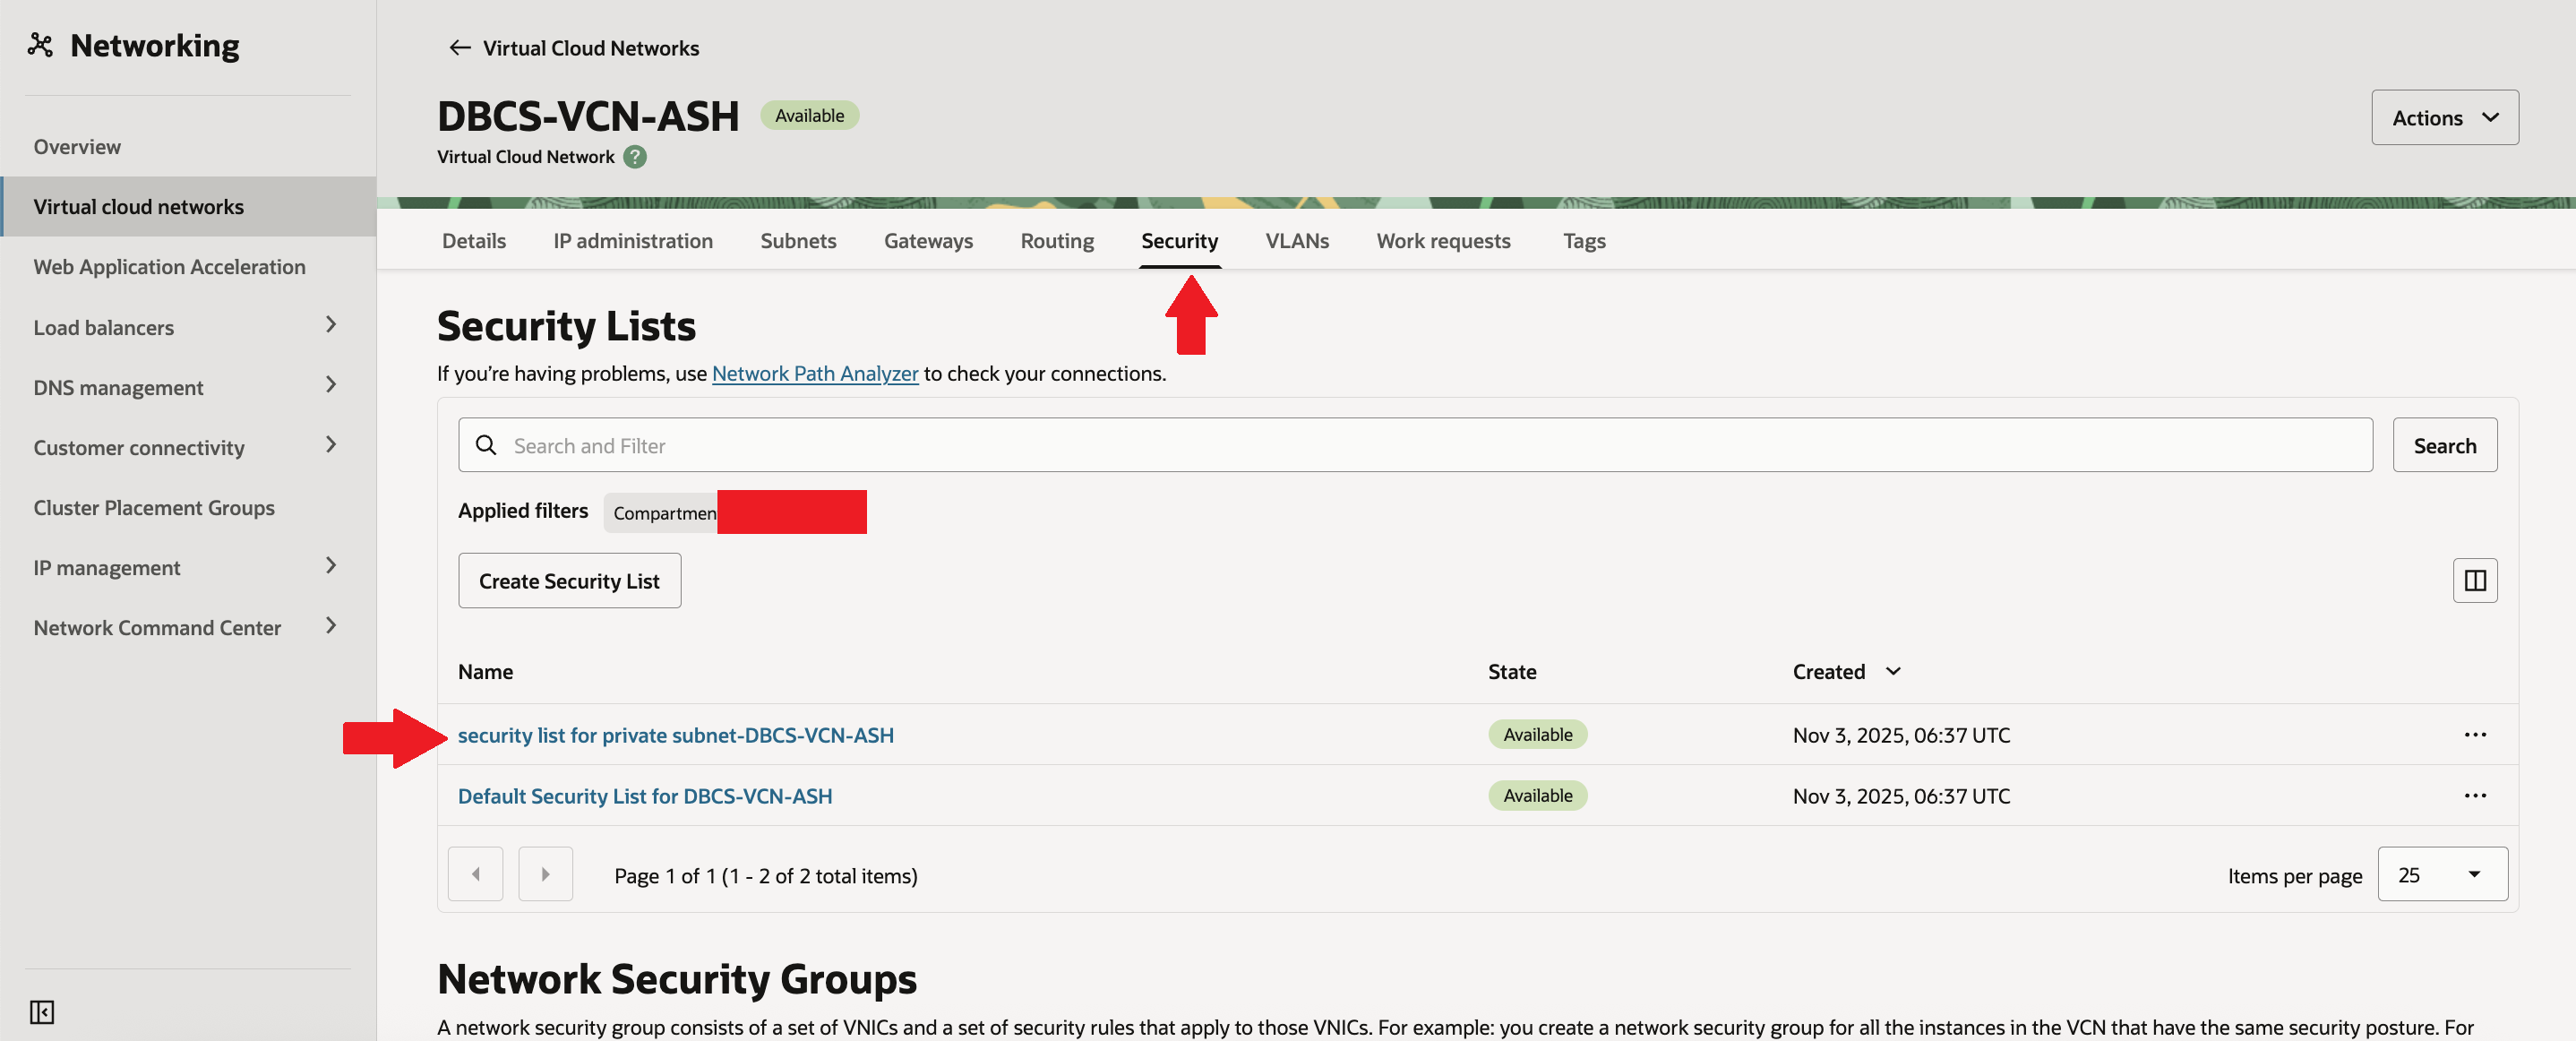
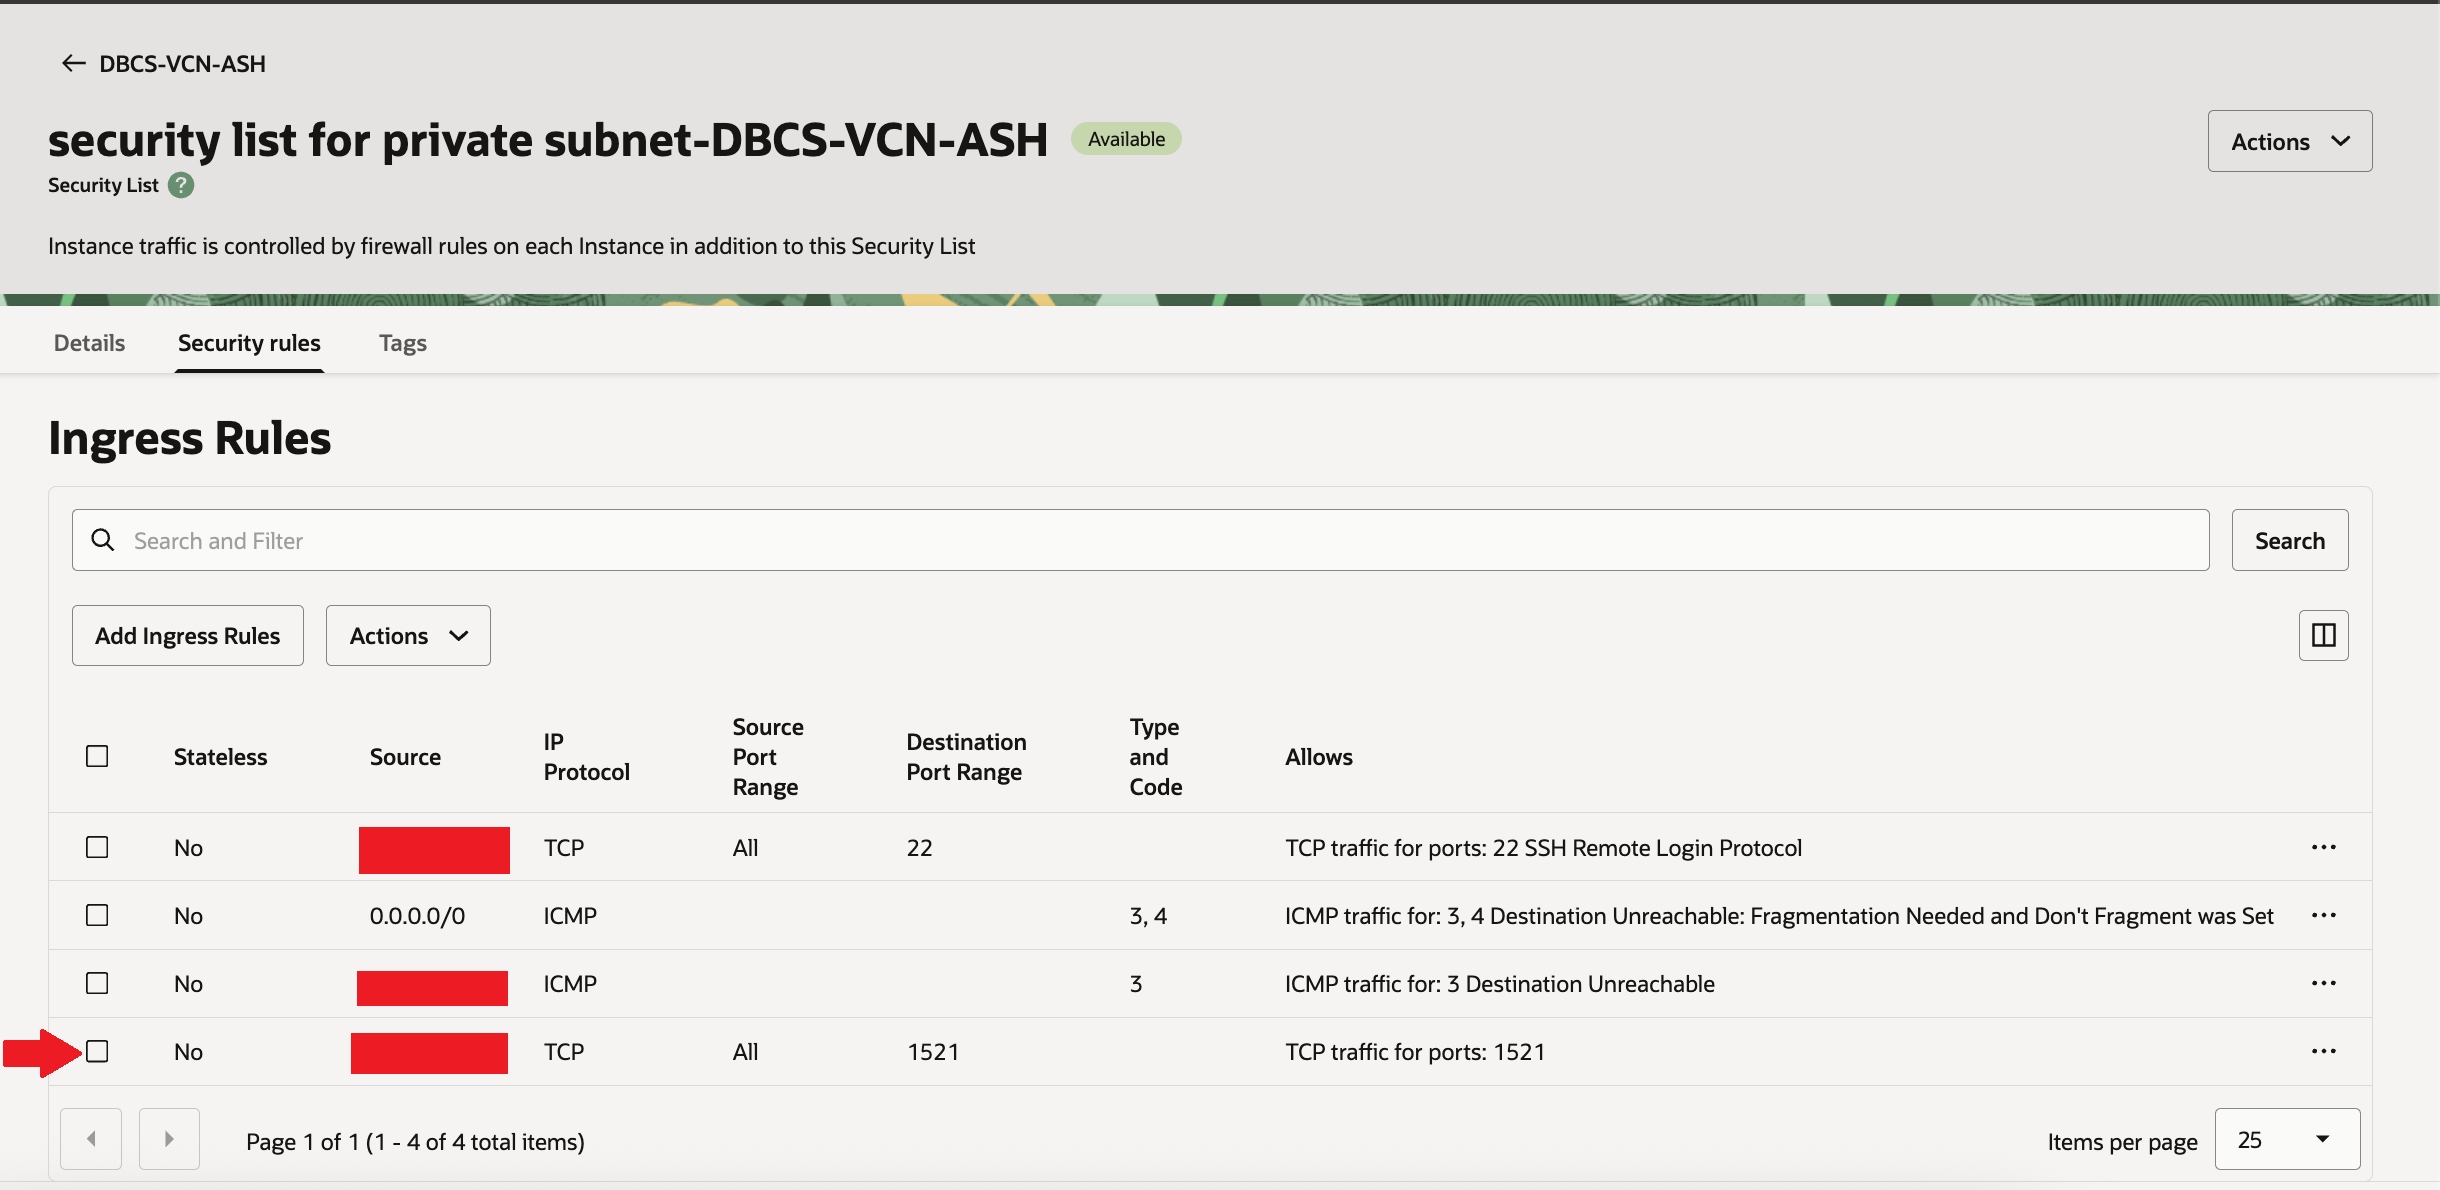
First go to VCN – DBCS-VCN-ASH of Ashburn (Primary) region. Go to Security & click on “security list for private subnet-DBCS-VCN-ASH”.
Select “Security rules” and then under “Ingress Rules” click on “Add Ingress Rule”
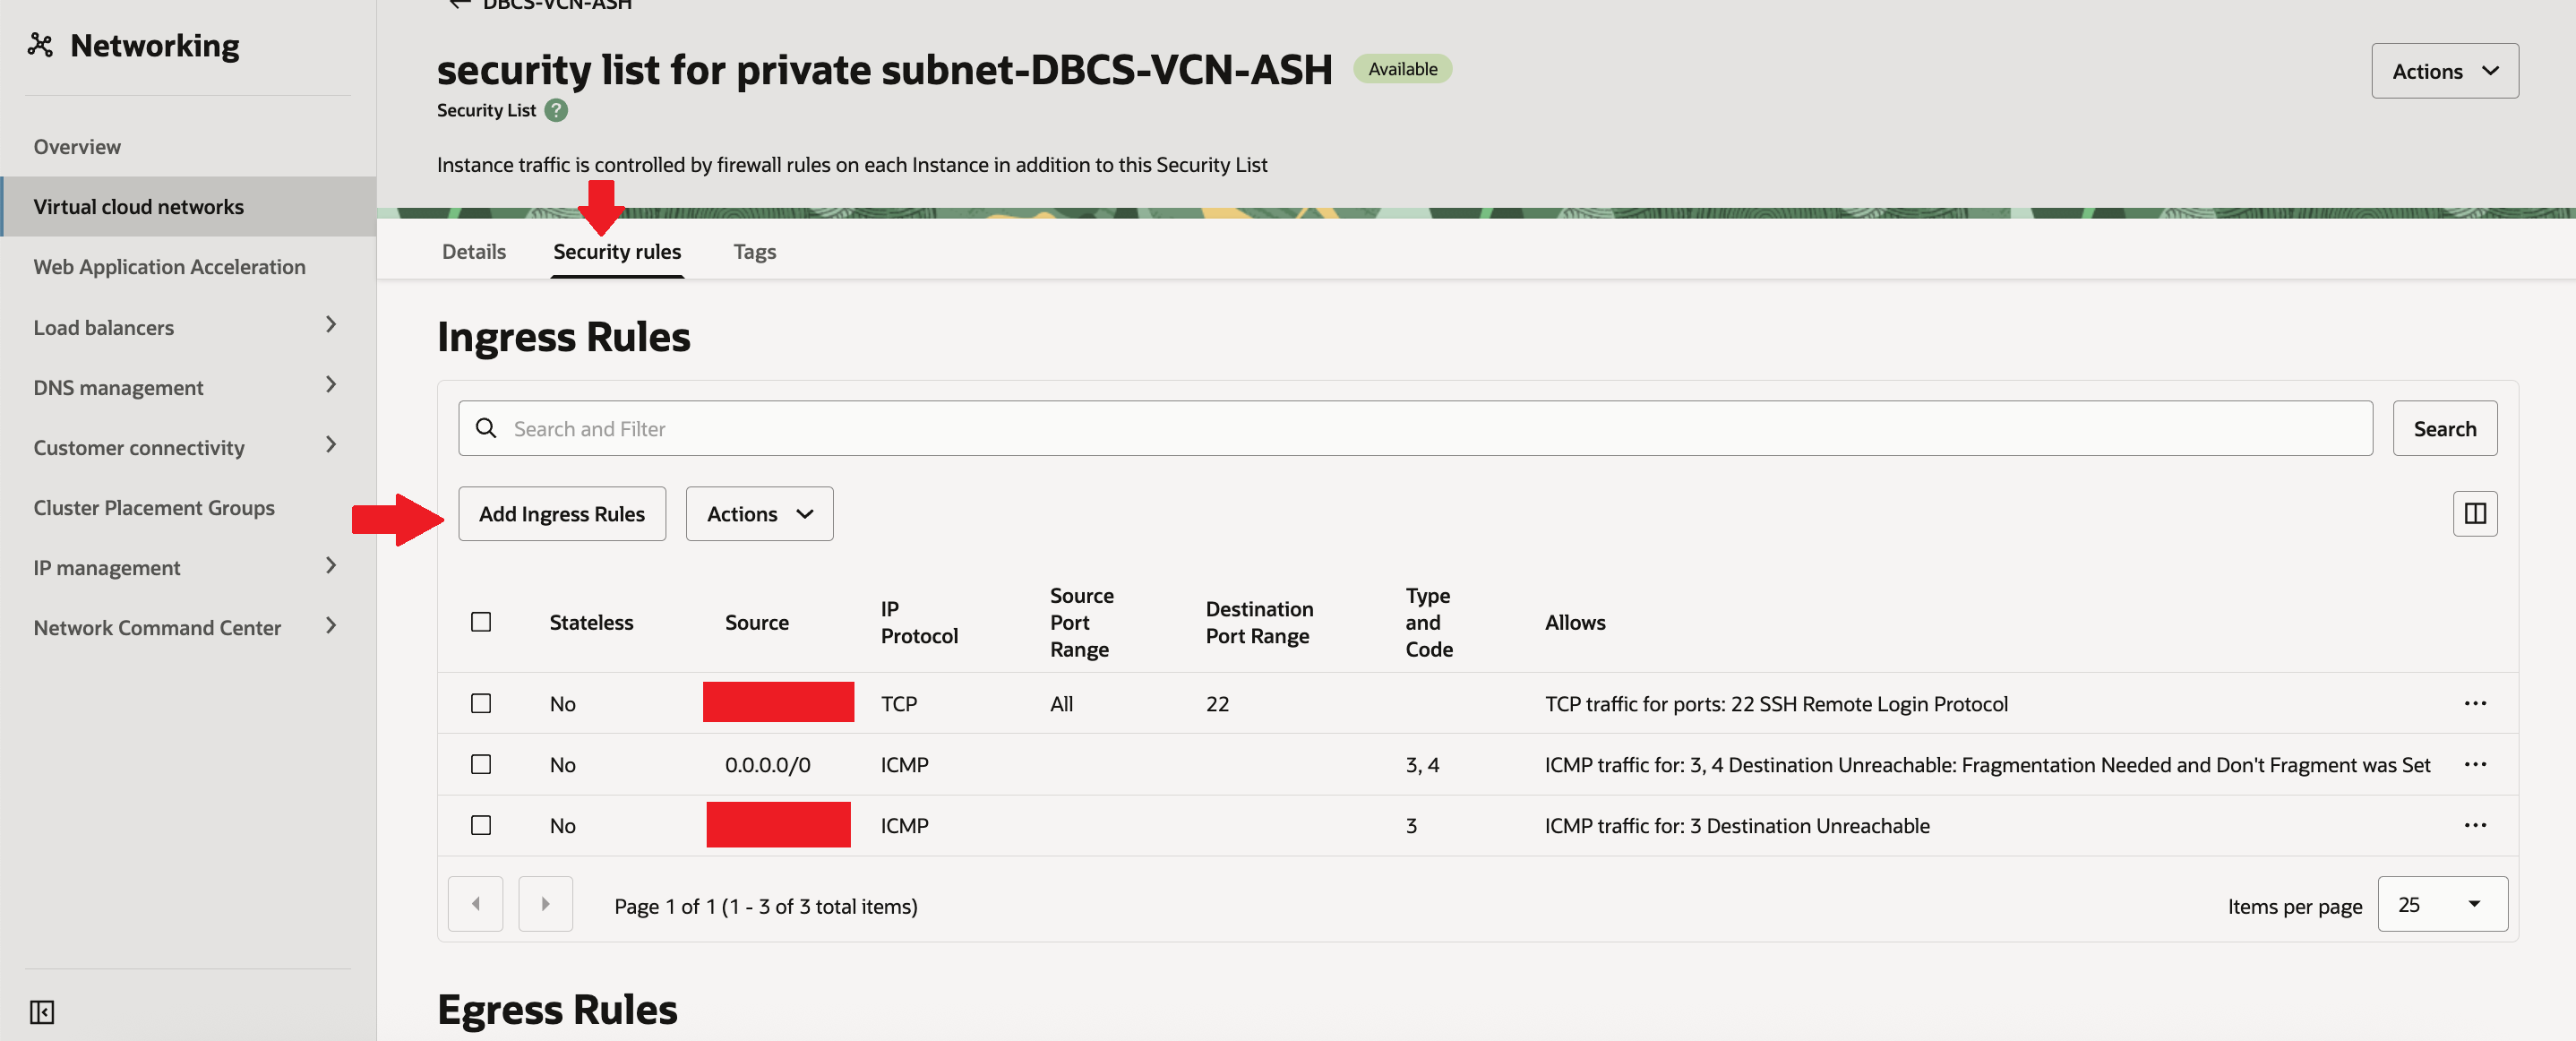
As Ingress is incoming connection from standby/peer region VCN – “DBCS-VCN-PHNX”, put source CIDR as of “DBCS-VCN-PHNX”, protocol “TCP” and destination port as 1521 and then click on “Add Ingress Rule”.

Confirm ingress rule has been successfully added.
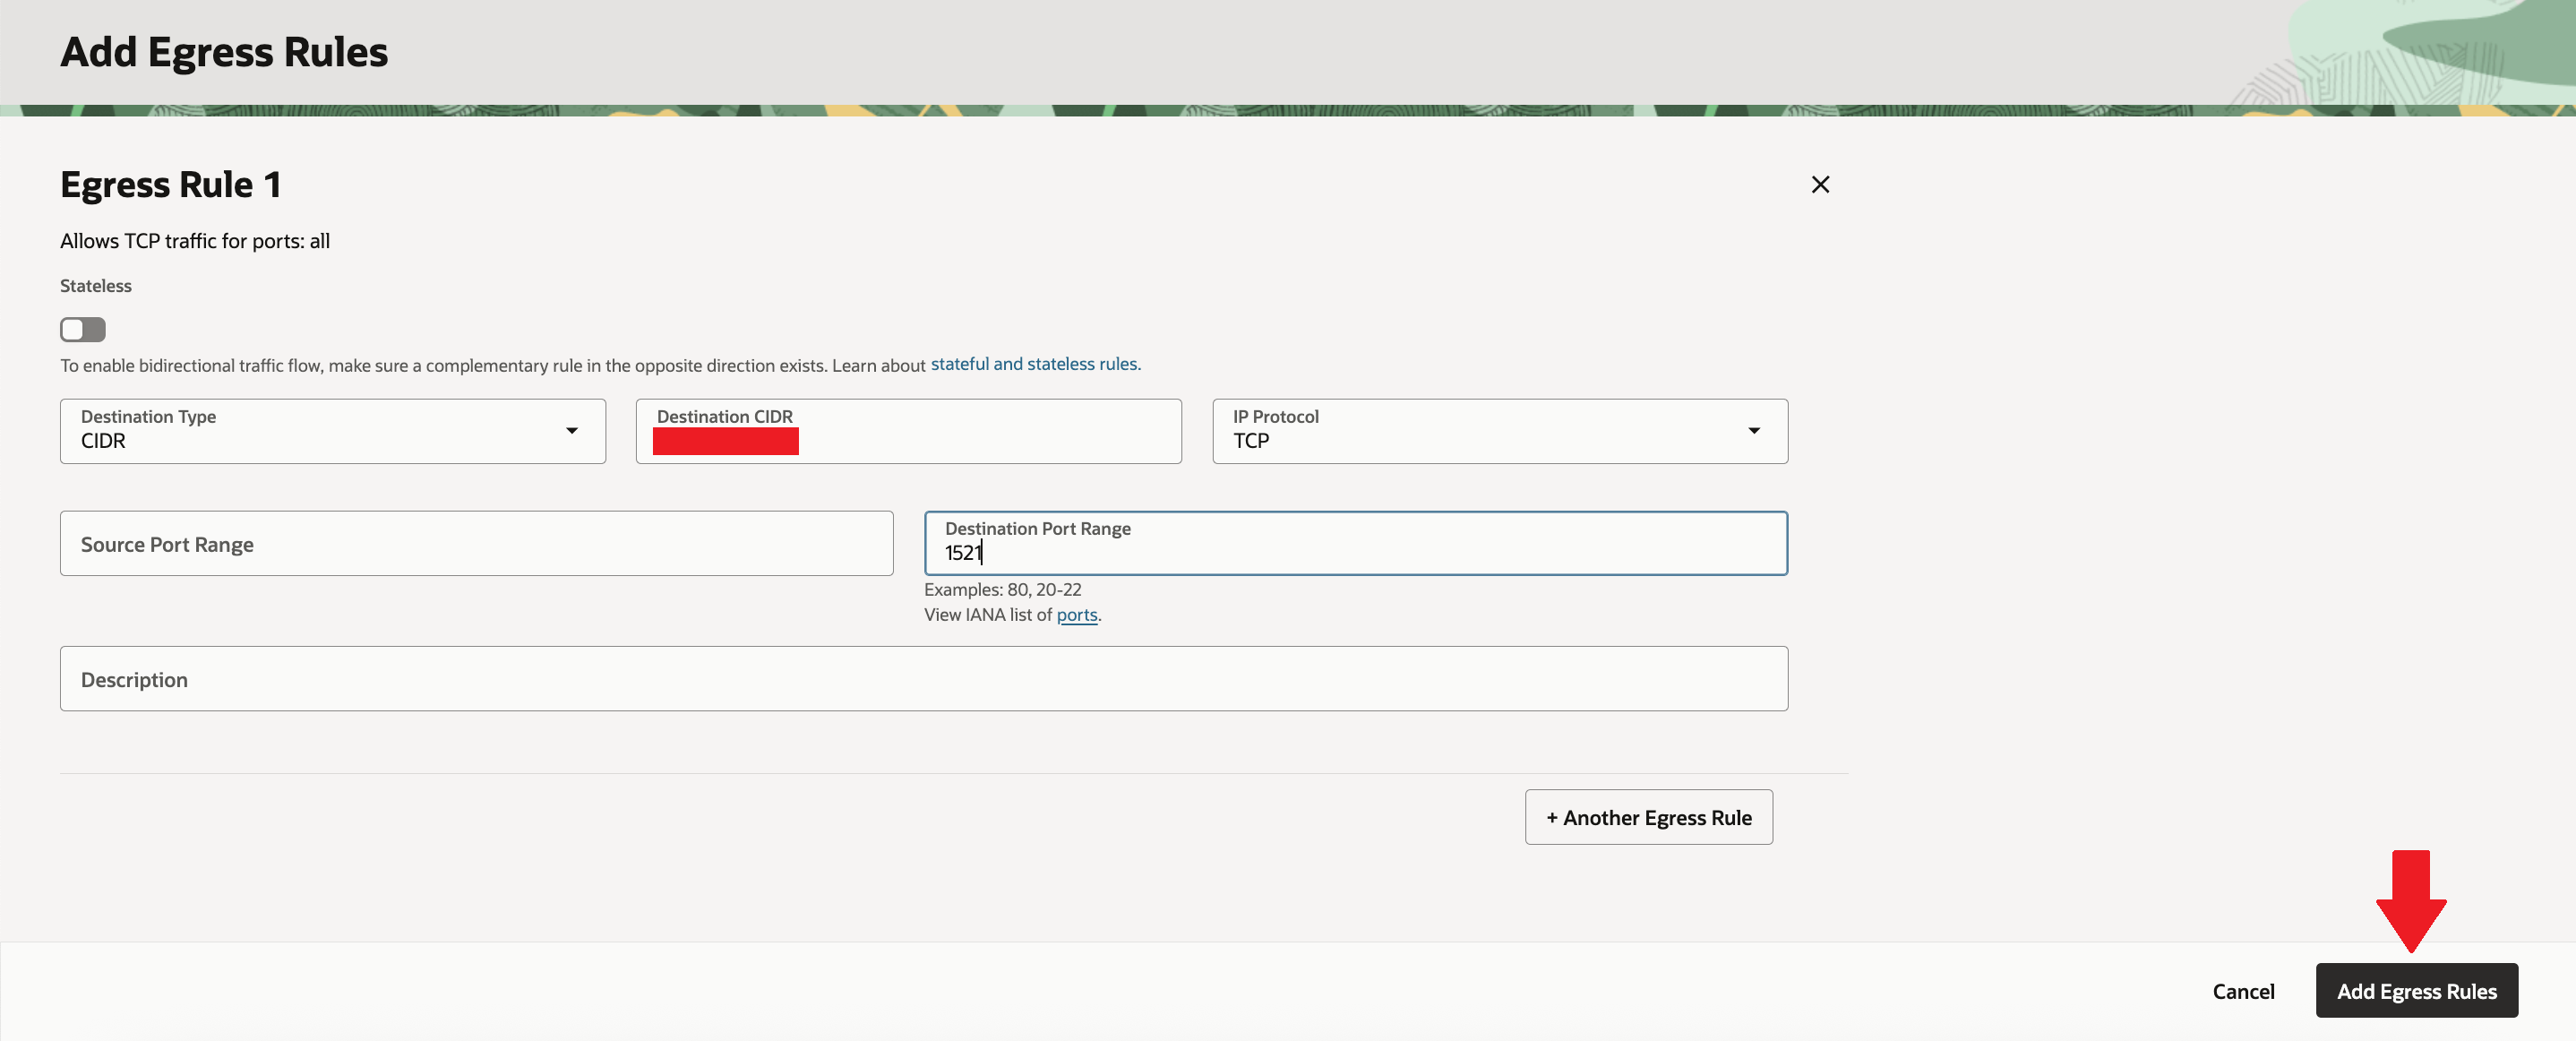
Now lets add Egress rule – Select “Security rules” and then under “Egress Rules” click on “Add Egress Rule”

As Egress is outgoing connection to standby/peer region VCN – “DBCS-VCN-PHNX“, put destination CIDR as of “DBCS-VCN-PHNX”, protocol “TCP” and destination port as 1521 and then click on “Add Egress Rule”.
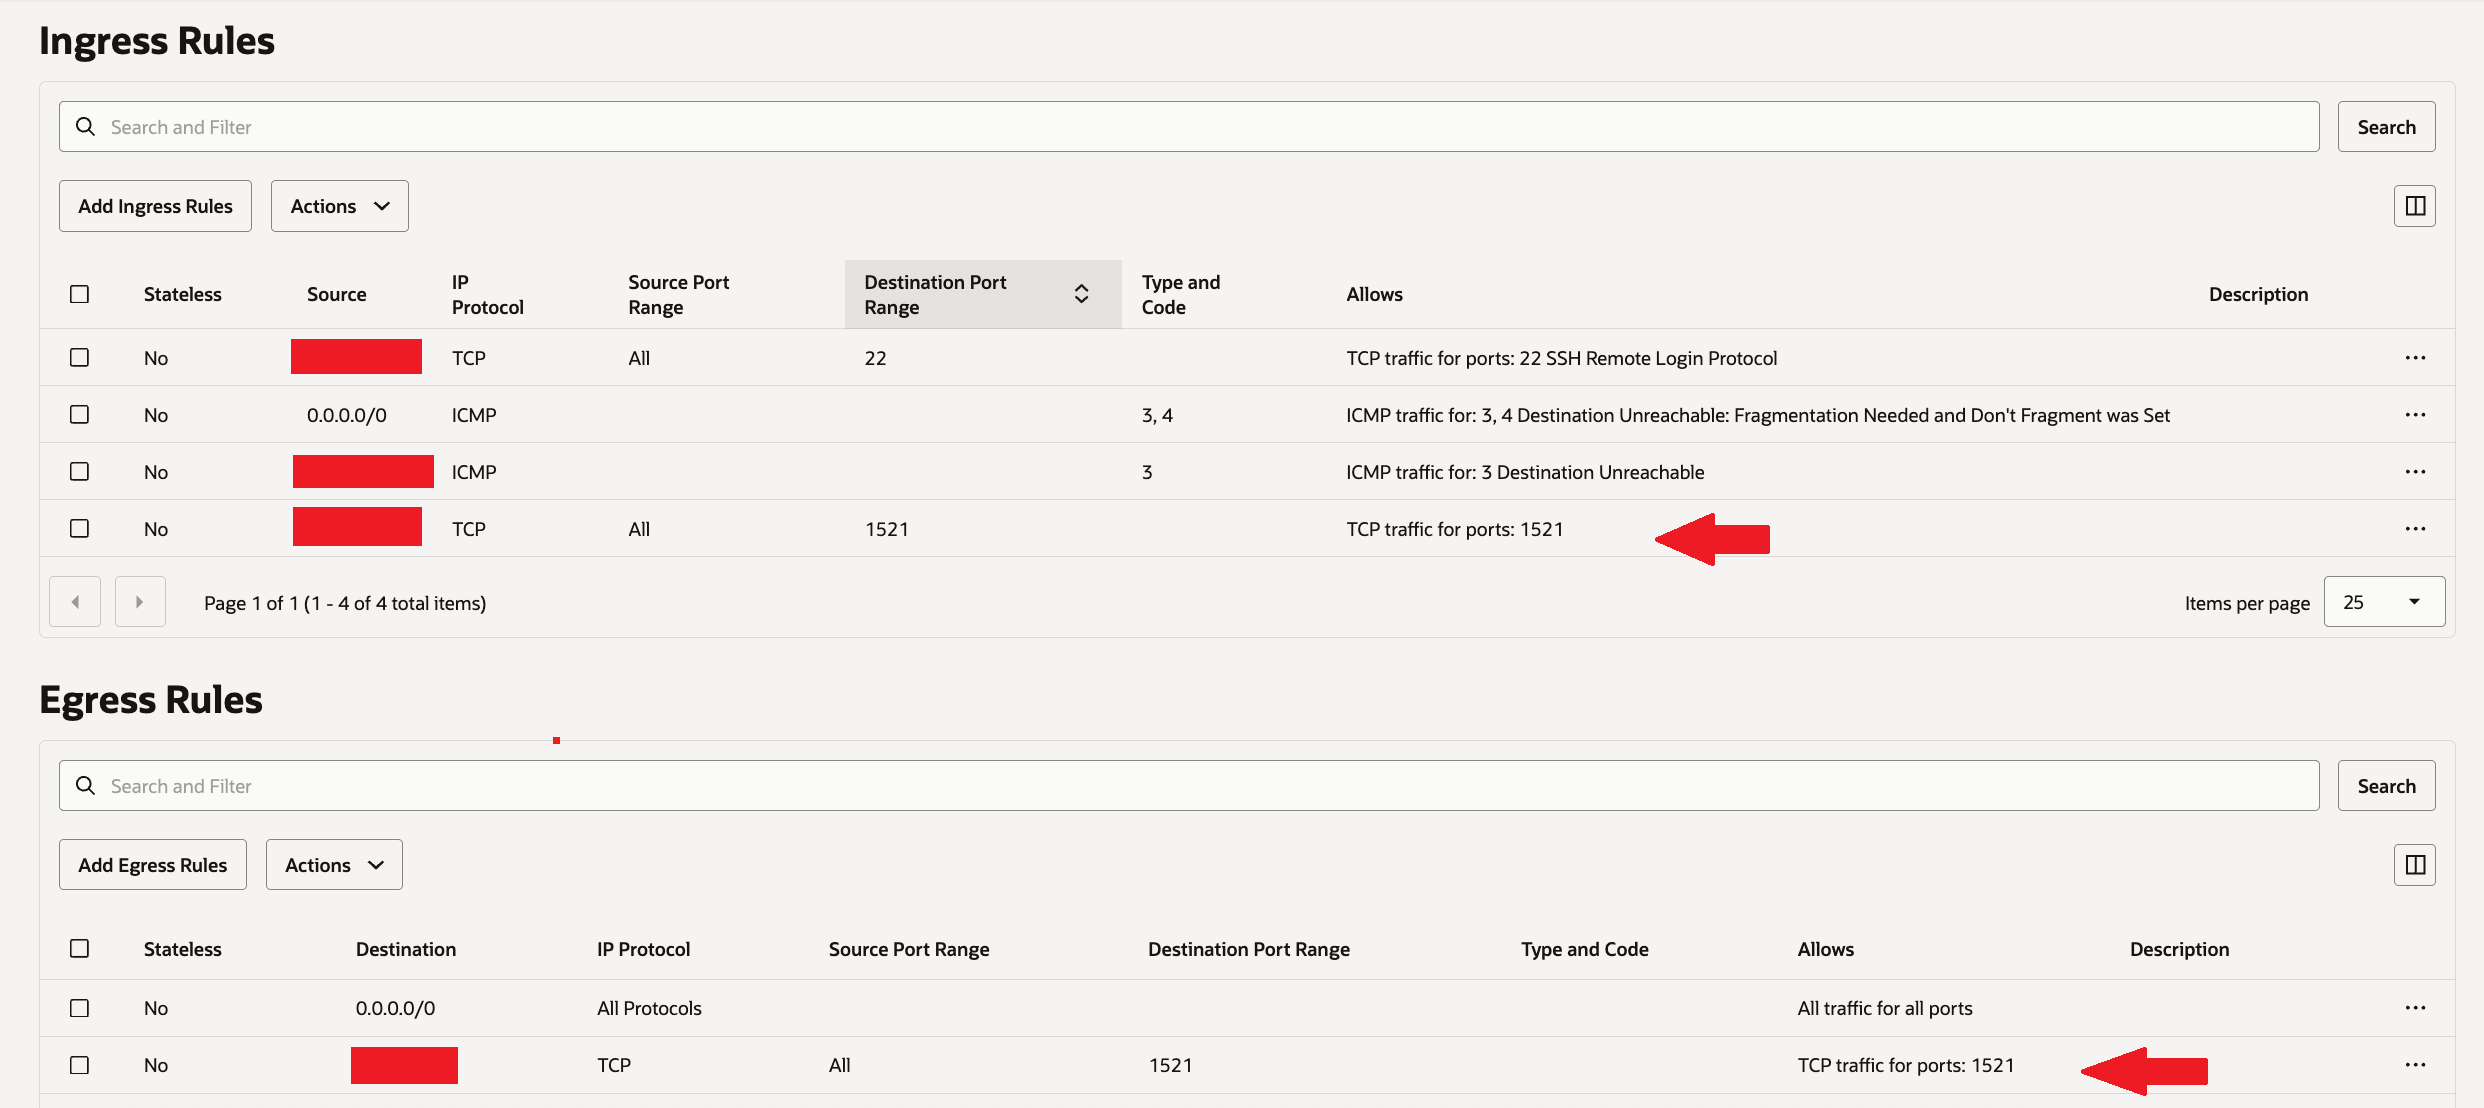
Confirm Egress rule has been successfully added.

Similaraly add Ingress & Egress rules for “DBCS-VCN-PHNX” of Phoenix (Standby/peer) region.
That completes our all OCI networking prerequisites needed for dataguard setup.
Steps to Enable Data Guard
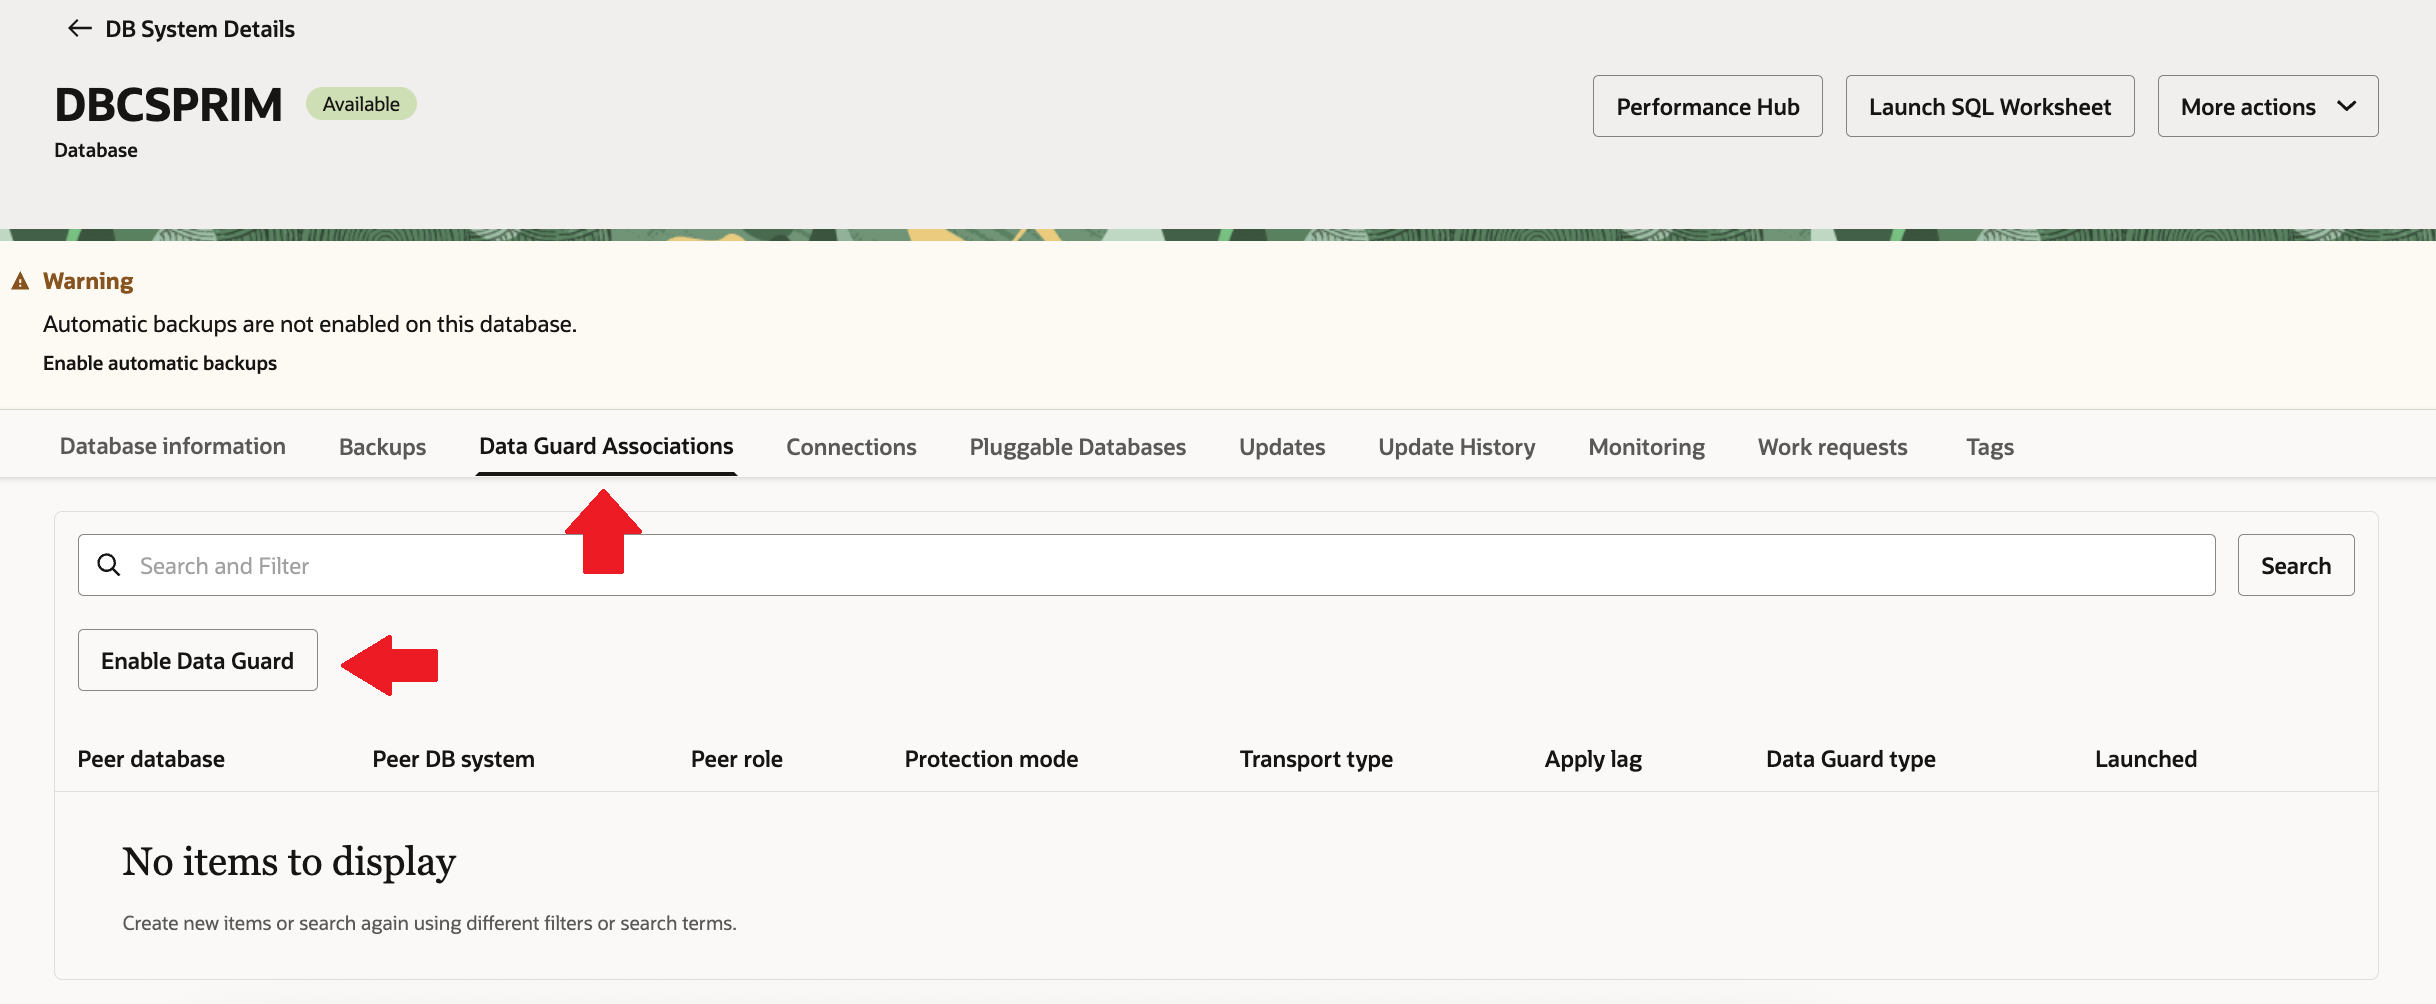
Lets select source DBCS system by clicking hamburger menu => Then “Oracle AI Database” => Then “Oracle Base Database Service”. Then select on “Databases” & click on Primary database “DBCSPRIM”

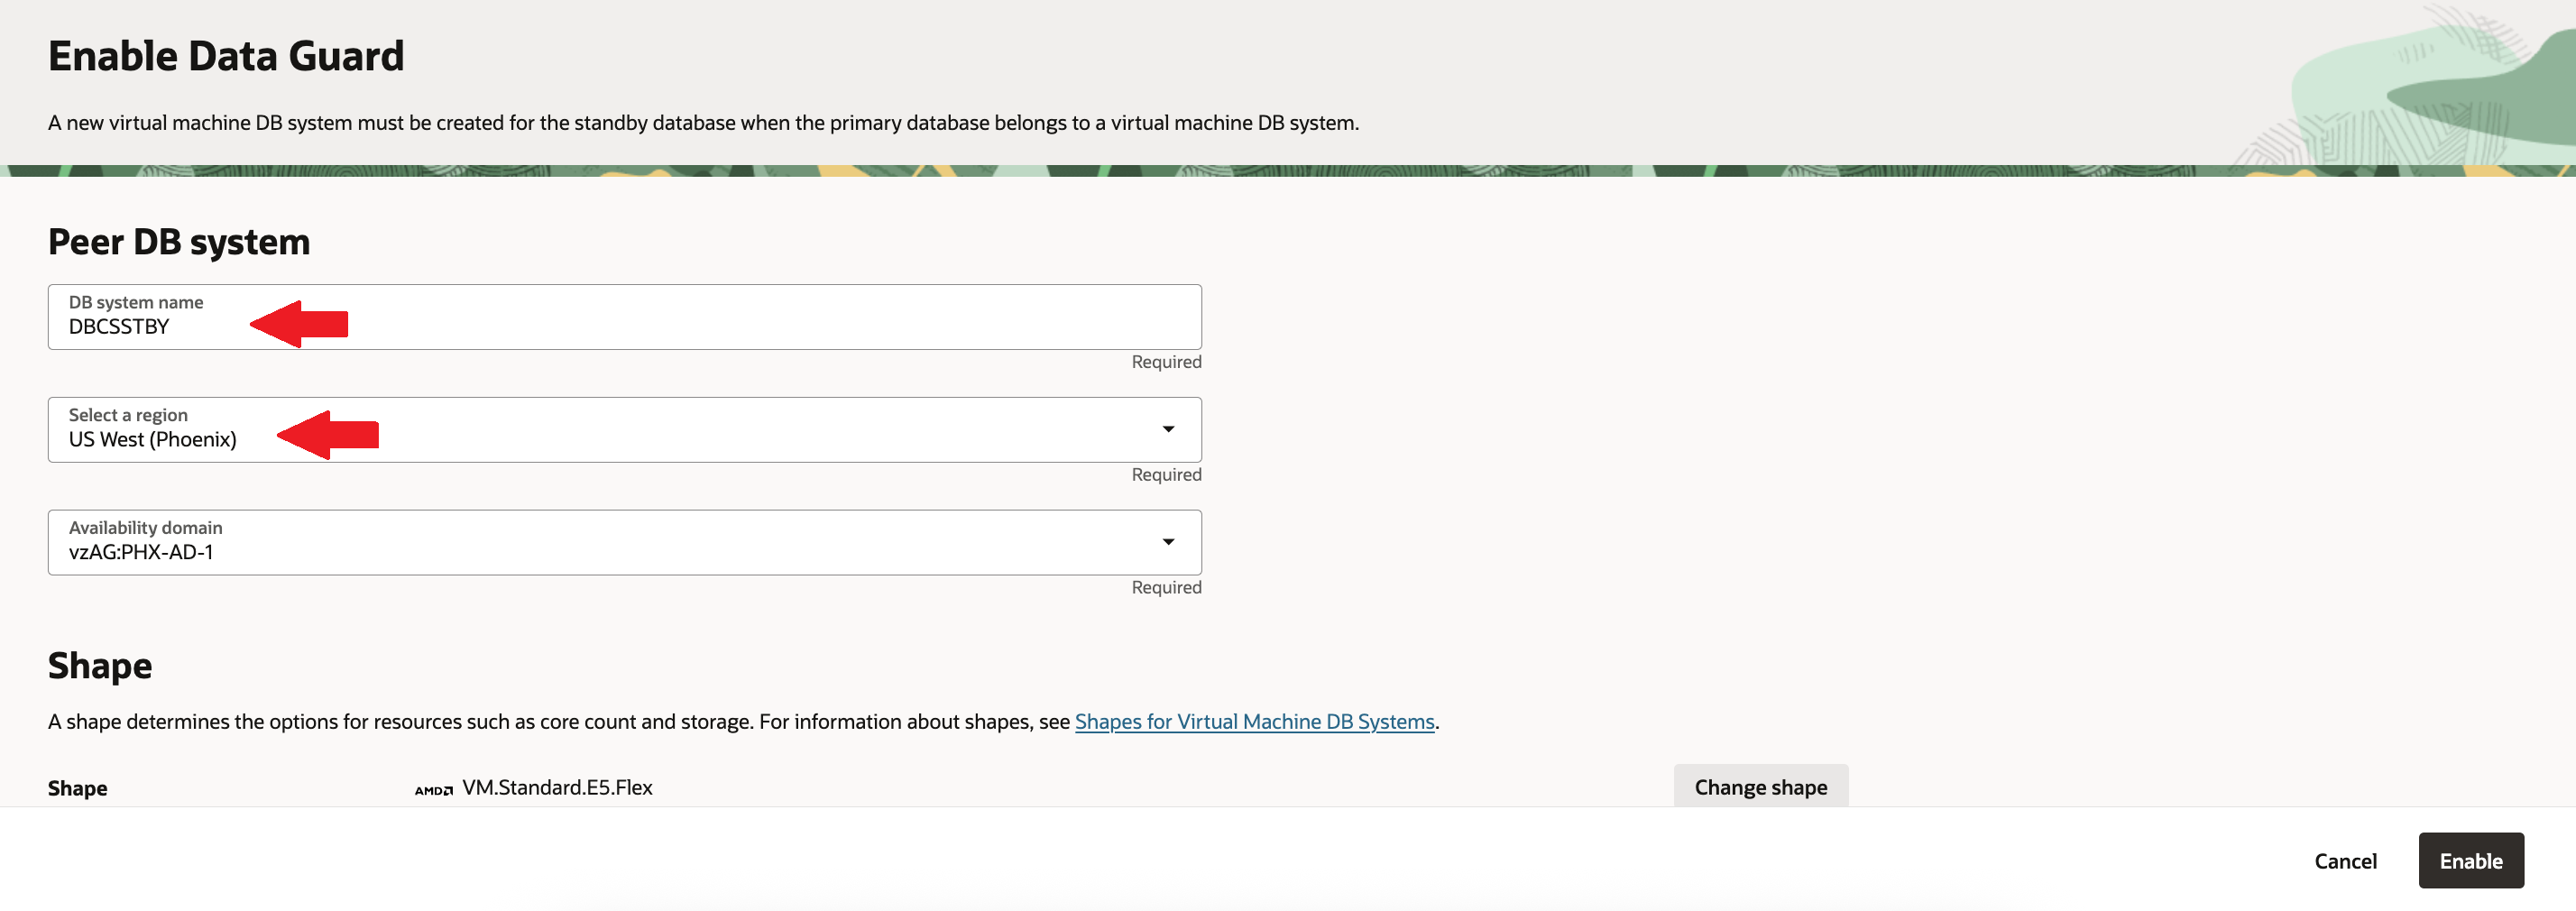
Now select “Data Guard Association” & Click on “Enable Data Guard”.
Add suitable peer DB system name “DBCSSTBY“, select “Phoenix” region.
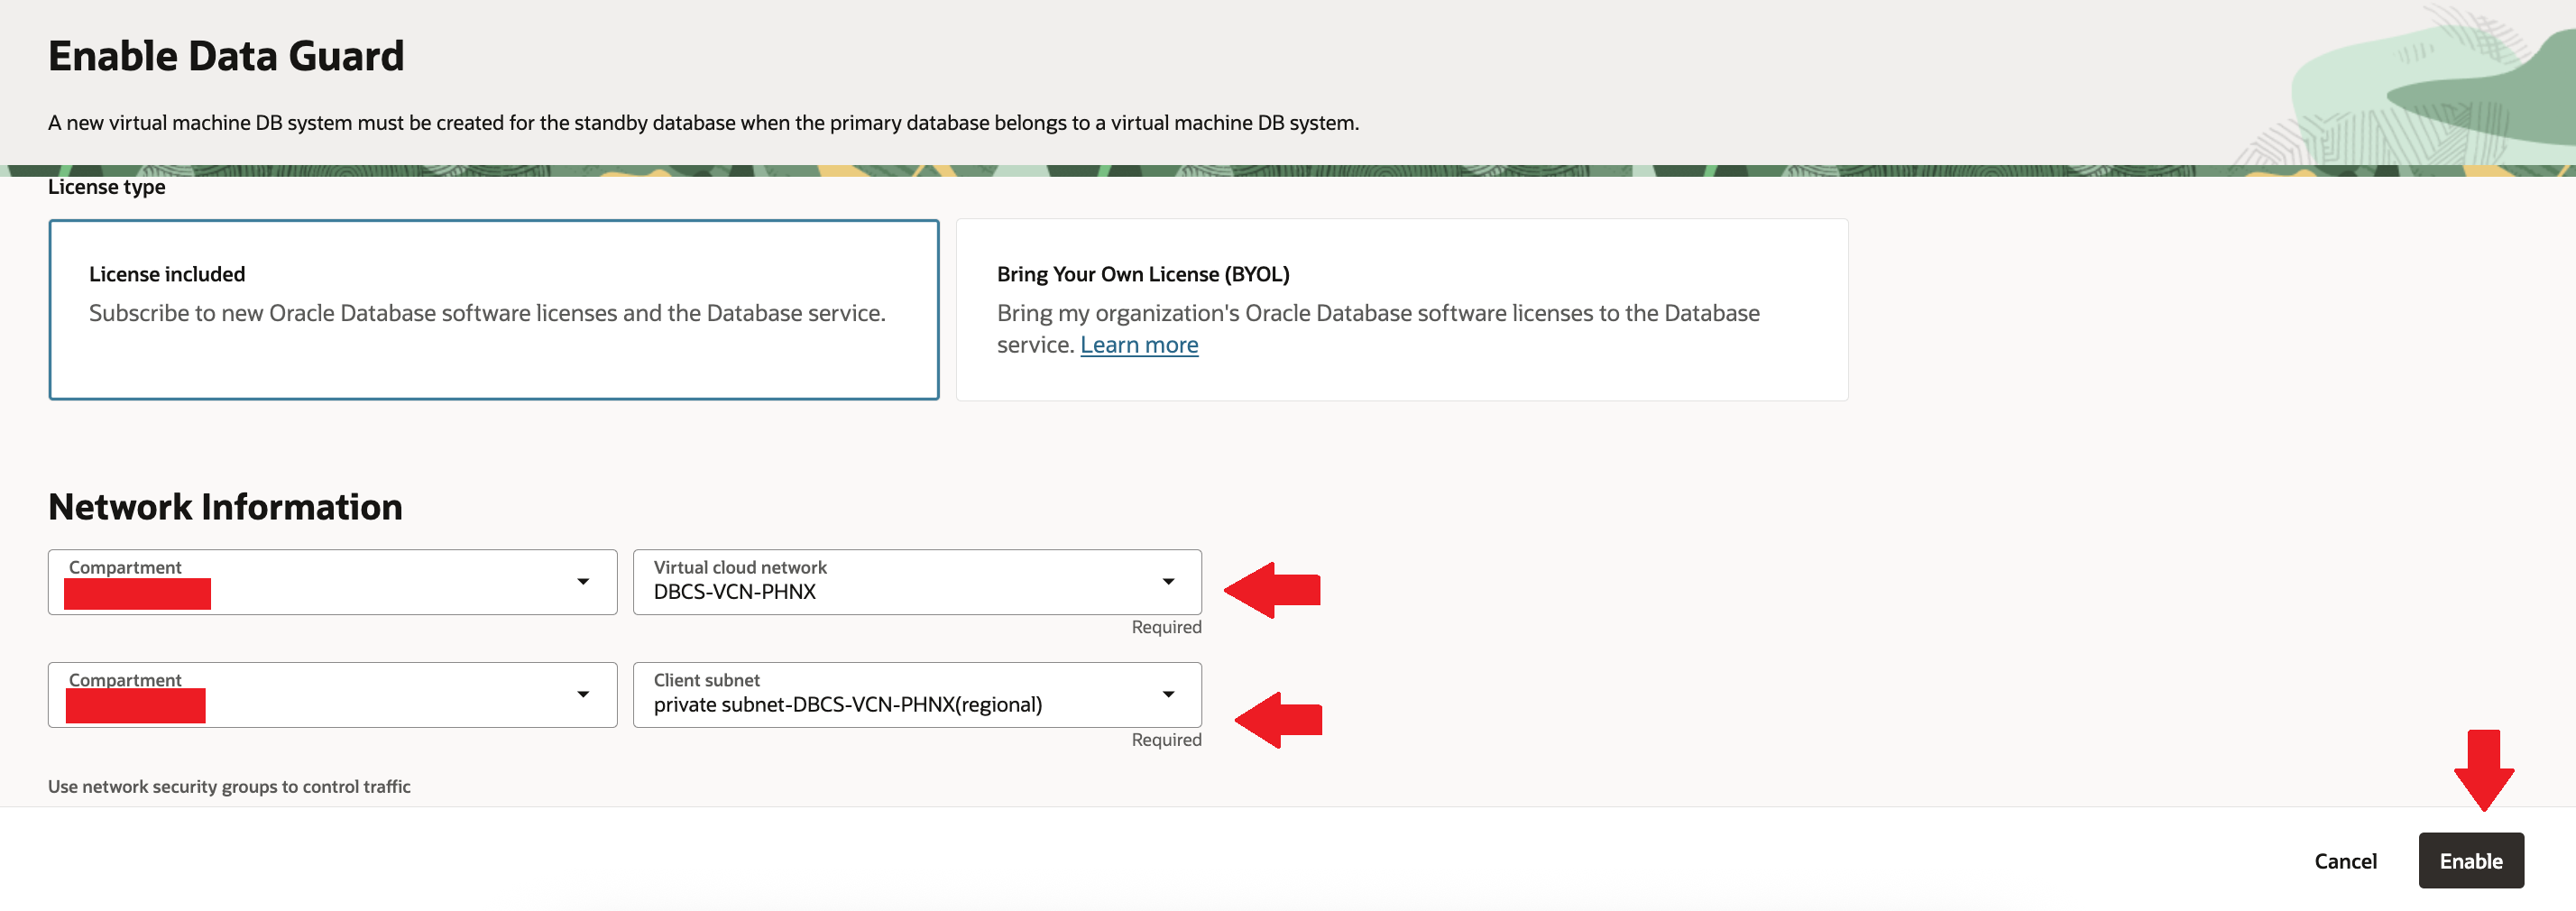
Then select suiable options for shape & licesing. Select target VCN as “DBCS-VCN-PHNX” & private subnet as client subnet. Then click on “Enable”
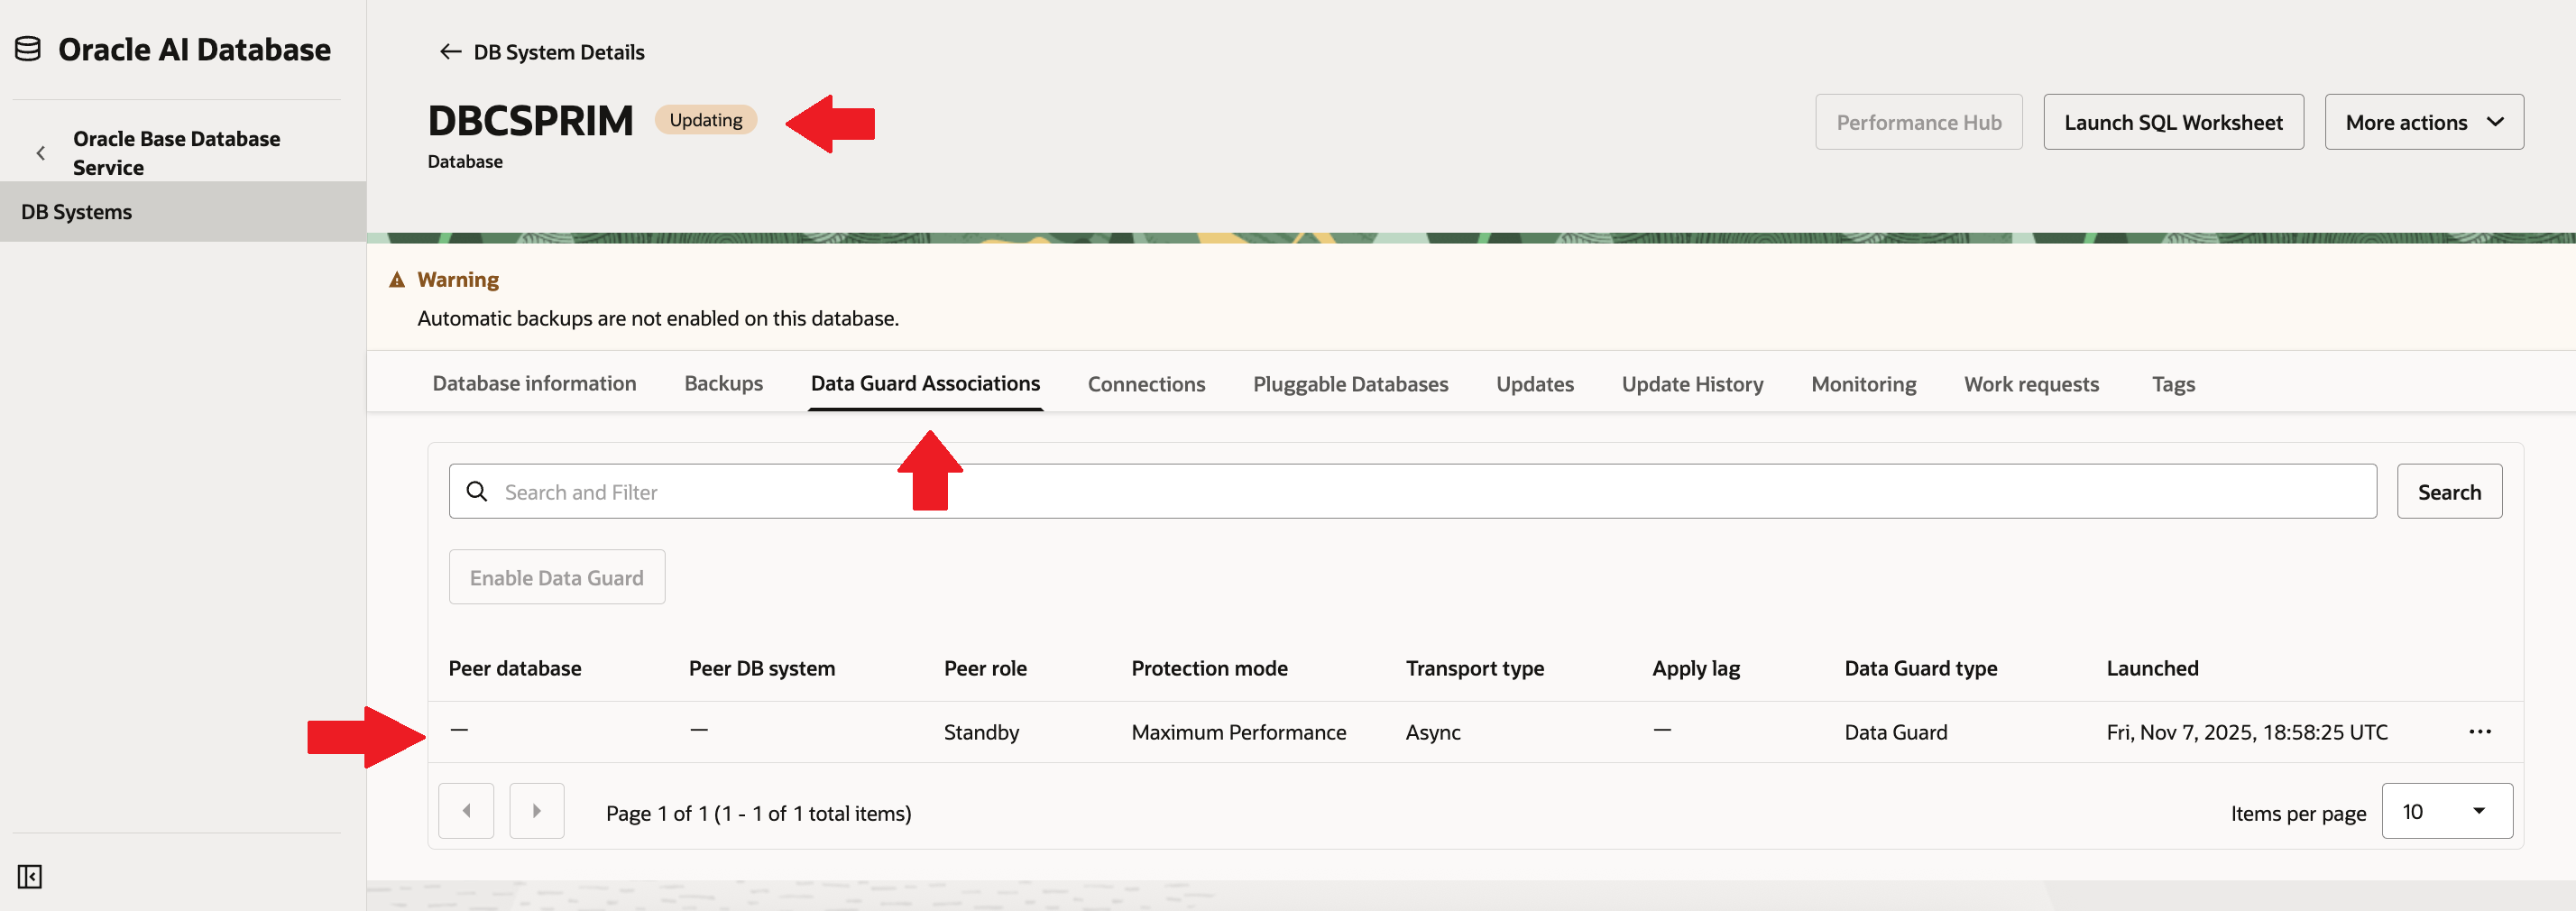
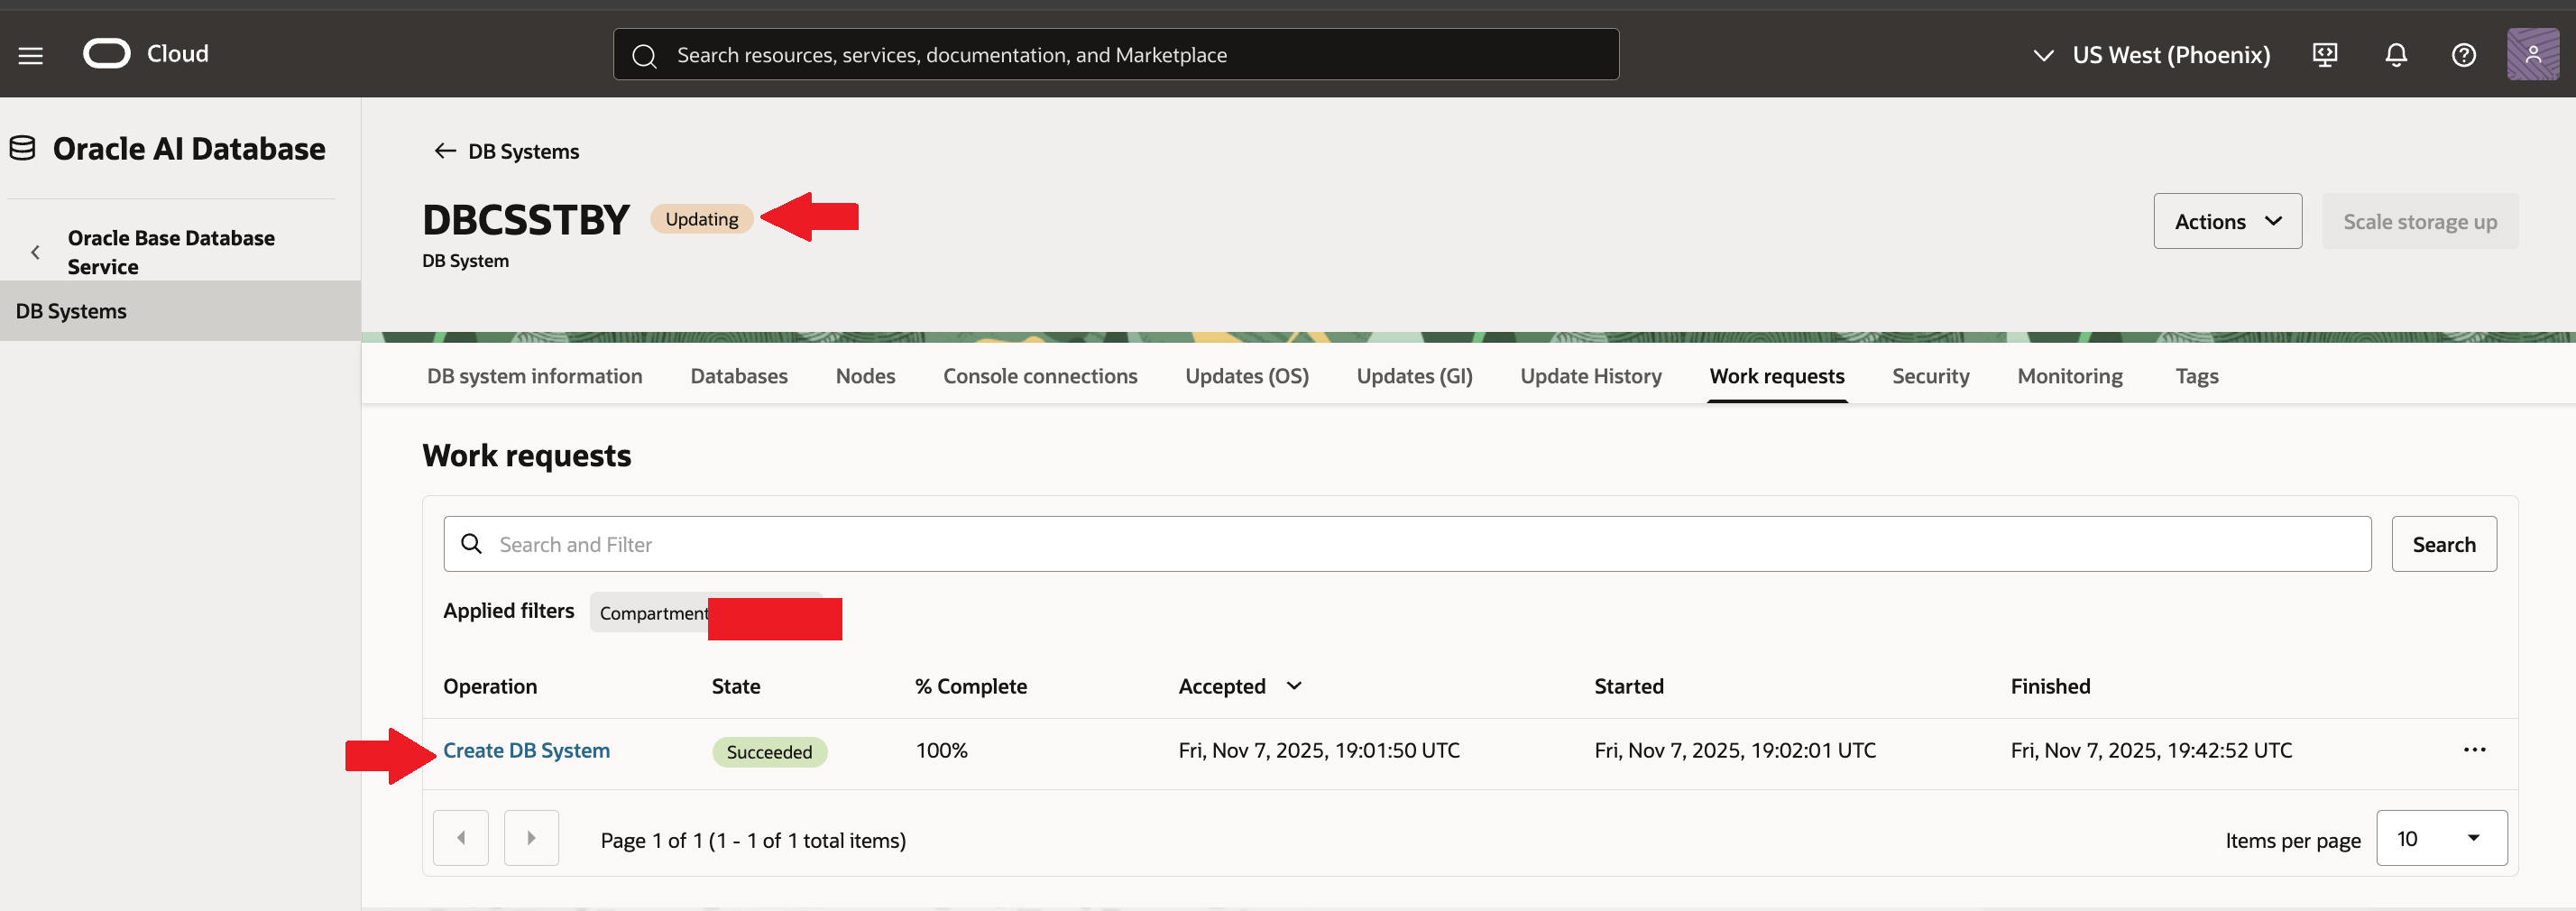
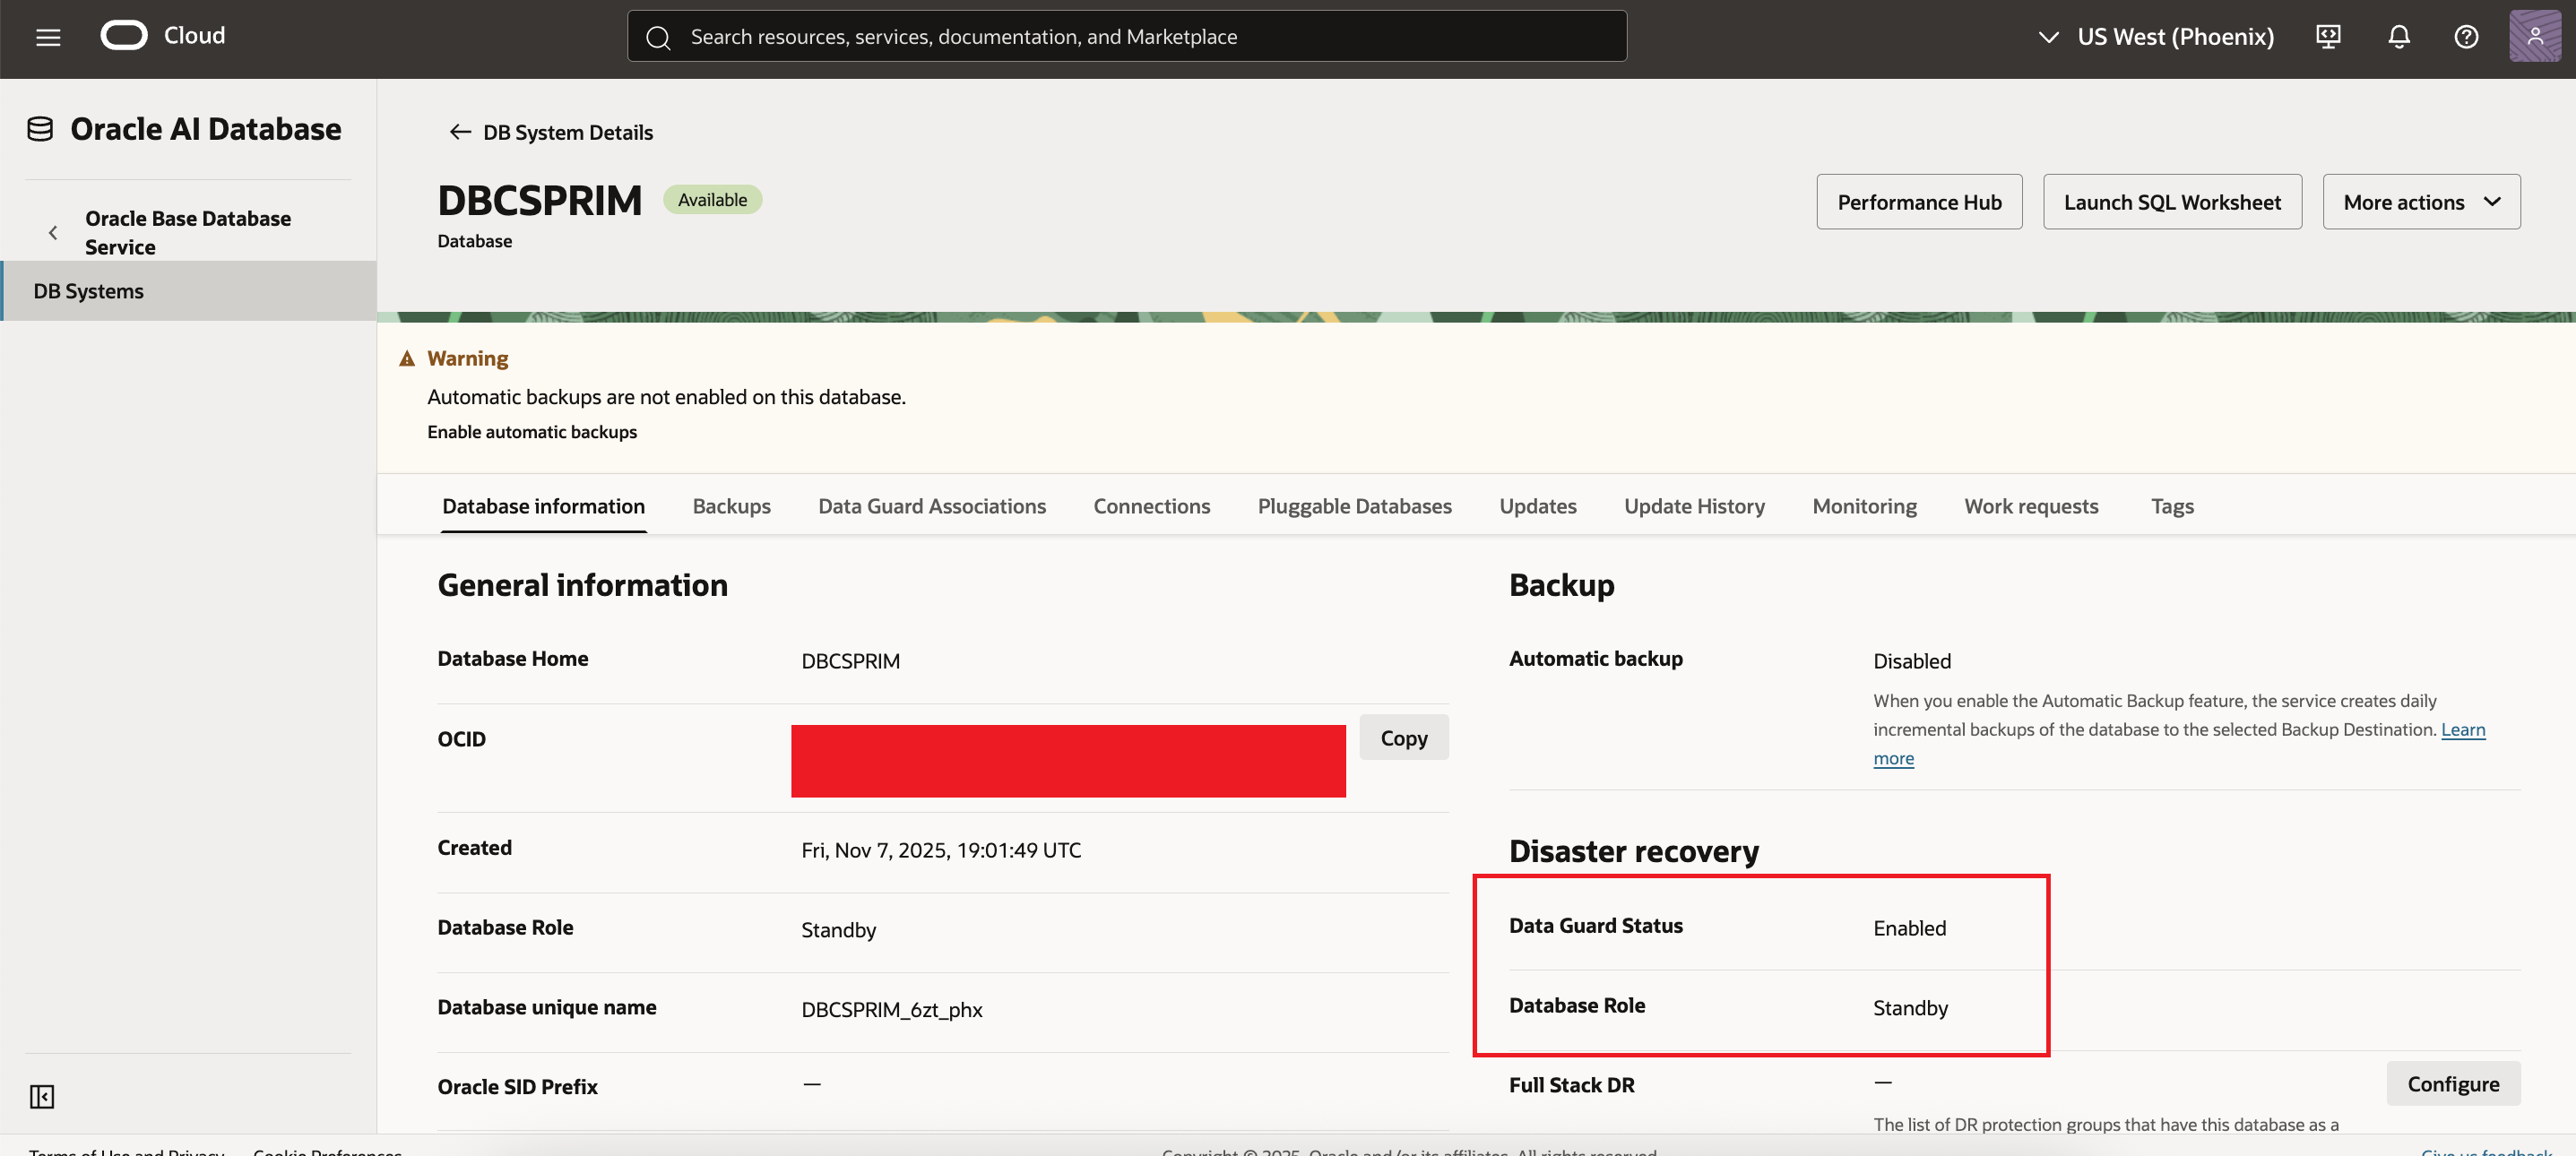
Now you will see Database system shows status as “Updating“.

You can see dataguard is being setup under “Data Guard Association” tab.
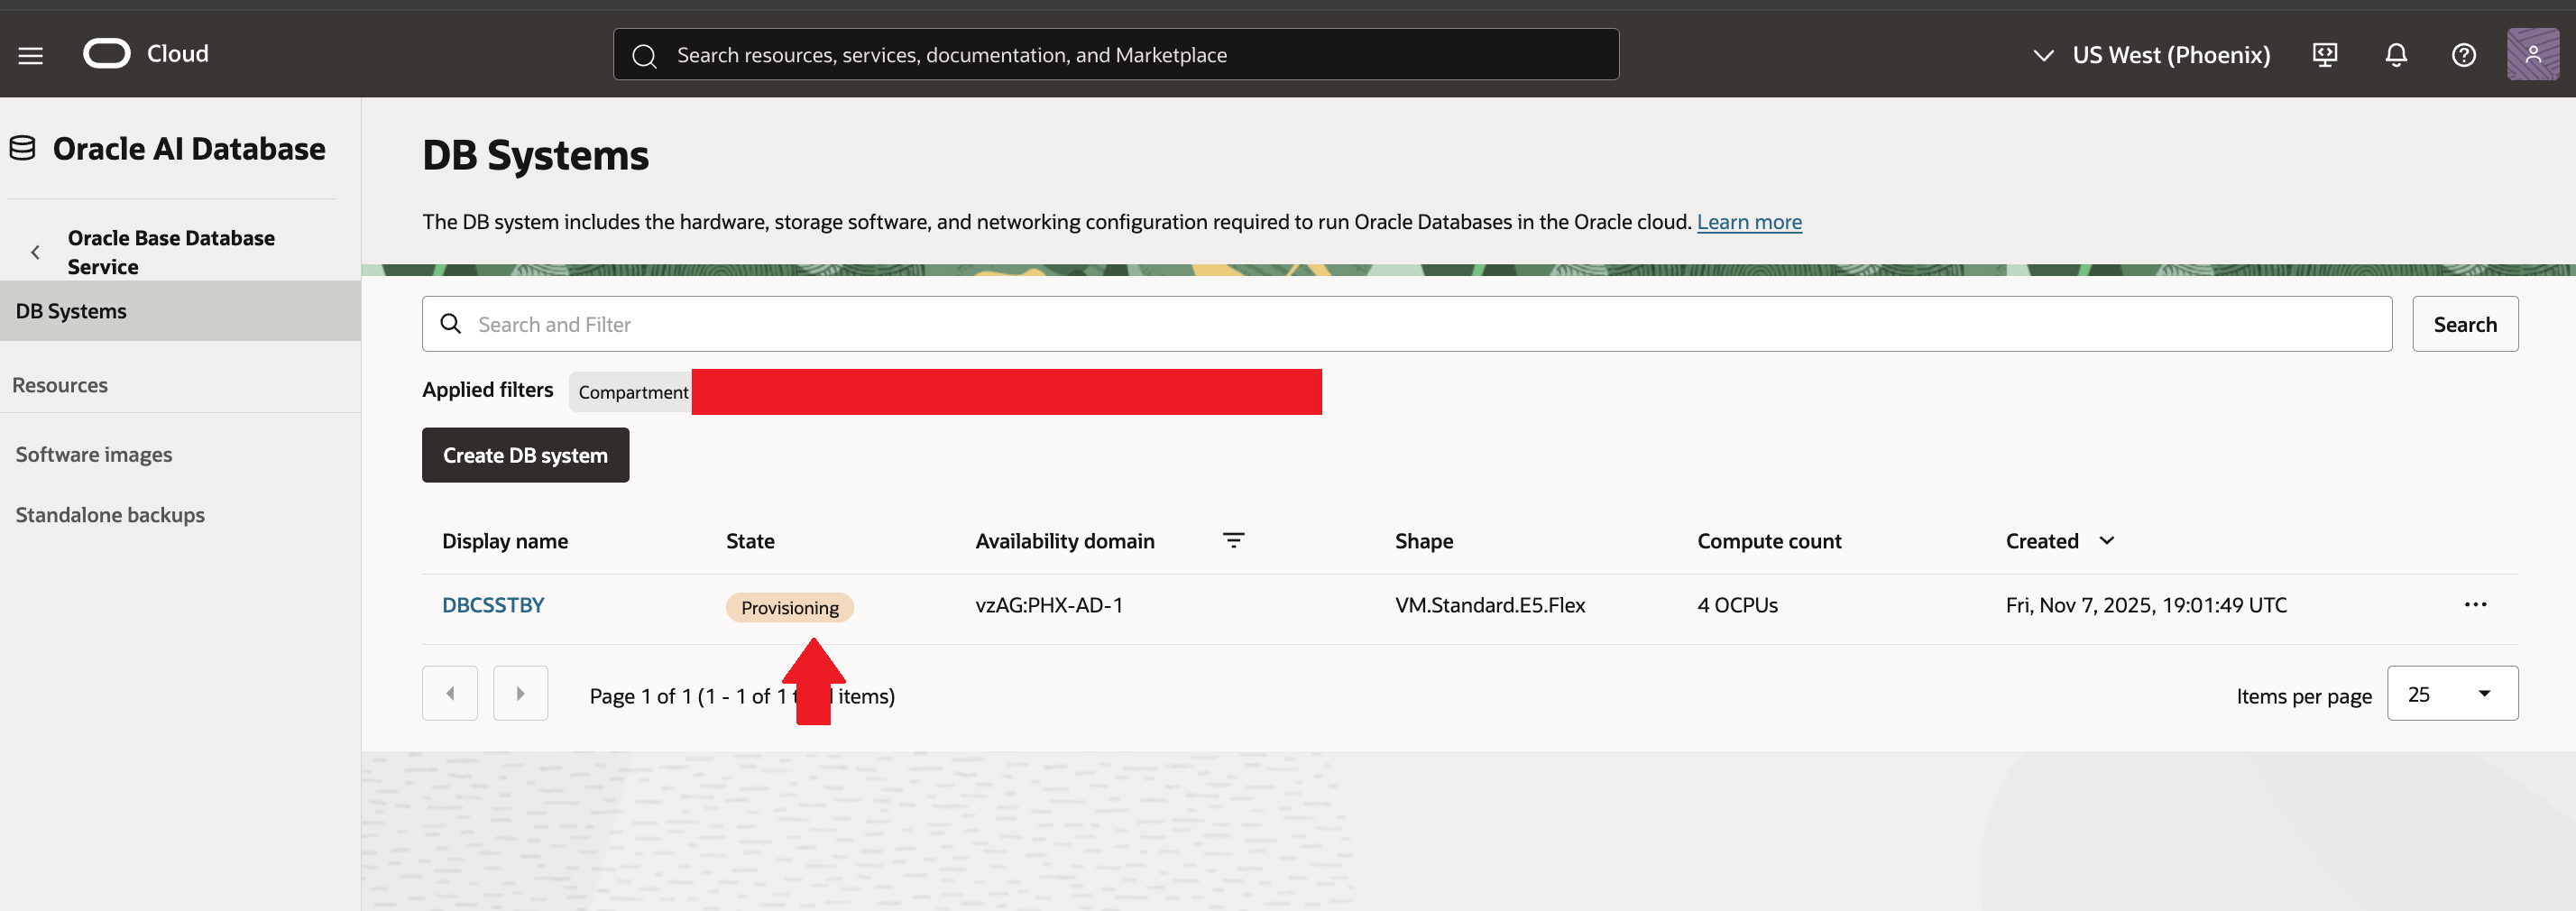
Once Standby DBCS system starts provisioning, name under “Peer DB System” gets updated.

In Phoenix (Standby/peer) region, you can DB system is under “Provisoning” status.
Under “work request” tab, you can monitor progress for “Provisoning” operation.

Once the standby DBCS system provisoning gets complete, standby DB system moves into “Updating” state.
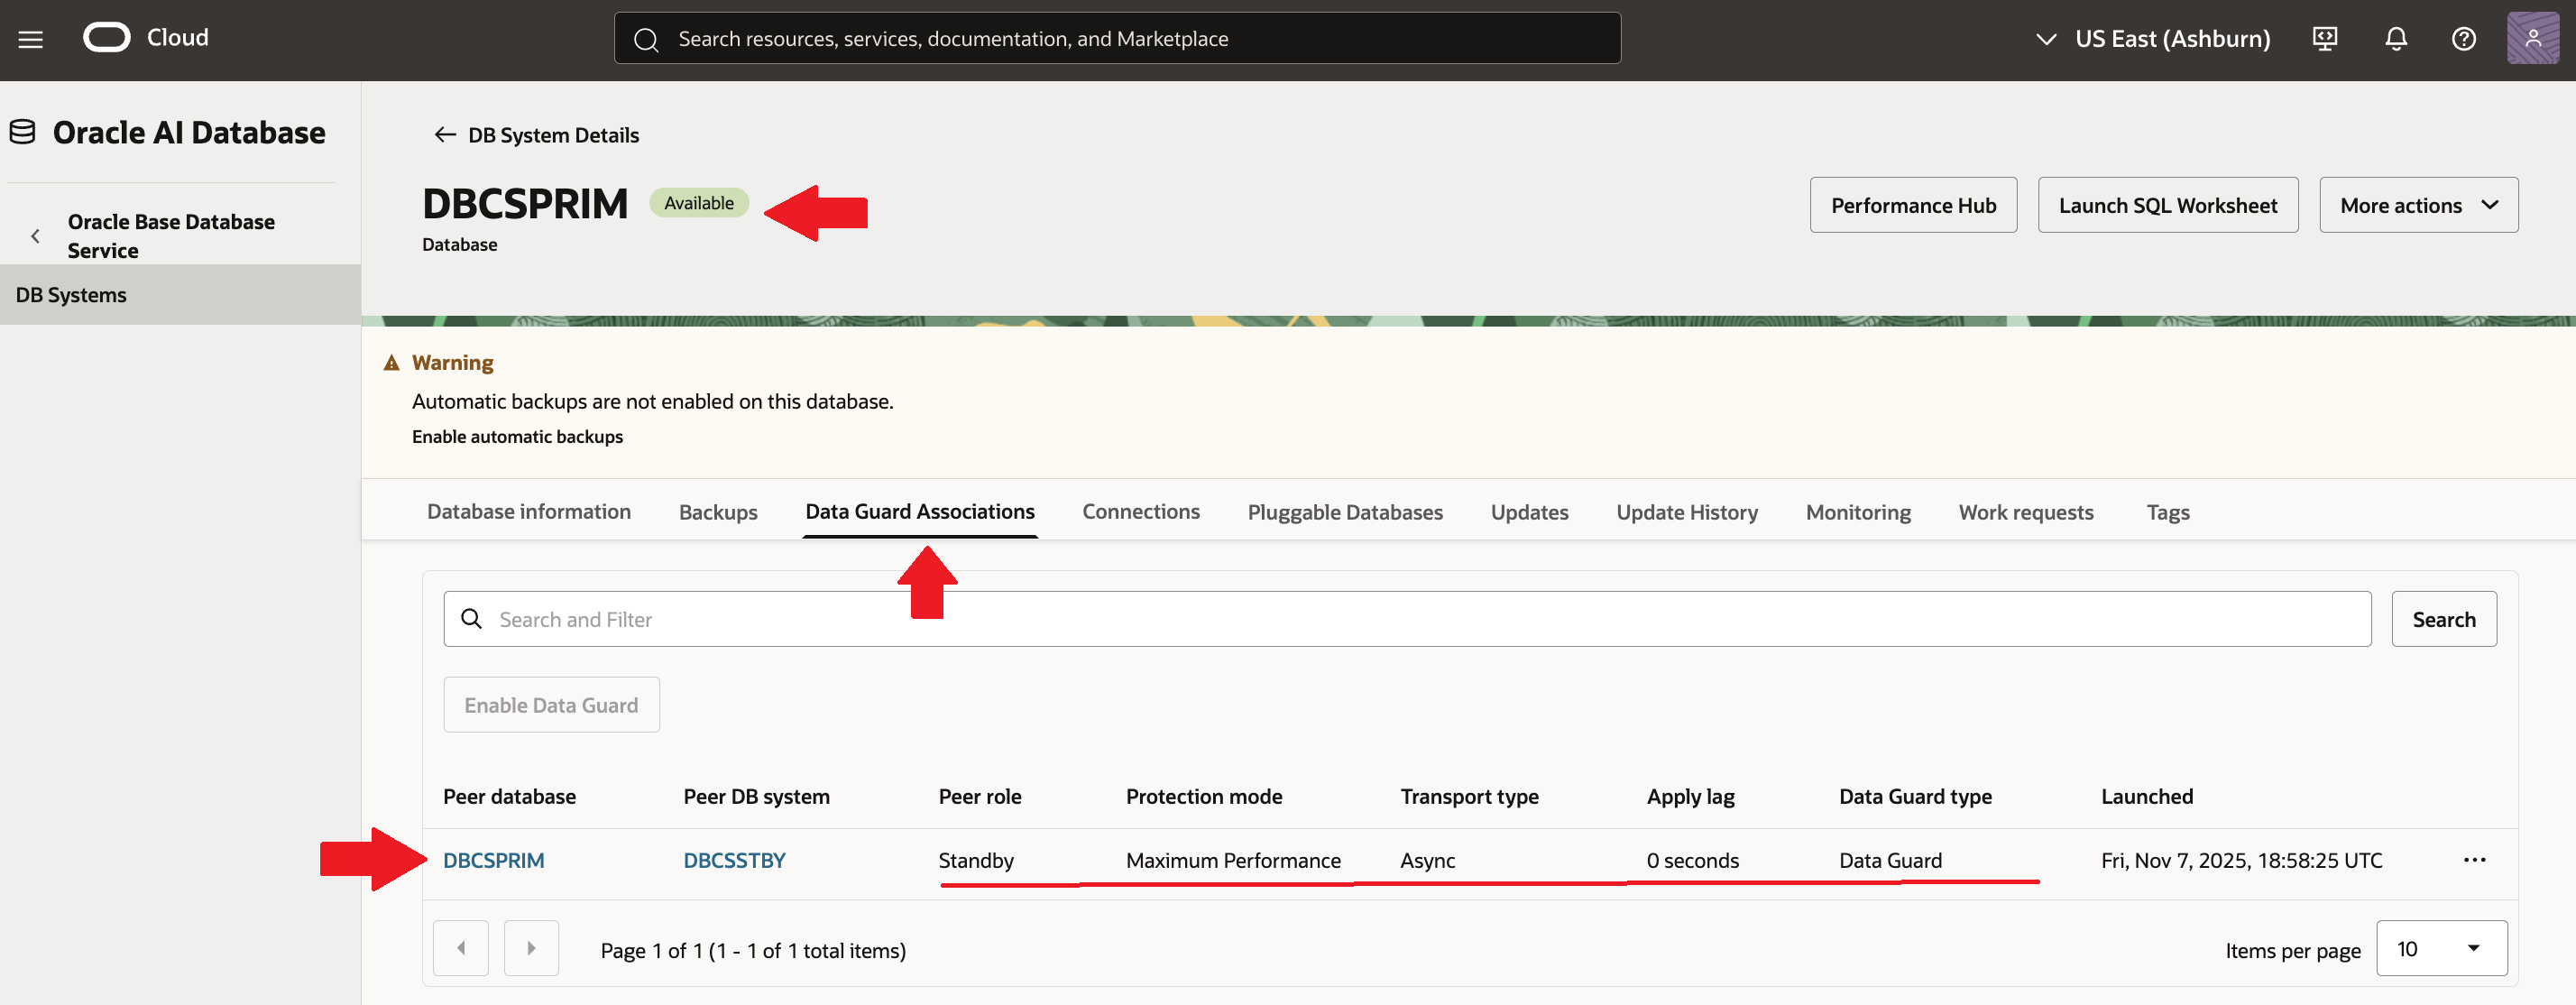
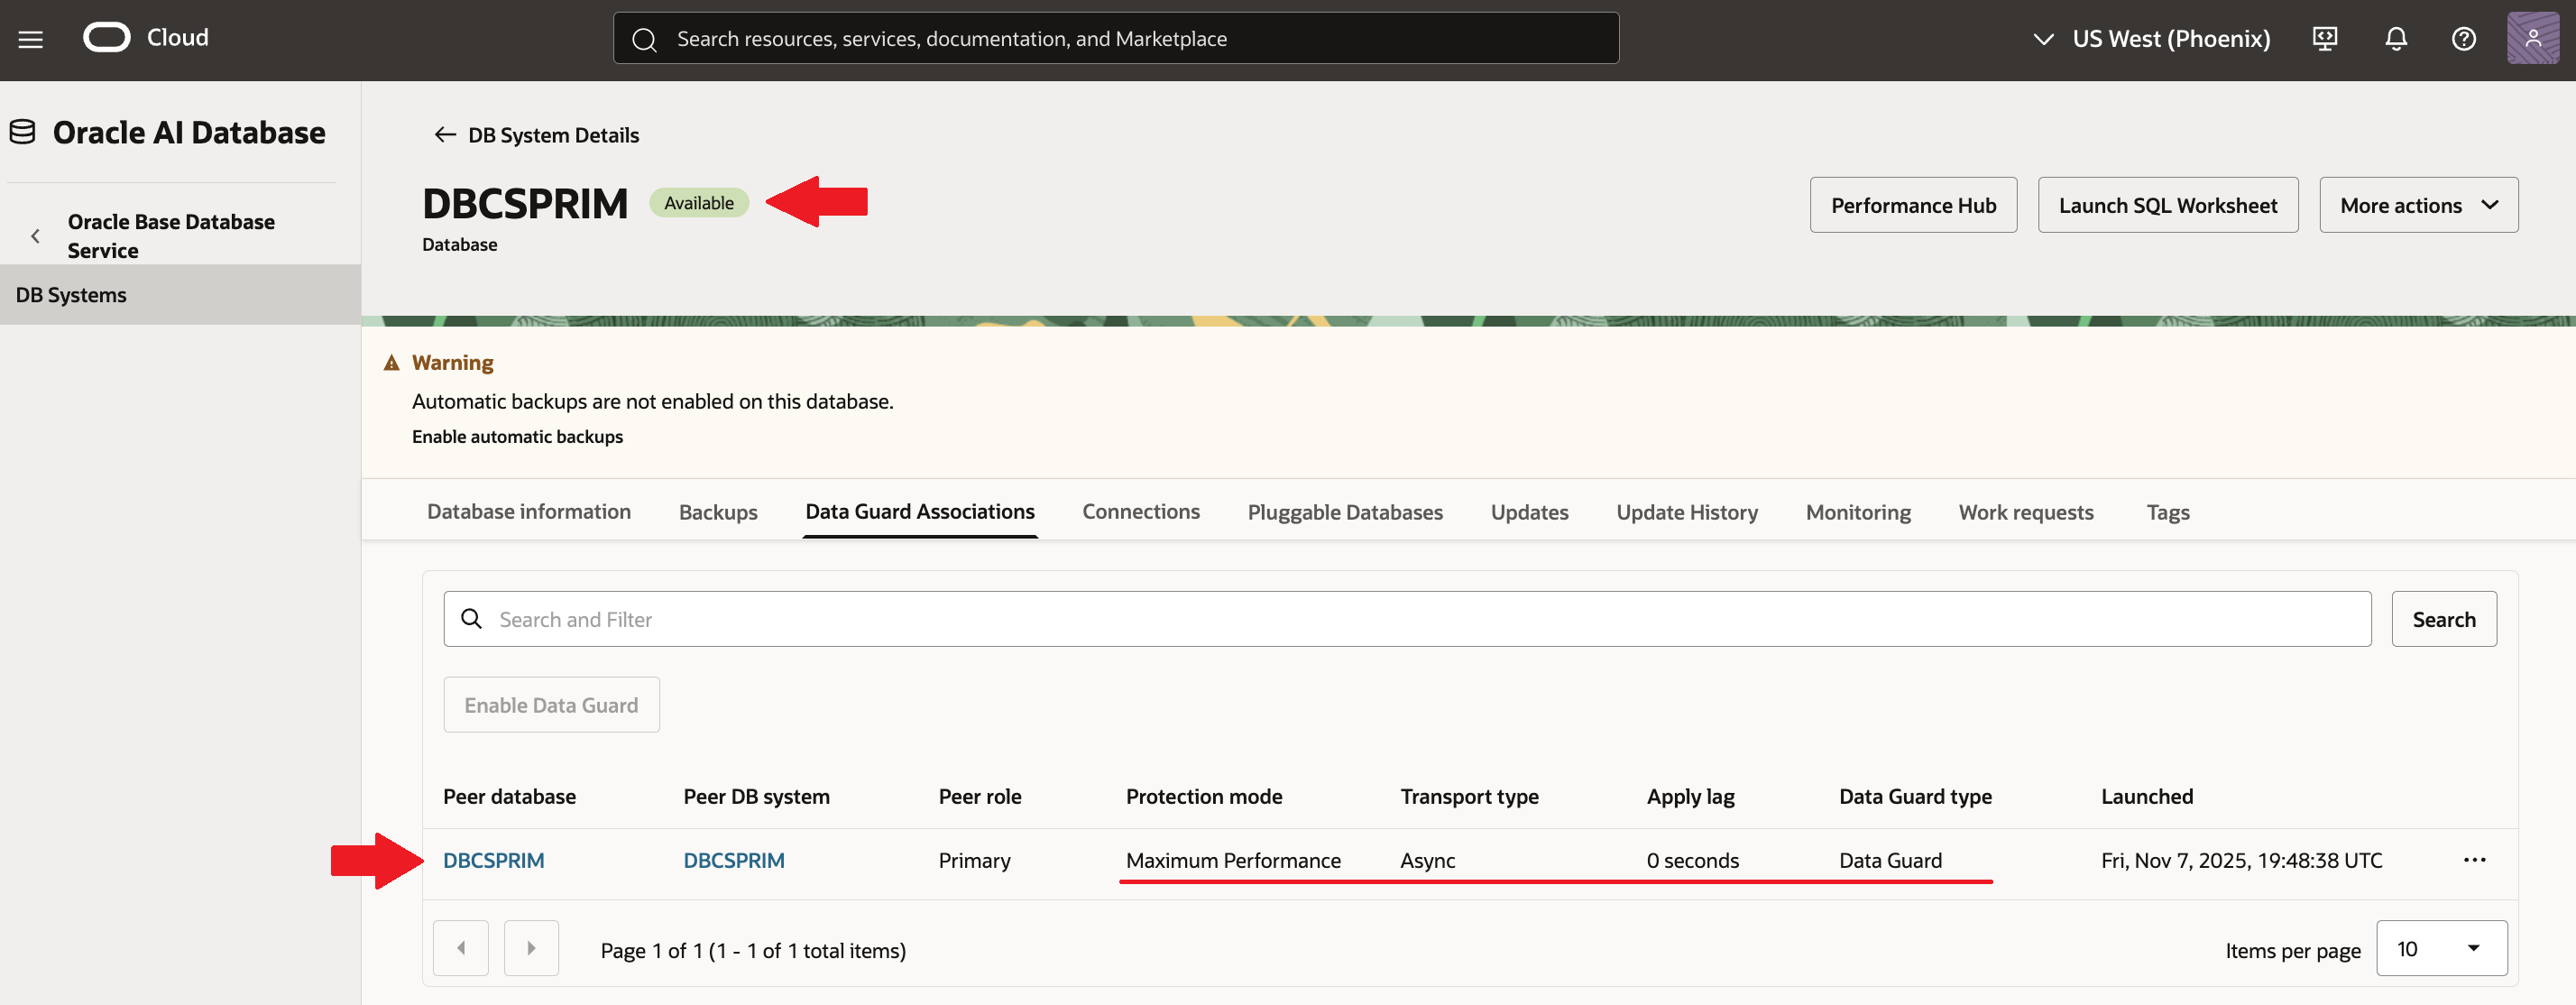
Now lets wait till it goes in “Available” state. After sometime you can see both Primary & Standby system are in available state and showing “0 Seconds” apply lag.
This completes our demo of setting up dataguard (DR) for OCI DBCS system across regions with dataguard association.
Hope you will find this post very useful!!
Let me know for any questions and any further information in comments or LinkedIn.


Leave a reply to Mou Pal Cancel reply