Dear Readers,
Good evening!!!
Today we’ll discuss a key security feature – OCI dynamic groups that enables access to OCI resources without embedding API keys, passwords, or configuration files.

What are OCI Dynamic Groups?
An OCI Dynamic Group is an IAM feature that allows you to group OCI resources—such as Compute instances, Functions, and other services—for authorization purposes.
Instead of manually managing membership, resources are included automatically based on matching rules that evaluate attributes like resource type, compartment OCID, and tags.
Once the dynamic group is defined, you can create IAM policies that grant those resources permission to call OCI APIs and access required OCI services.
How it works:
When you create a dynamic group, you assign it a unique name that must be distinct across all groups in your tenancy. You also provide a description (which can be blank and can be updated later). OCI then generates a unique identifier for the group called an OCID (Oracle Cloud Identifier).
A dynamic group has no permissions by default. It only gains access after you create at least one IAM policy granting permissions at the tenancy or compartment level. In policies, you can reference the dynamic group by either its name or OCID, though IAM ultimately uses the OCID internally to evaluate access.
How to create dynamic group:
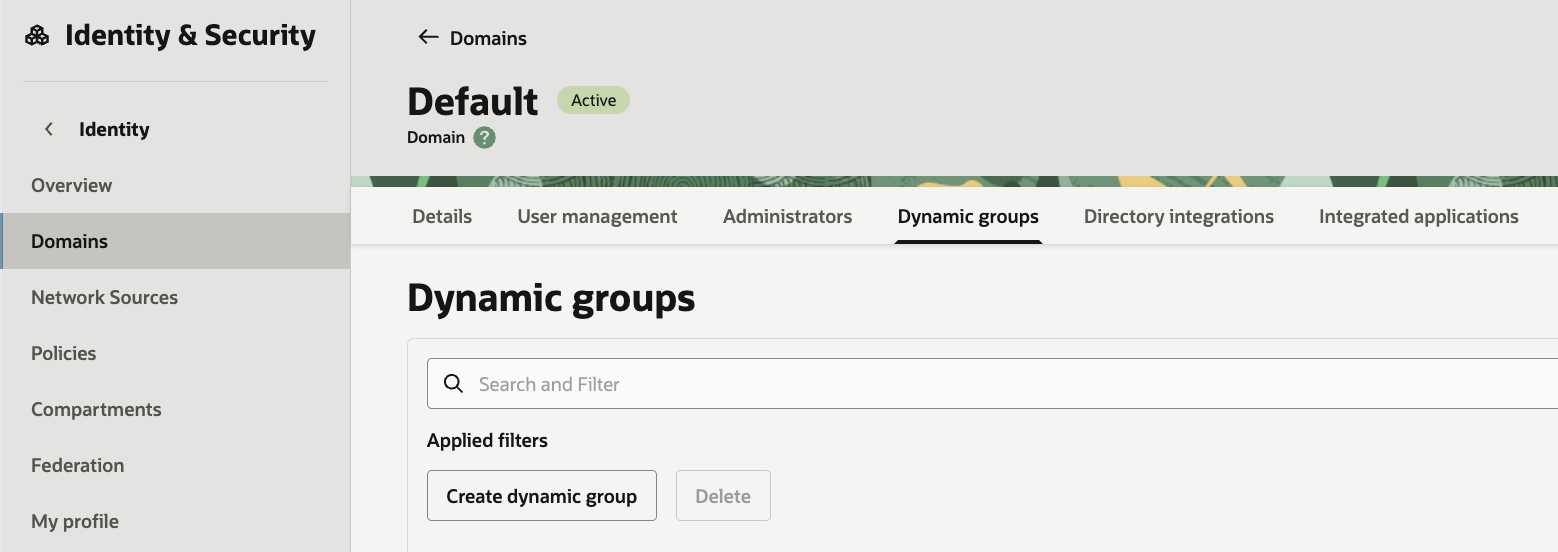
- On the Domains list page, select the domain in which you want to make changes. If you need help finding the list page for the domain, see Listing Identity Domains.
- On the details page, select Dynamic groups. A list of dynamic groups in the domain is displayed.
- Select Create dynamic group.
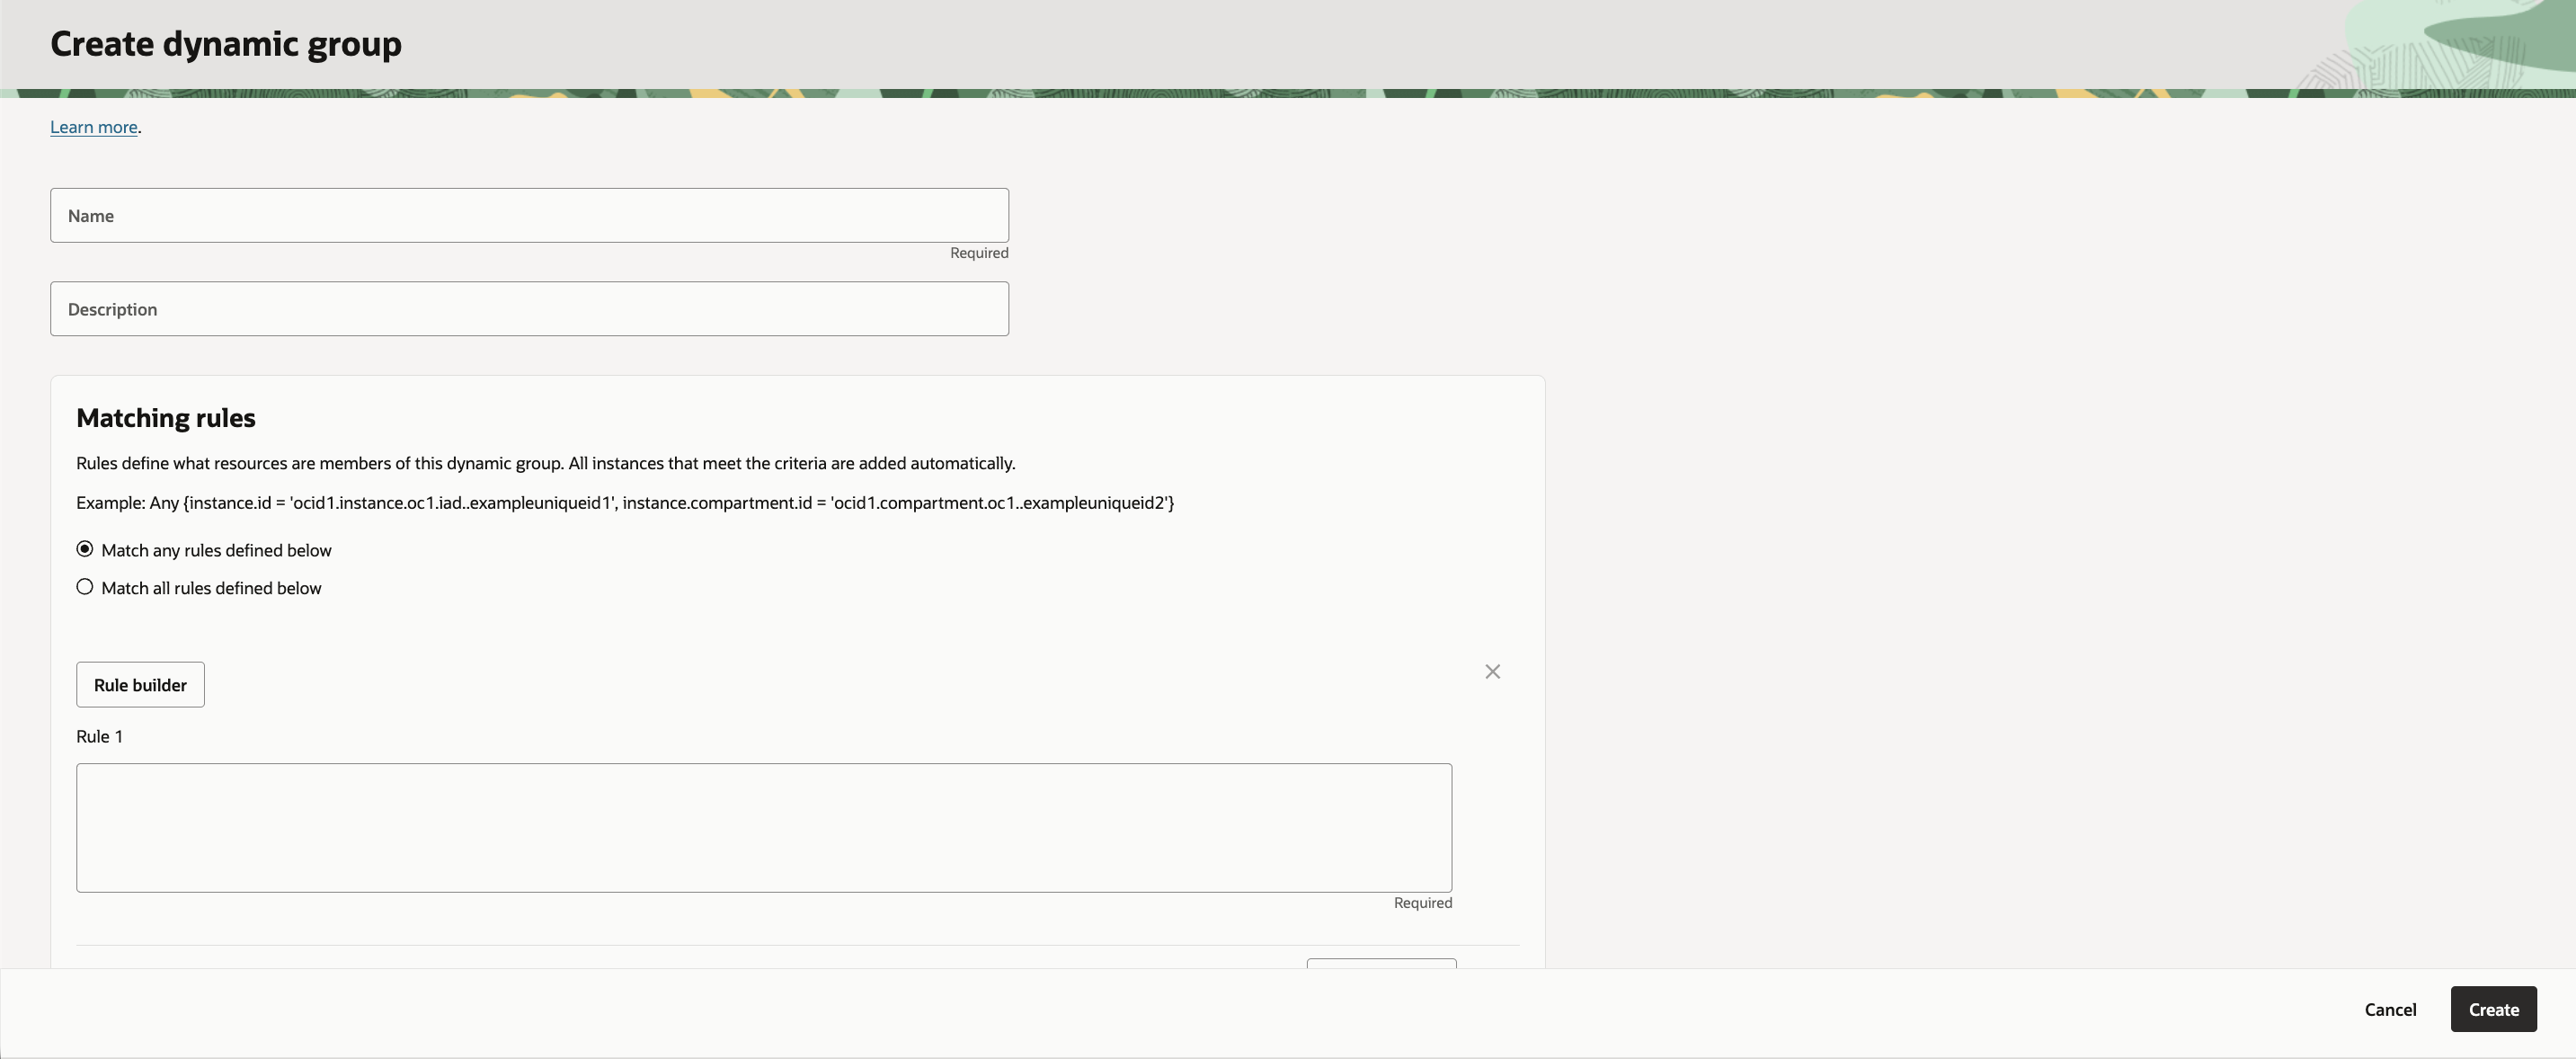
- Enter the following information:
- Name: A unique name for the group. The name must be unique across all groups in the tenancy (dynamic groups and user groups). You can’t change the name later. Avoid entering confidential information.
- Description: A friendly description.
- Enter the Matching rules. Resources that meet the rule criteria are members of the group.
- Rule 1: Enter a rule following the guidelines in Writing Matching Rules to Define Dynamic Groups. You can manually enter the rule in the text box or open the rule builder.
- Enter more rules as needed. To add a rule, select +Additional rule.
- To assign tags to the group, select Add tag and enter the tagging details.
- If you have permissions to create a resource, then you also have permissions to apply free-form tags to that resource. To apply a defined tag, you must have permissions to use the tag namespace. For more information about tagging, see Resource Tags. If you’re not sure whether to apply tags, skip this option or ask an administrator. You can apply tags later. You can apply tabs later.
- Select Create.
- The matching rule syntax is verified, but the OCIDs aren’t. Be sure that the OCIDs you enter are correct.
To give the dynamic group permissions, you need to write a policy.
Writing Matching Rules to Define Dynamic Groups:
Matching rules specify which resources are included in a dynamic group.
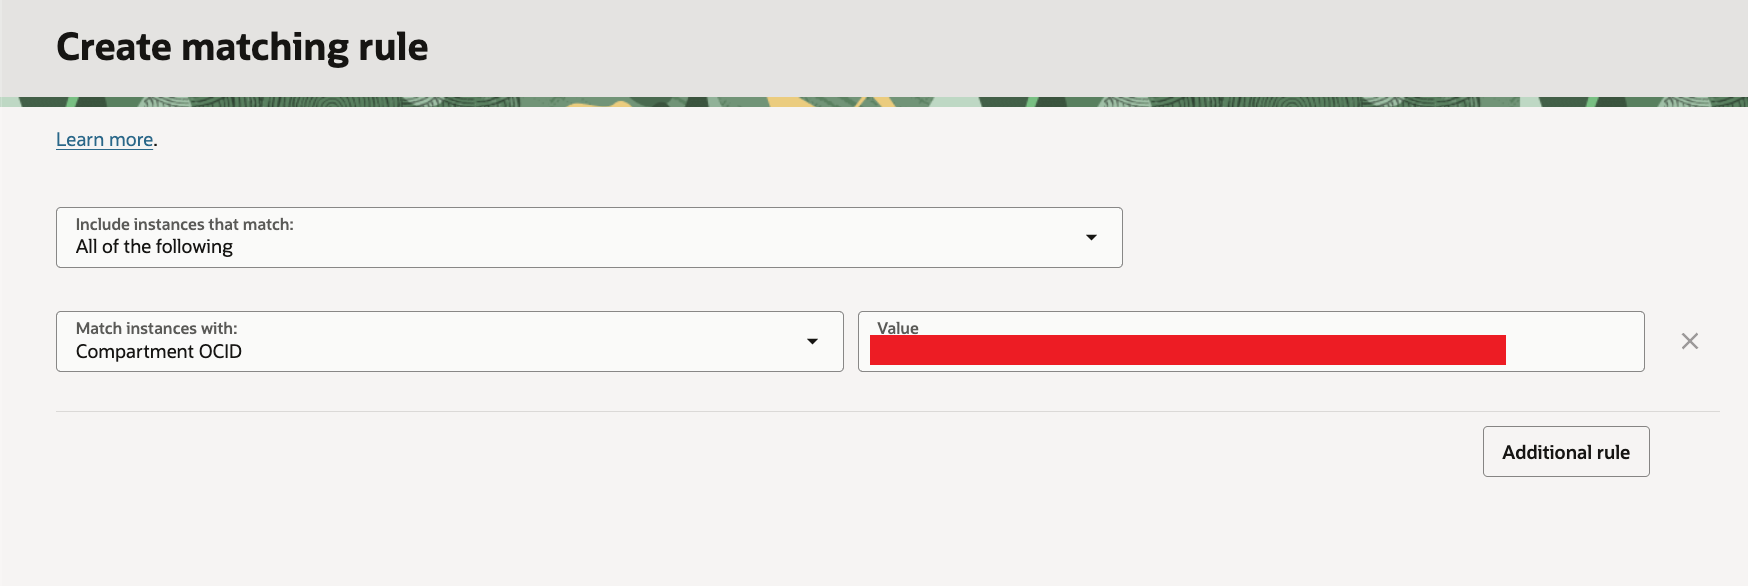
In the Console, you can either type the rule directly in the text box or use the rule builder, which prompts you for inputs and generates the rule automatically. The rule builder supports instance and compartment variables; for rules using other variables, you’ll need to enter them manually.
Examples:
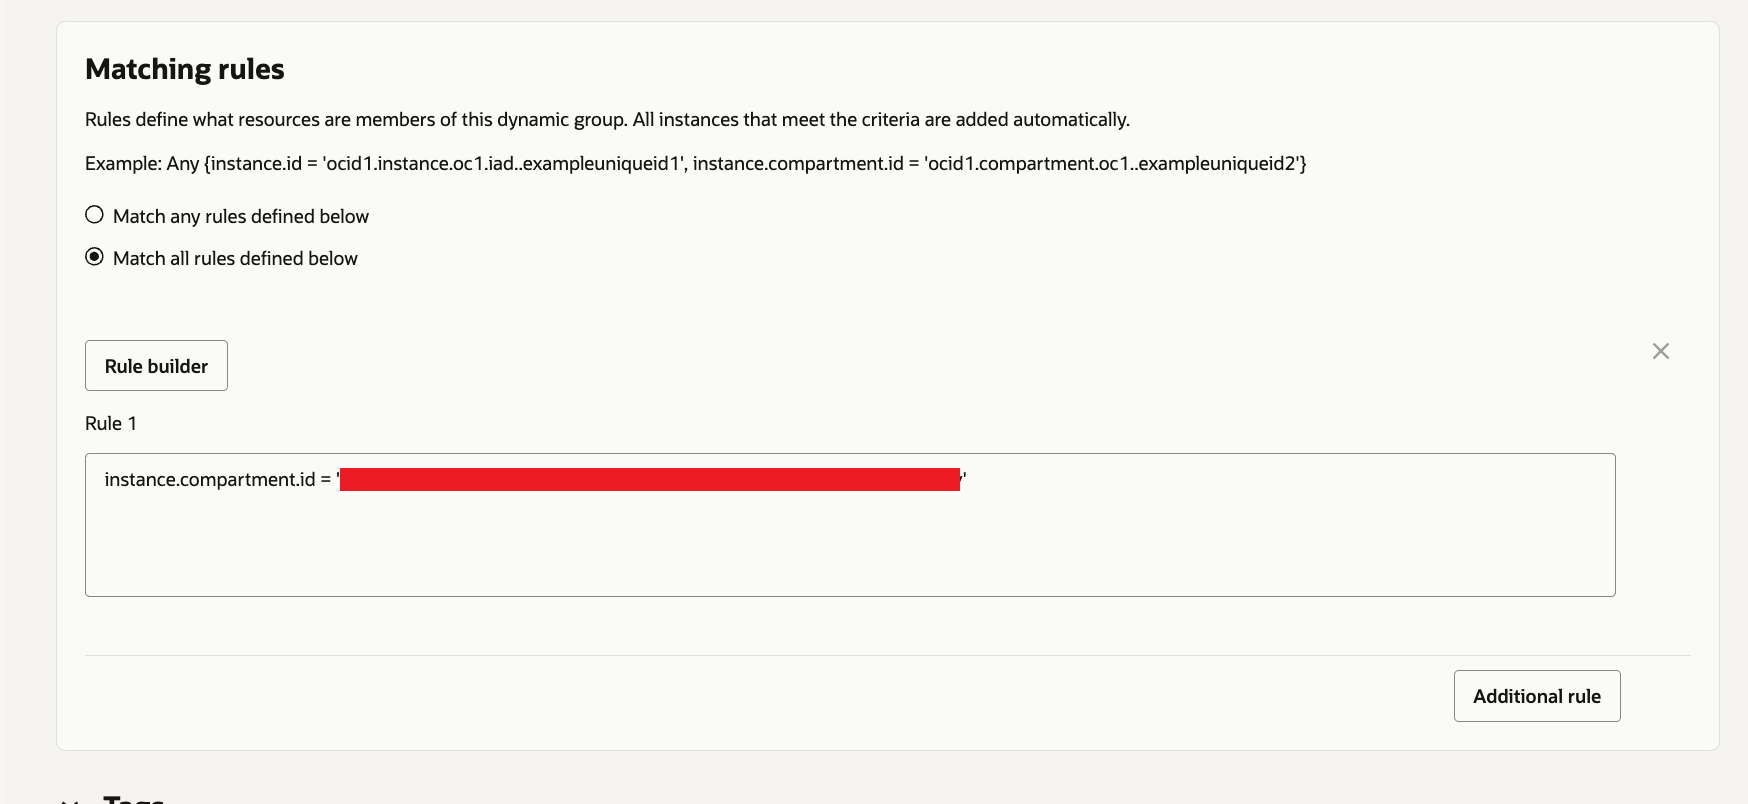
To include all instances that are in a specific compartment, add a rule with the following syntax:
instance.compartment.id = '<compartment_ocid>'To include all instances that reside in any of two (or more) compartments, add a rule with the following syntax:
Any {instance.compartment.id = '<compartment_ocid>', instance.compartment.id = '<compartment_ocid>'}To include a specific resource that’s in a specific compartment, add a rule with the following syntax:
All {resource.id = '<resource_ocid>', resource.compartment.id = <compartment_ocid>}To include all occurrences of a specific resource type in a specific compartment, add a rule with the following syntax:
All {resource.type = '<resource_type', resource.compartment.id = <compartment_ocid>}To include all instances that are tagged with a specific tag namespace and tag key, add a rule with the following syntax:
tag.<tagnamespace>.<tagkey>.valueTo include all instances in a specific compartment that are tagged with a specific tag namespace, key, and value, add a rule with the following syntax:
All {instance.compartment.id = '<compartment_ocid>', tag.<tagnamespace>.<tagkey>.value = '<tagvalue>'}Writing Policies for Dynamic Groups
After creating a dynamic group, you must define IAM policies that allow it to access Oracle Cloud Infrastructure services. The policy syntax is the same as policies written for standard IAM user groups.
The syntax to permit a dynamic group access to resources in a compartment is:
Allow dynamic-group <dynamic_group_name> to <verb> <resource-type> in compartment <compartment_name>The syntax to permit a dynamic group access to a tenancy is:
Allow dynamic-group <dynamic_group_name> to <verb> <resource-type> in tenancyDeleting a Dynamic Group
- On the Domains list page, select the domain in which you want to make changes. If you need help finding the list page for the domain, see Listing Identity Domains.
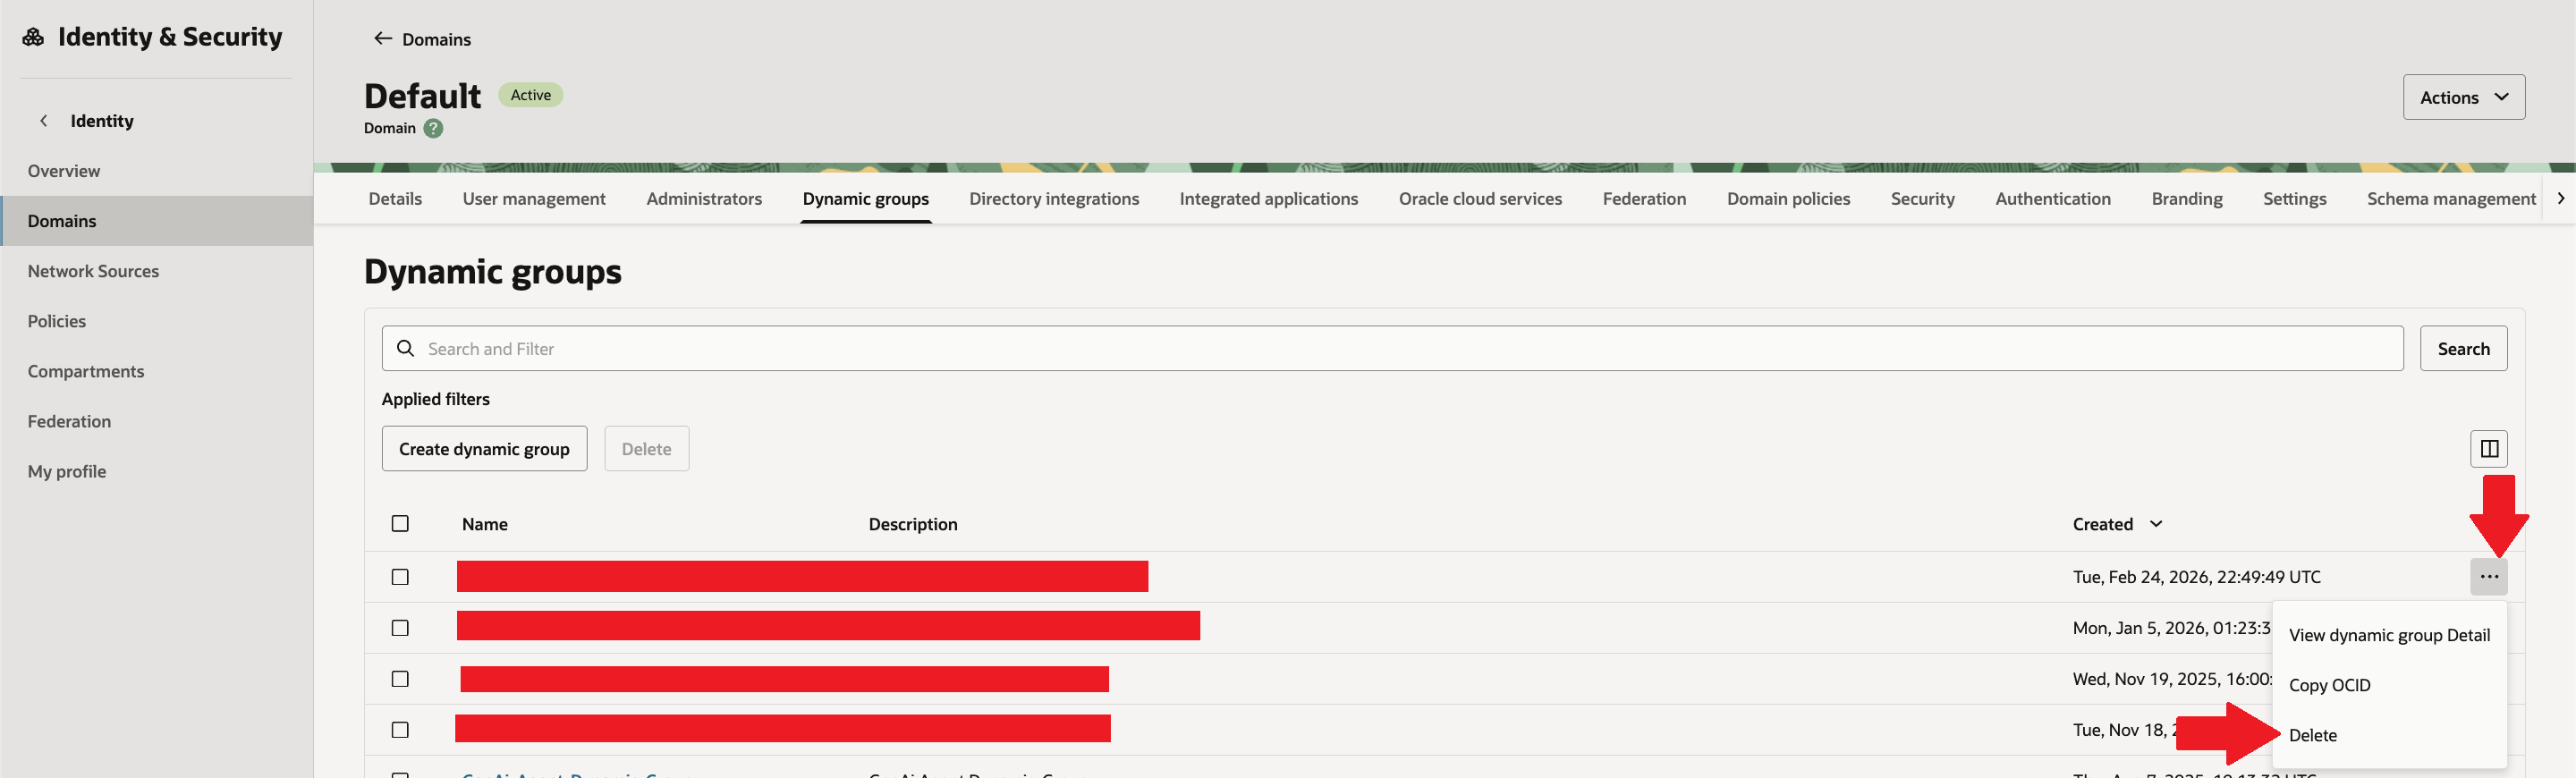
- On the domain details page, select Dynamic Groups. A list of dynamic groups in the domain is displayed.
- Select the Actions menu (three dots) for the OCI IAM dynamic group, and then select Delete.
- Confirm the deletion when prompted.
Summary:
OCI Dynamic Groups let you grant IAM permissions to workloads (instances, functions, etc.) automatically using rules (compartment/type/tags), instead of managing membership manually.
They enable secure, credential-free authentication to OCI services via instance/resource principals, reducing risks from stored keys.
They support least-privilege access at scale as environments grow and autoscale, improving governance and auditability.
Hope you will find this post very useful!!
Let me know for any questions and any further information in comments or LinkedIn.


Leave a reply to Mou Pal Cancel reply