Dear Readers,
I hope you are doing well.
Today, I will discuss the procedure for provisioning a NON-CDB Oracle 19c database on Oracle Exadata Database Service on Exascale Infrastructure. This cannot be done directly through the OCI Console.
This procedure is intended for customers who are still running Oracle Database 19c with a non-container database architecture and need to lift and shift those databases to OCI or Oracle Multicloud Exascale platforms.
An Exascale VM Cluster must first be provisioned with the storage type set to Exascale Block Storage. This is mandatory because Oracle Database 19c cannot be hosted on Exascale Smart Storage. The VM Cluster can be provisioned through the OCI Console or, for multicloud deployments, through the respective cloud provider’s console.
After the cluster is provisioned, the database can be created. The OCI Console supports creation of CDB databases only. To create a non-CDB database, use the “dbaascli” command-line utility.
On Exascale VM Clusters, ASM disk groups are created as part of the database-creation lifecycle step. The normal “dbaascli” database-creation method does not work because it requires the target empty ASM disk groups to already exist.
The workaround here is to create a temporary CDB database through the OCI Console, which creates the required ASM disk groups. After cleaning up the temporary database’s files from ASM, reuse those disk groups to create the required non-CDB database through “dbaascli“.
Detailed steps are below:
- Create a CDB database with a temporary name through the OCI Console.
Navigate to:
“Oracle AI Database” → “Oracle Exadata Database Service on Exascale Infrastructure” → select the required VM Cluster → “Container databases” → “Create container database”
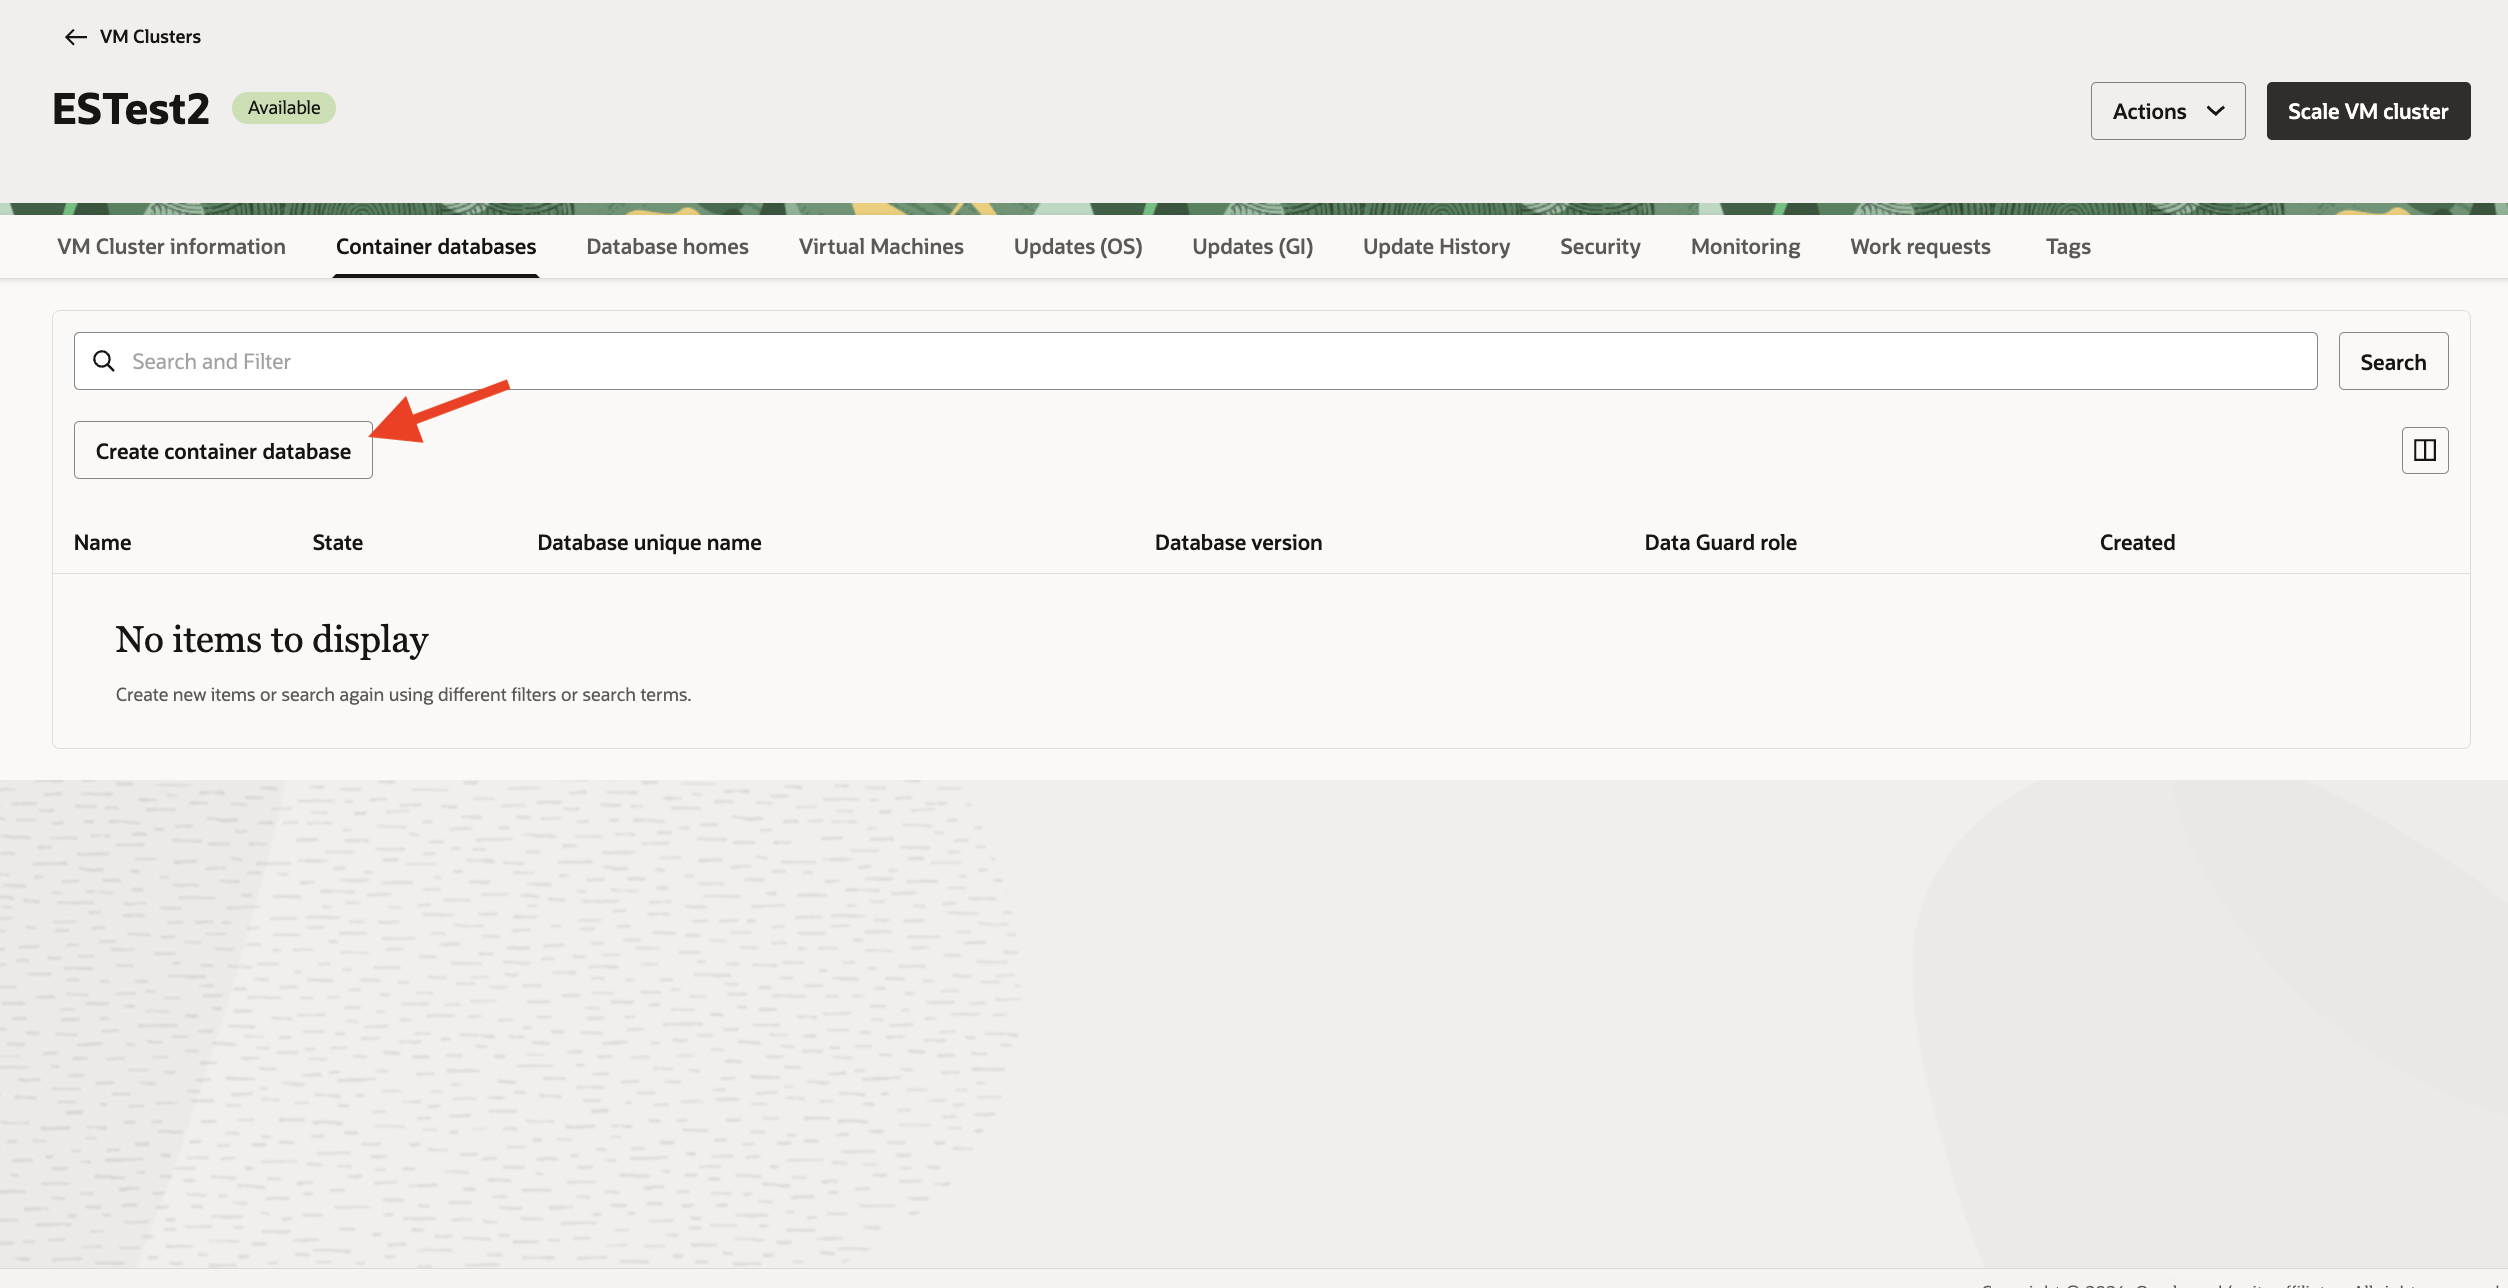
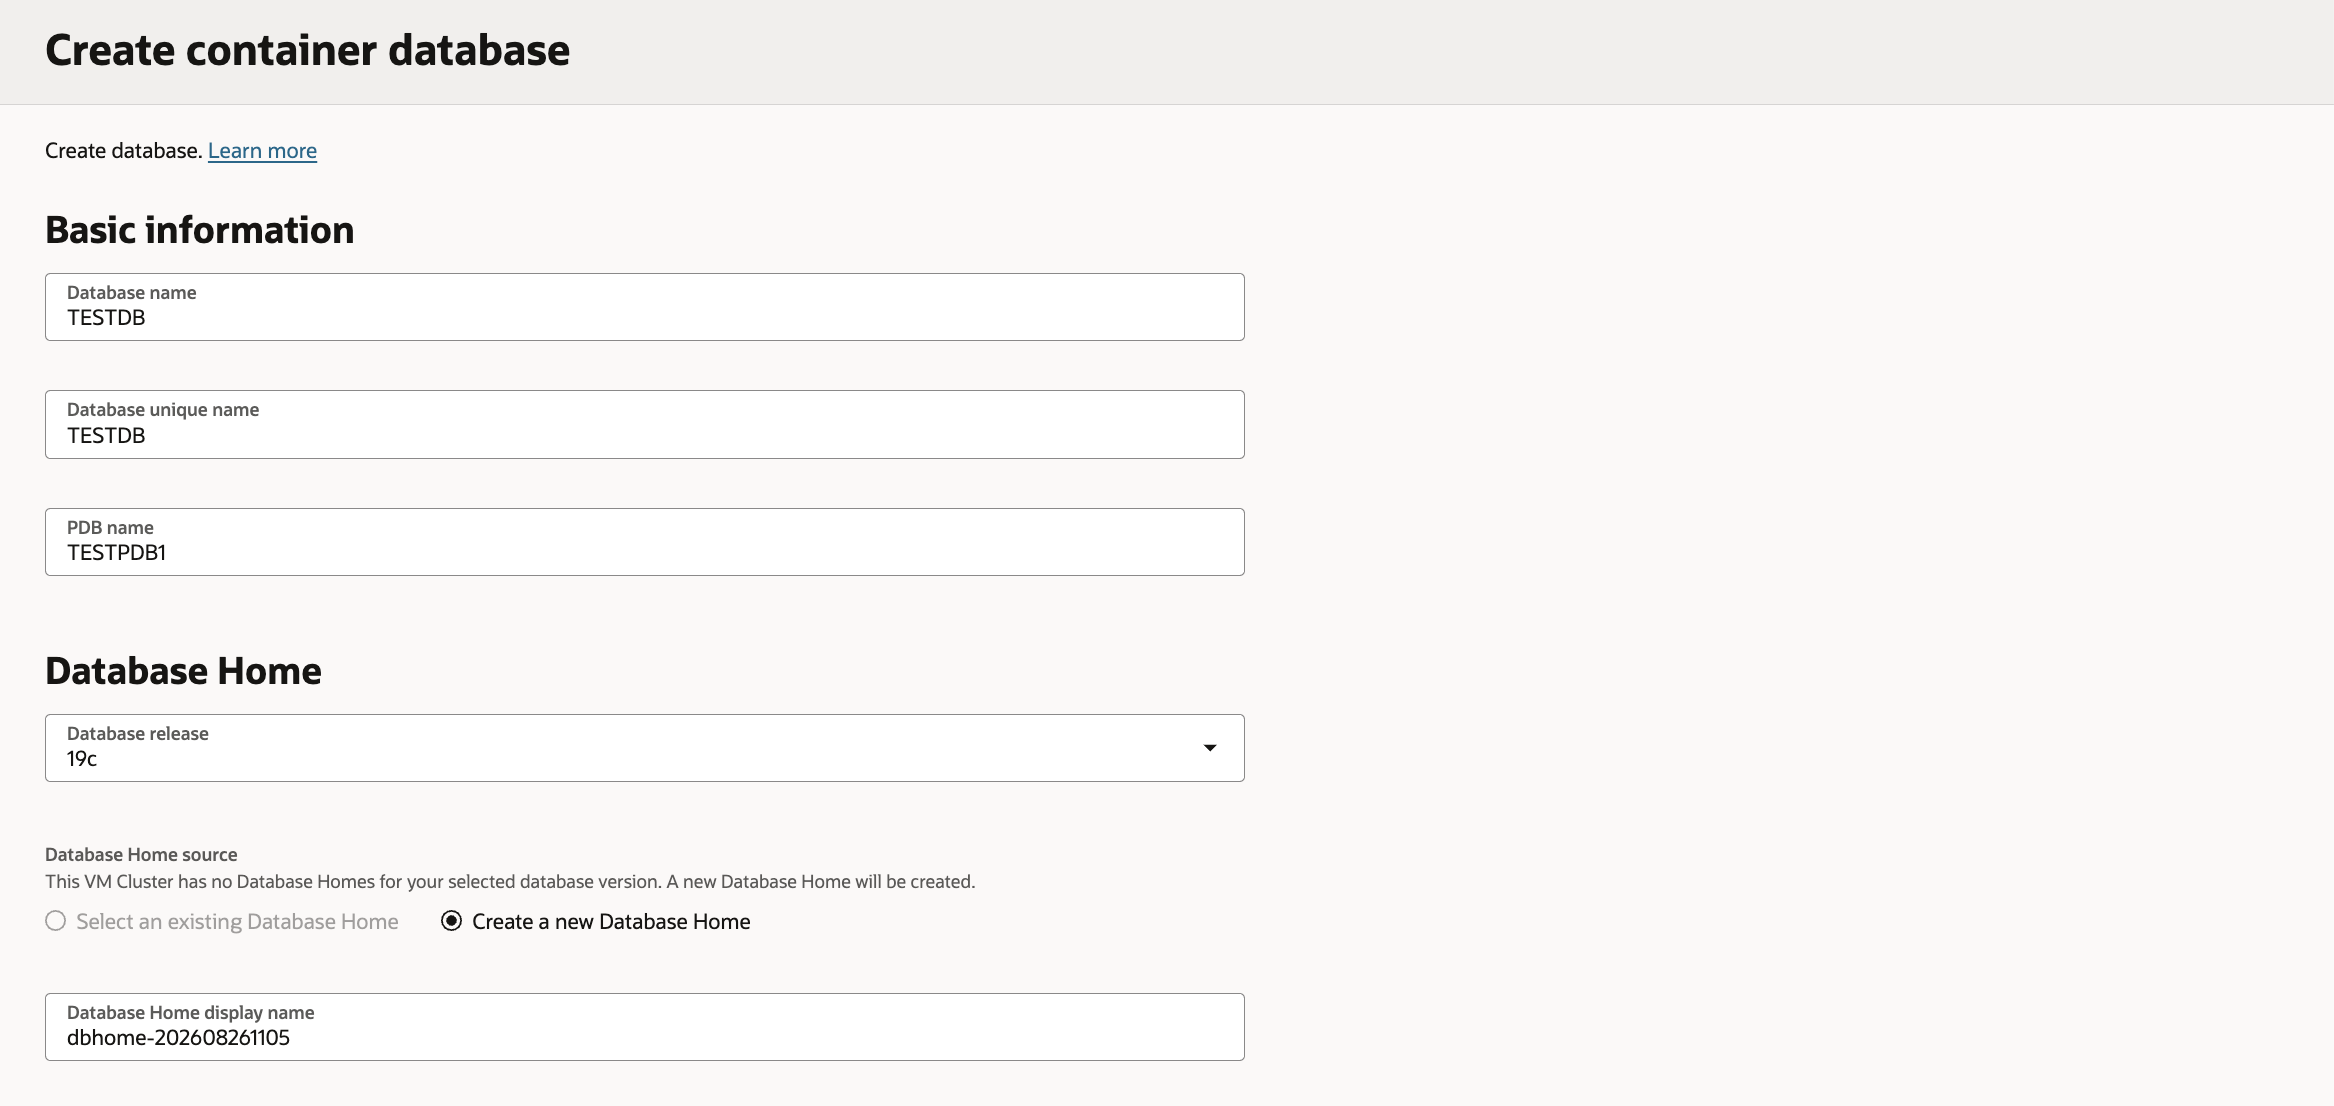
2. Enter the required database details. For this example, use “TESTDB” as the temporary database name.
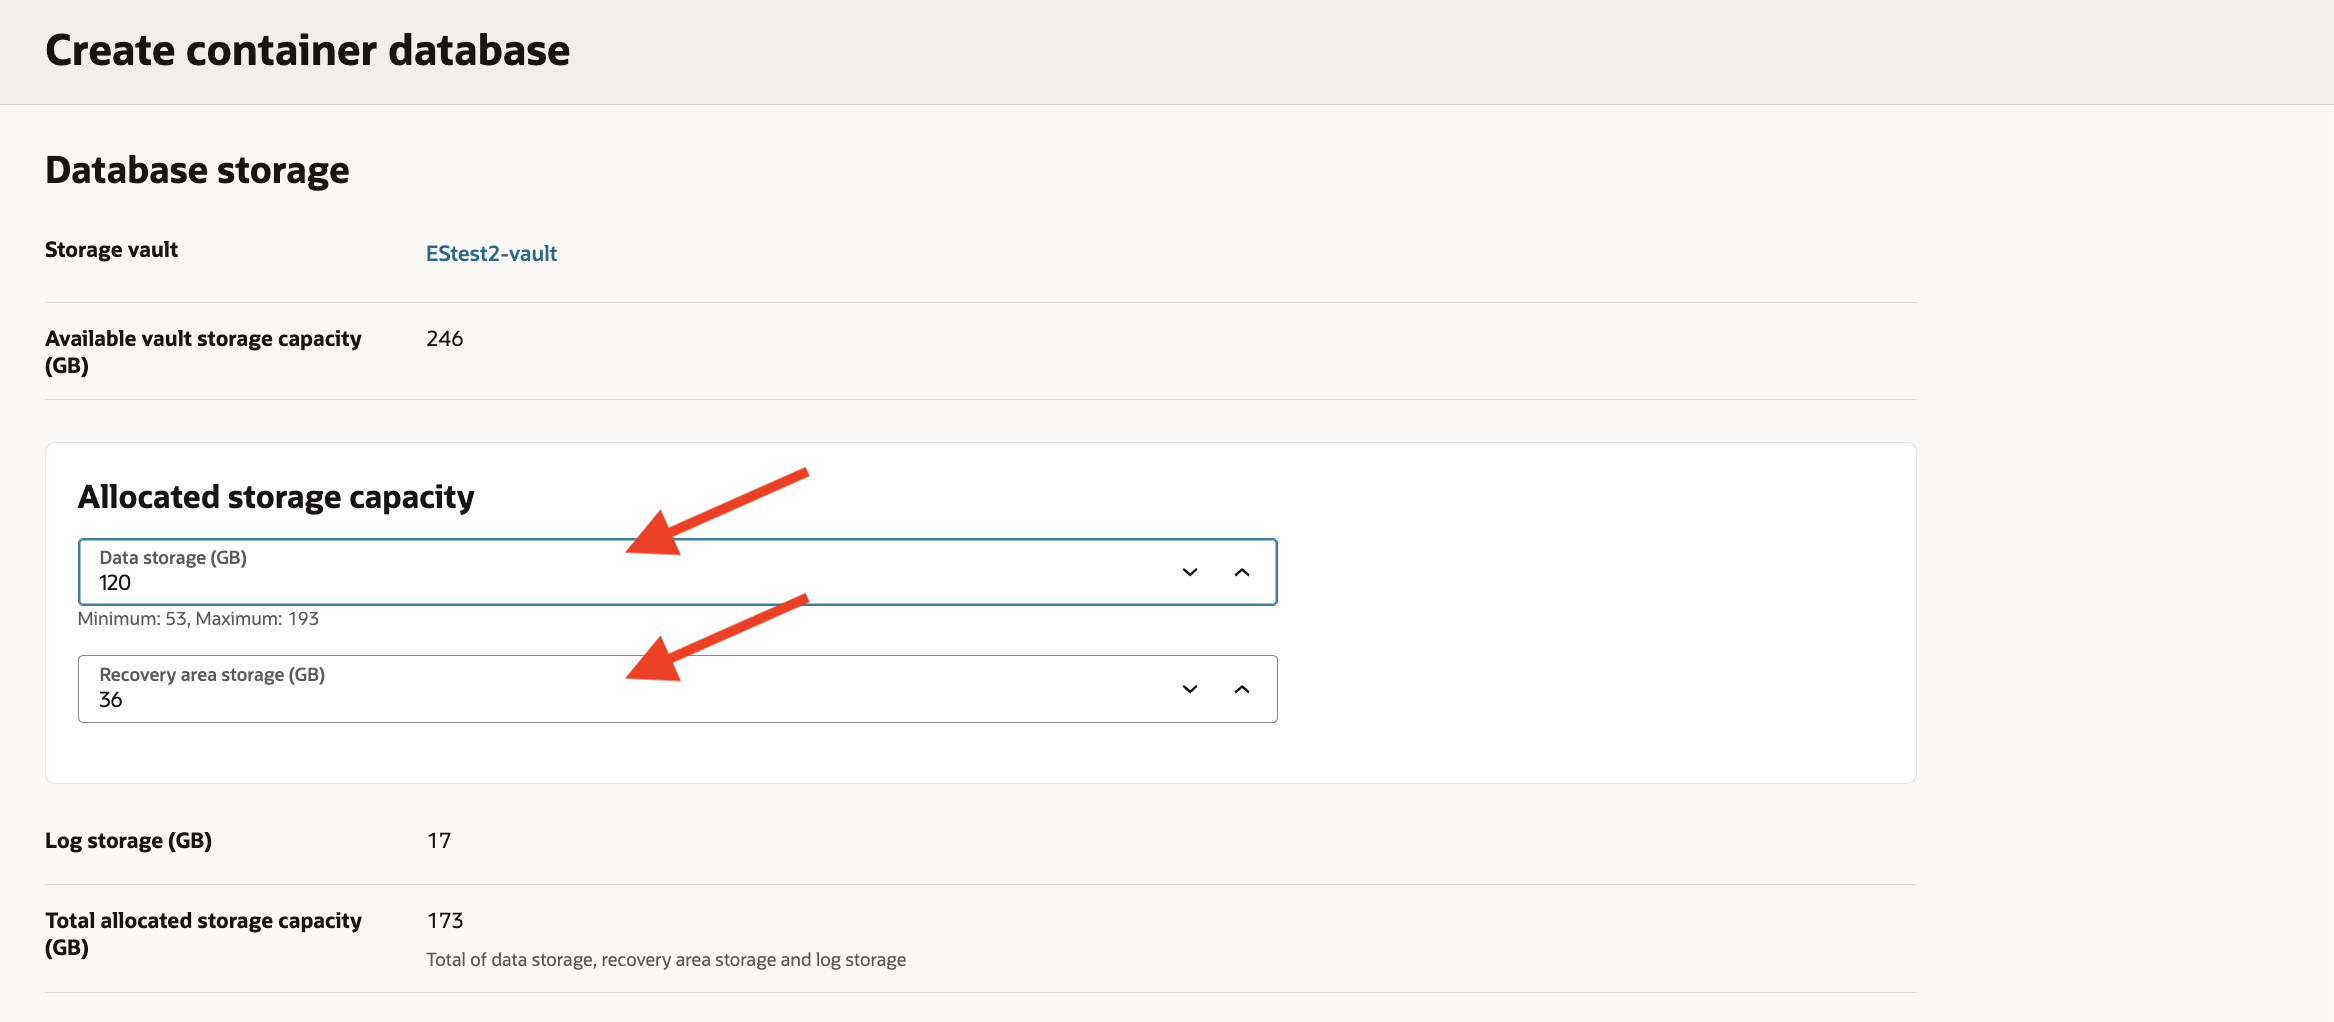
3. Specify the required sizes for the “DATA” and “RECO” disk groups based on the capacity requirements of the target non-CDB database.
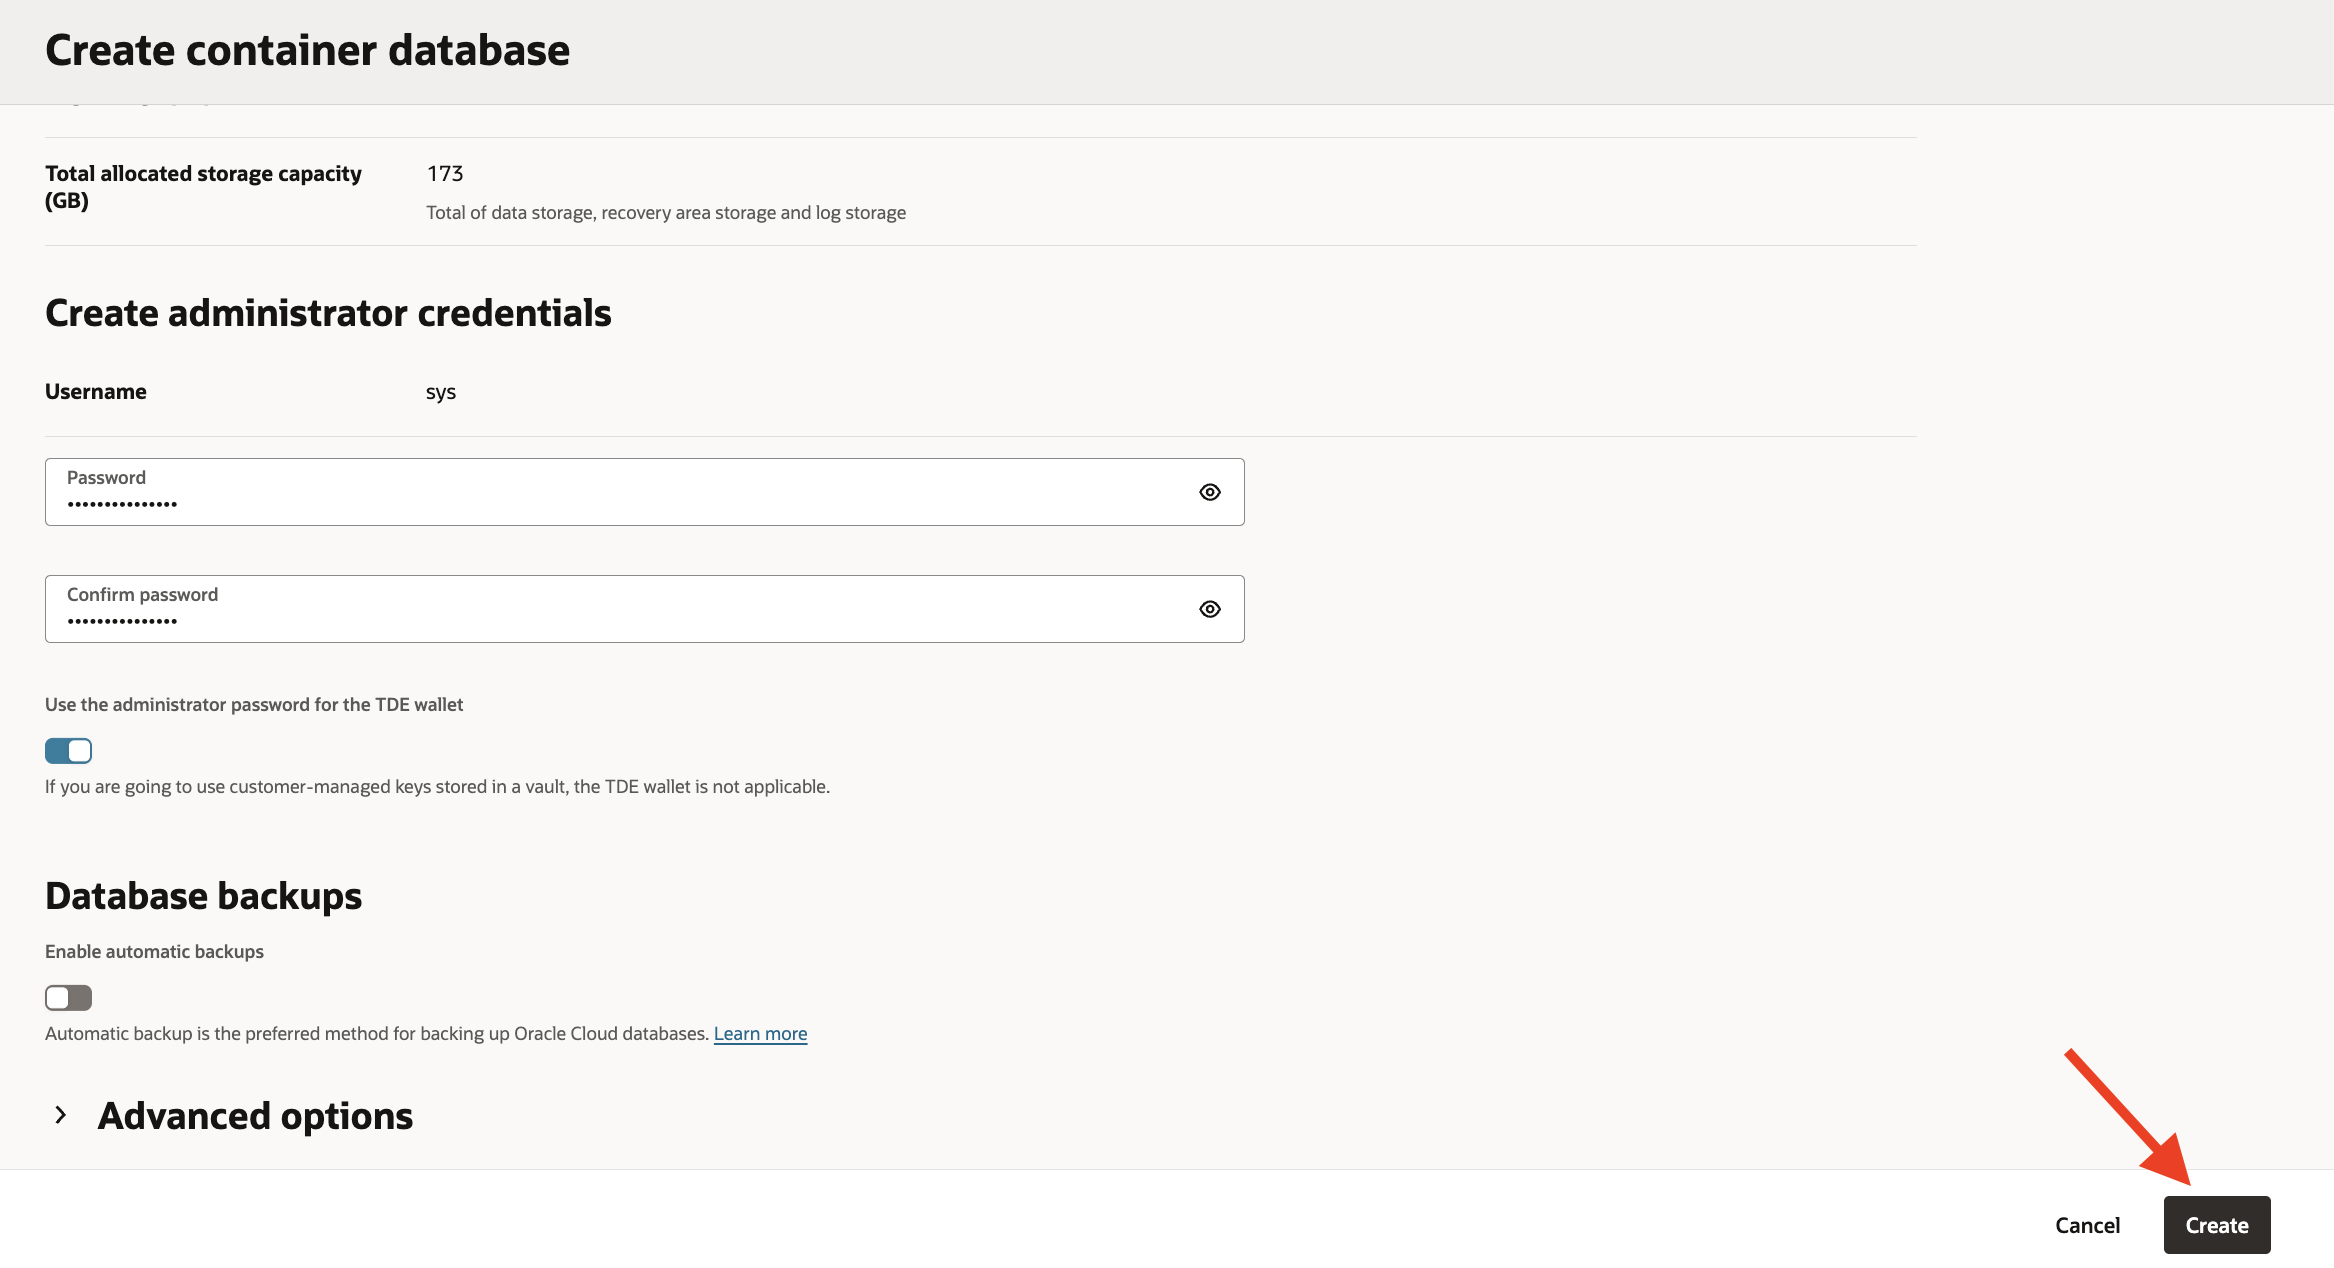
4. Provide the remaining details and click Create.
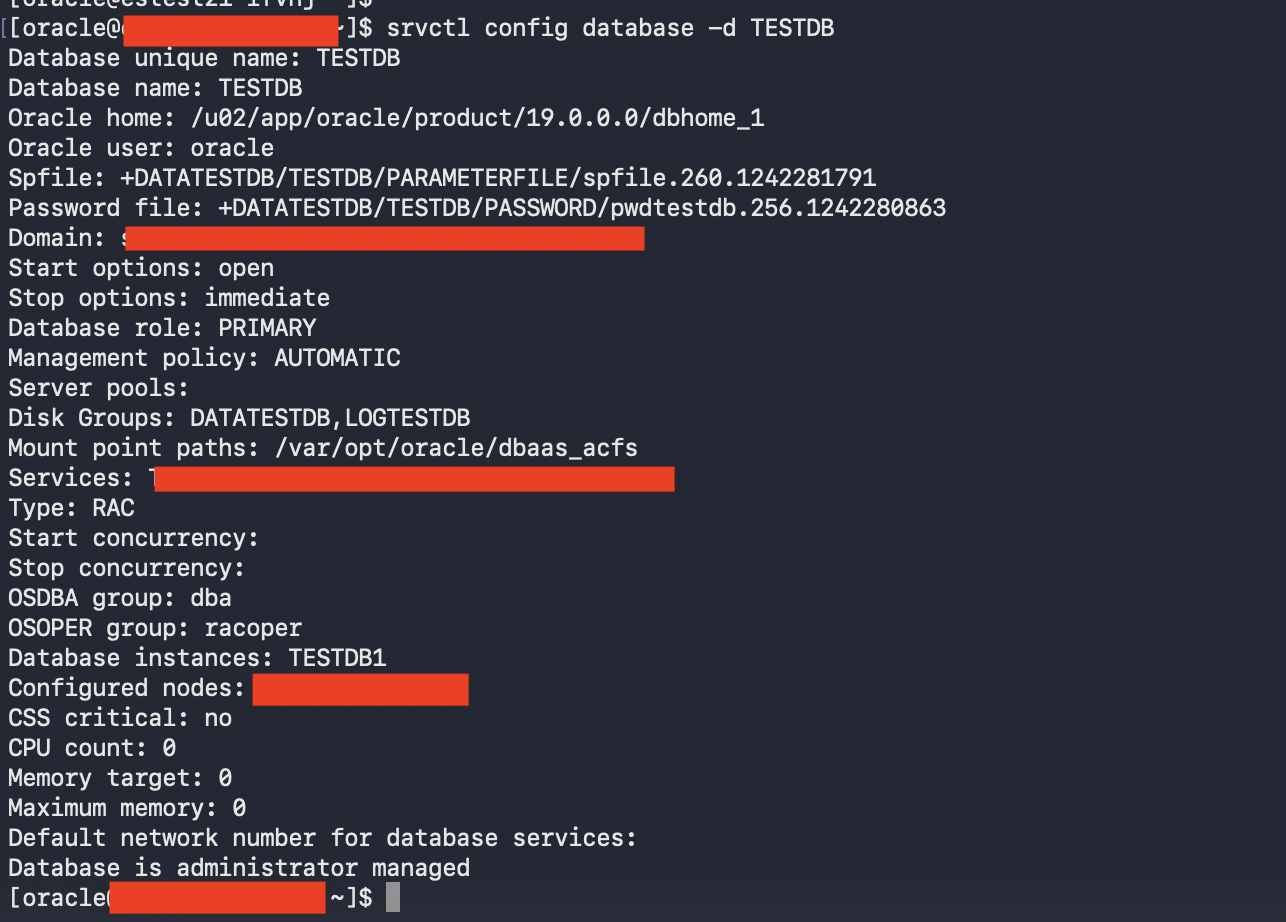
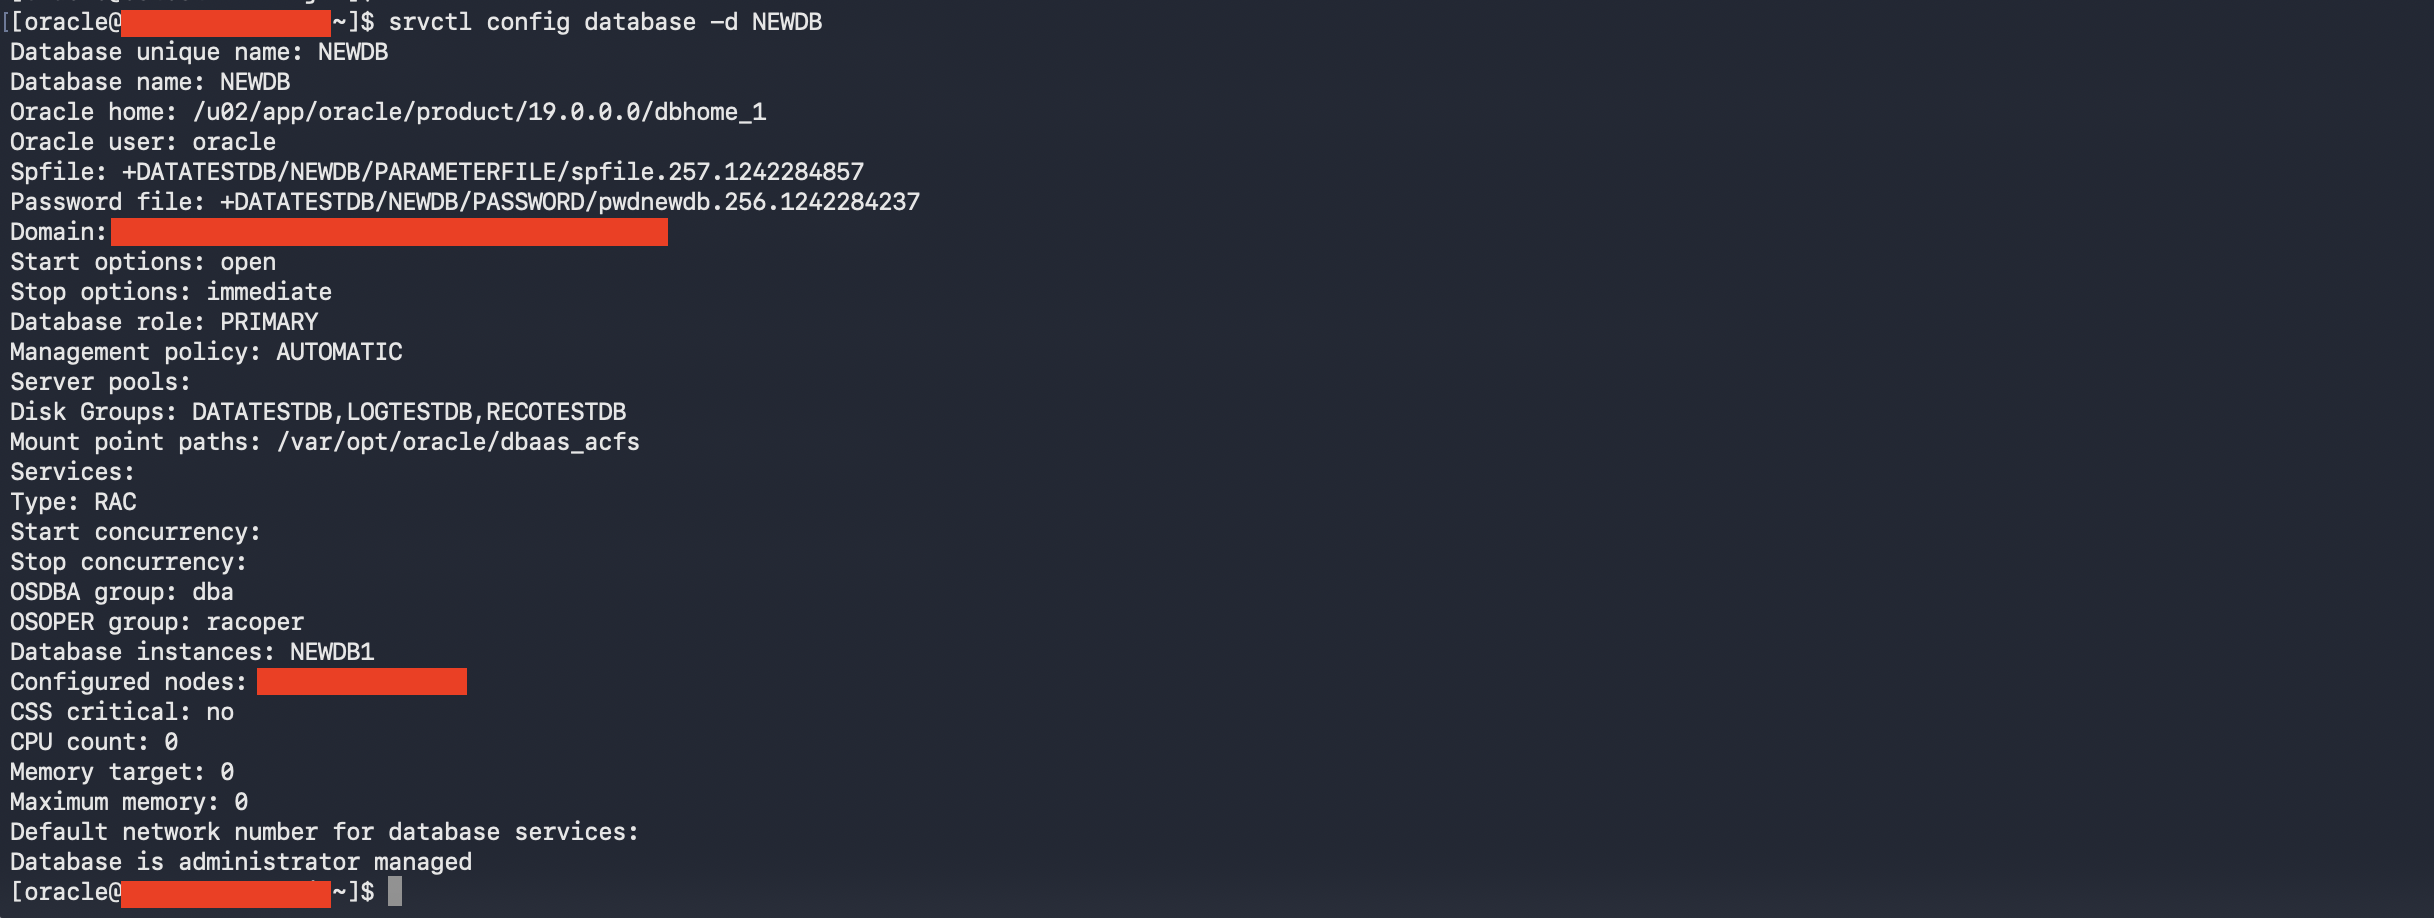
5. After the database is provisioned, SSH to the Exascale VM Cluster and review the “TESTDB” configuration using “srvctl“.
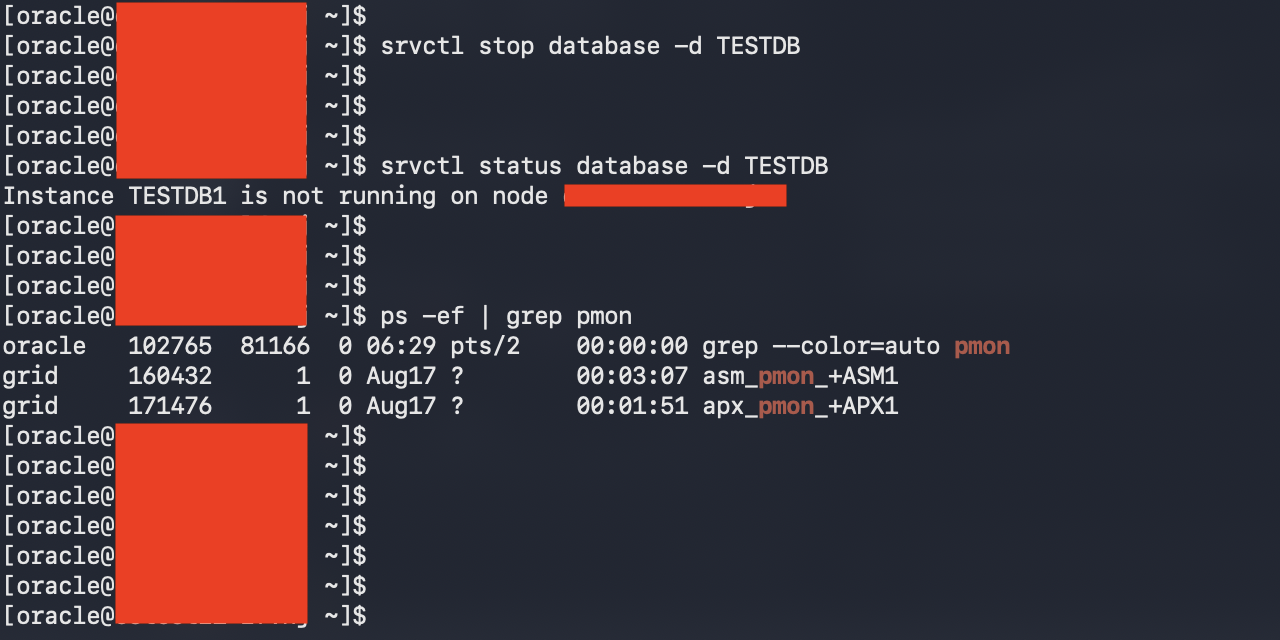
6. Shut down “TESTDB” using the “srvctl” command.
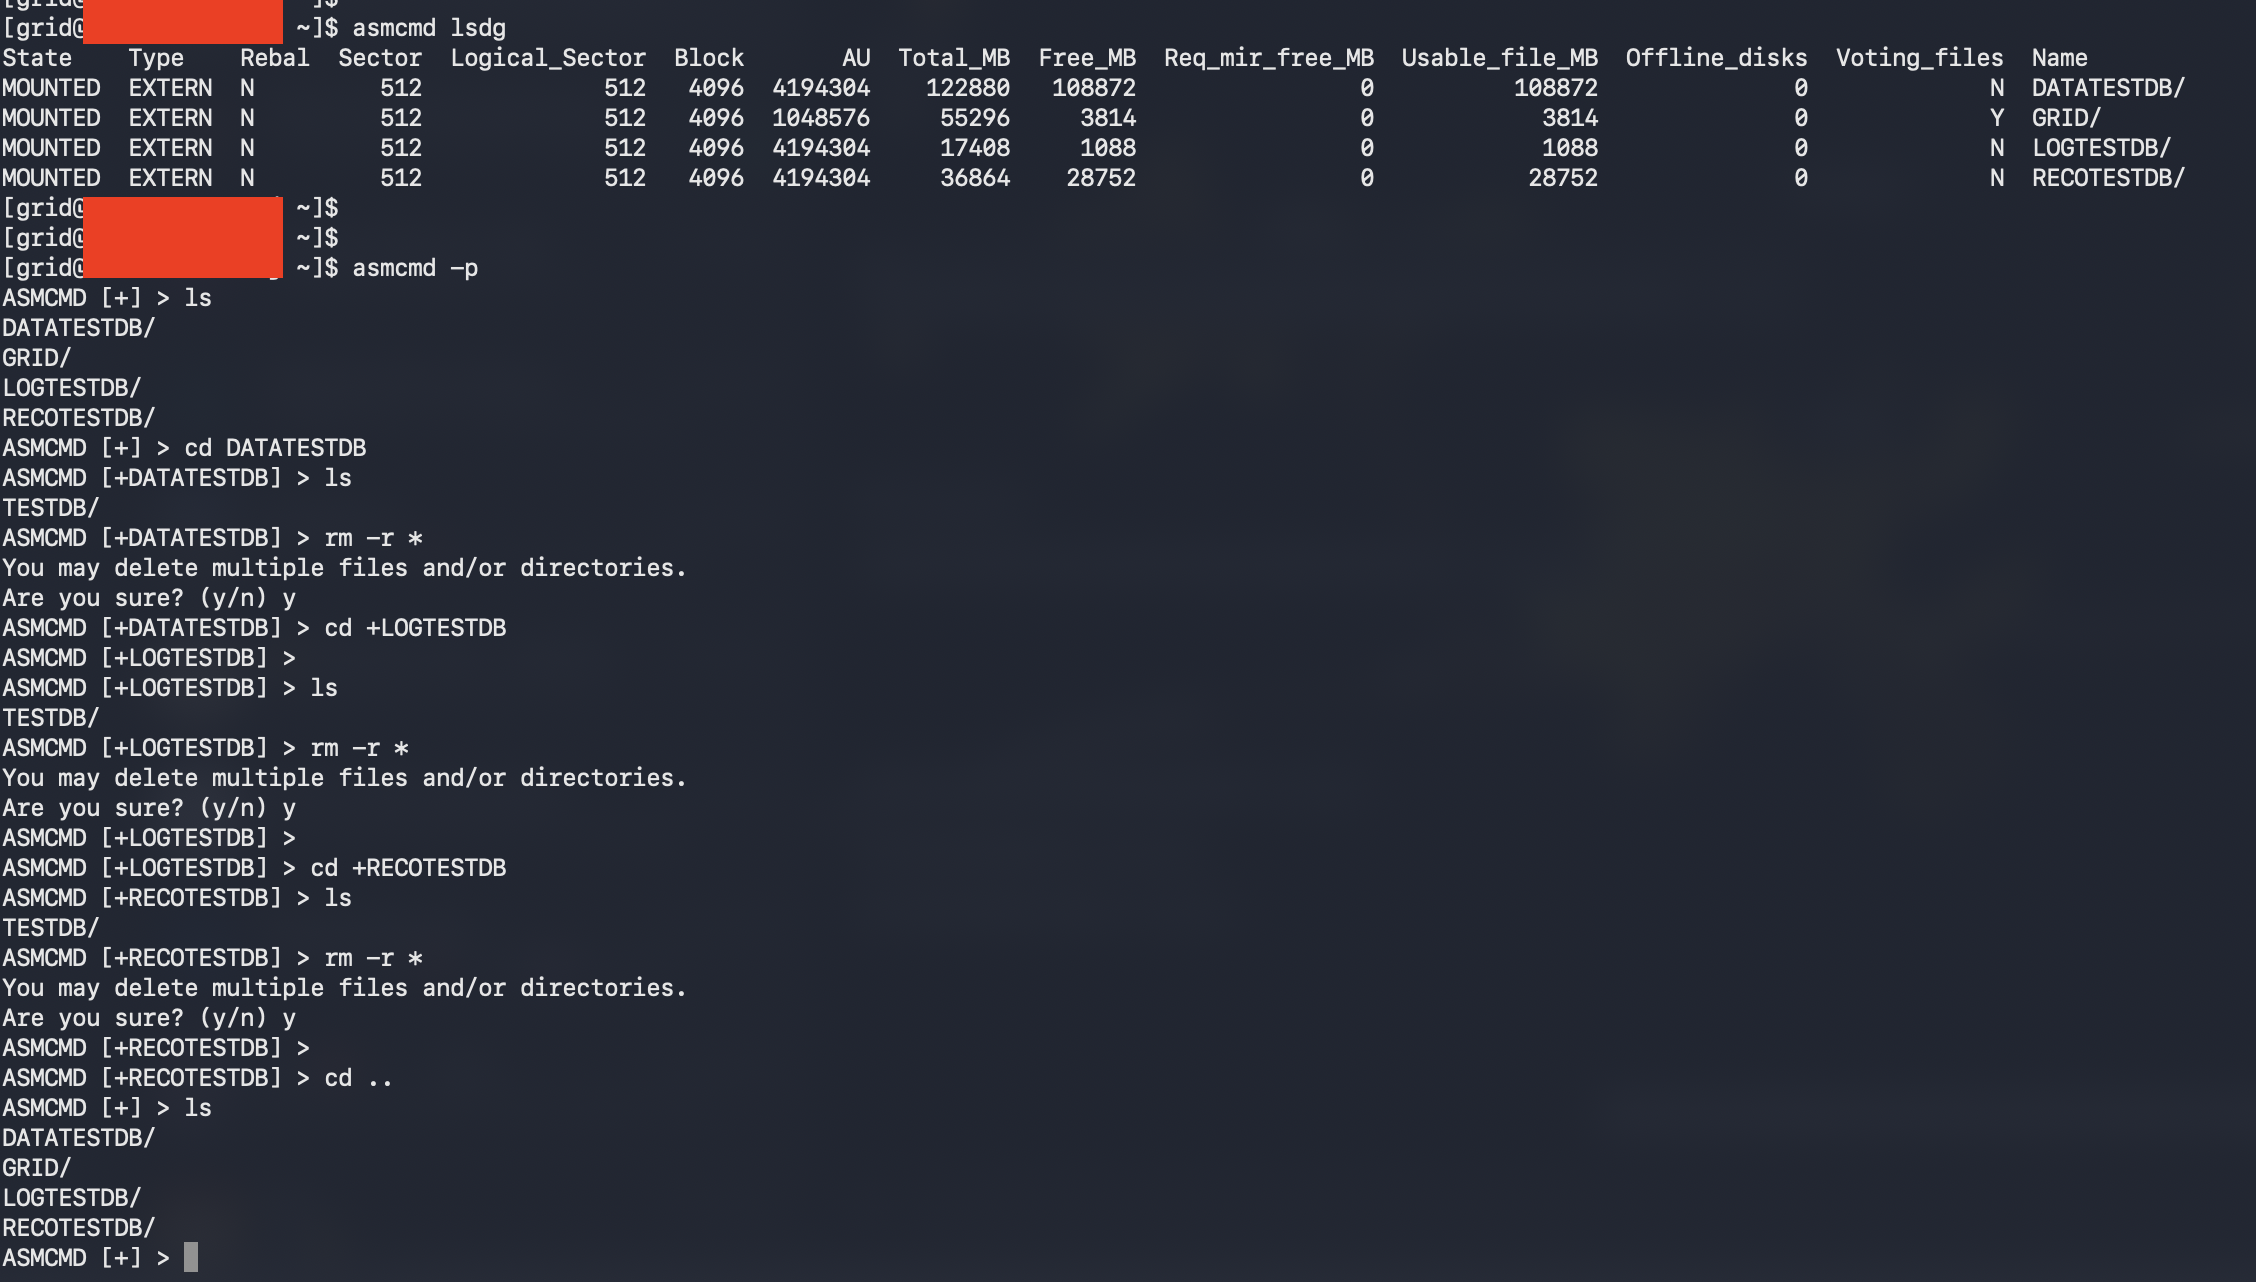
7. Switch to the “grid” OS user and use “asmcmd” to clean up the temporary database files.
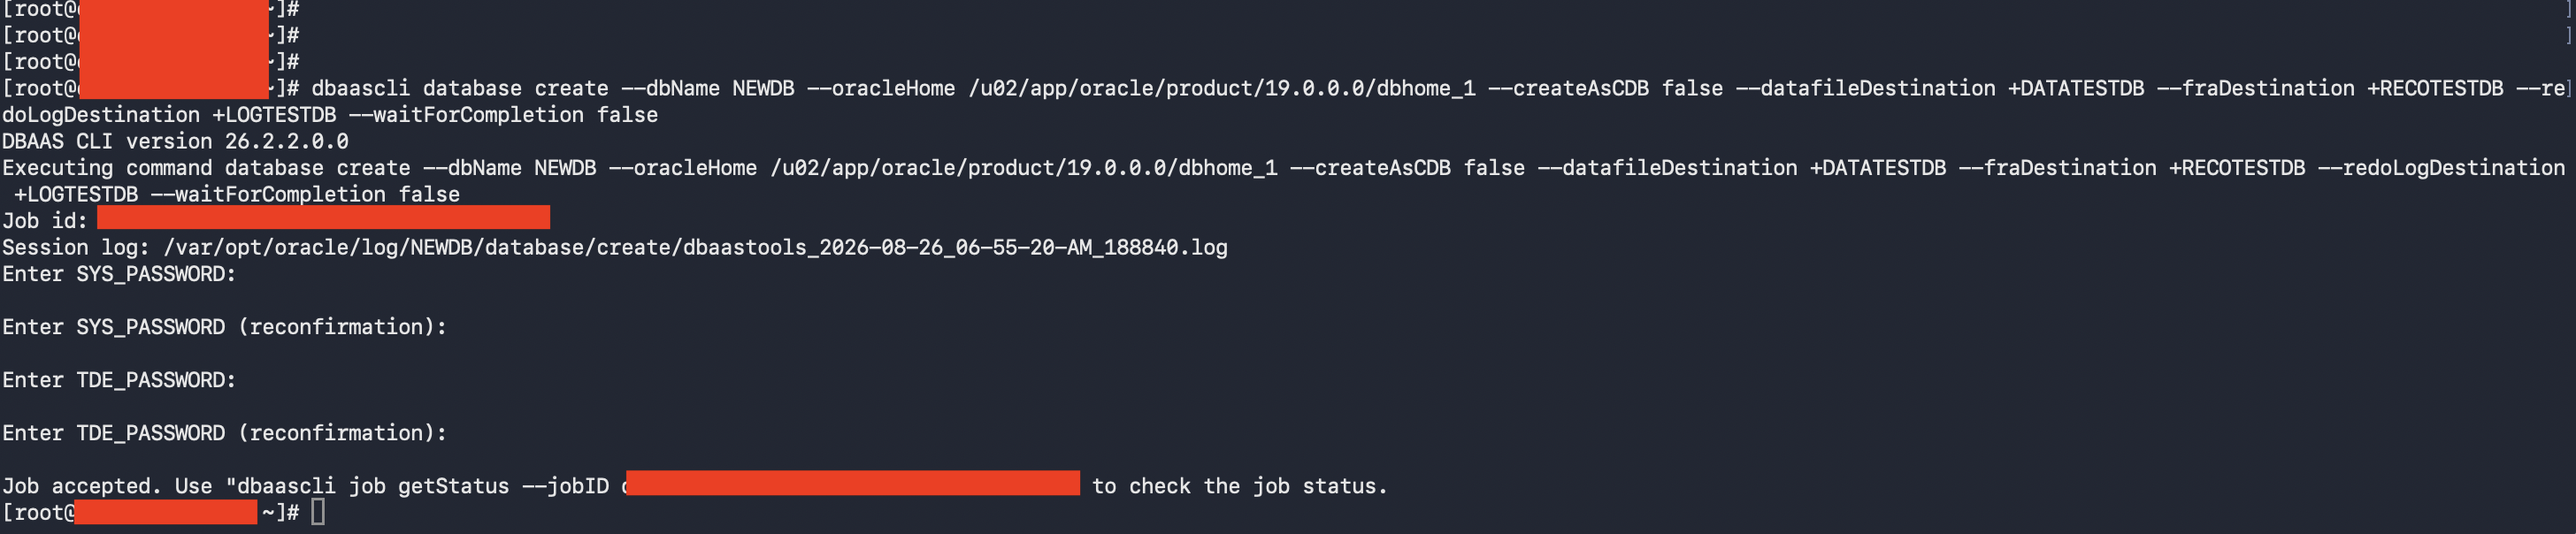
8. The cluster now has empty disk groups that can be reused to provision the target non-CDB database, for example “NEWDB“. Retrieve the Oracle home and disk-group names from the earlier “srvctl config” output. Then run below sample command using root:
dbaascli database create
–dbName NEWDB
–oracleHome /u02/app/oracle/product/19.0.0.0/dbhome_1
–createAsCDB false
–datafileDestination +DATATESTDB
–fraDestination +RECOTESTDB
–redoLogDestination +LOGTESTDB
–waitForCompletion false
9. Monitor progress using the log files in:
/var/opt/oracle/log/<DB_NAME>/database/create
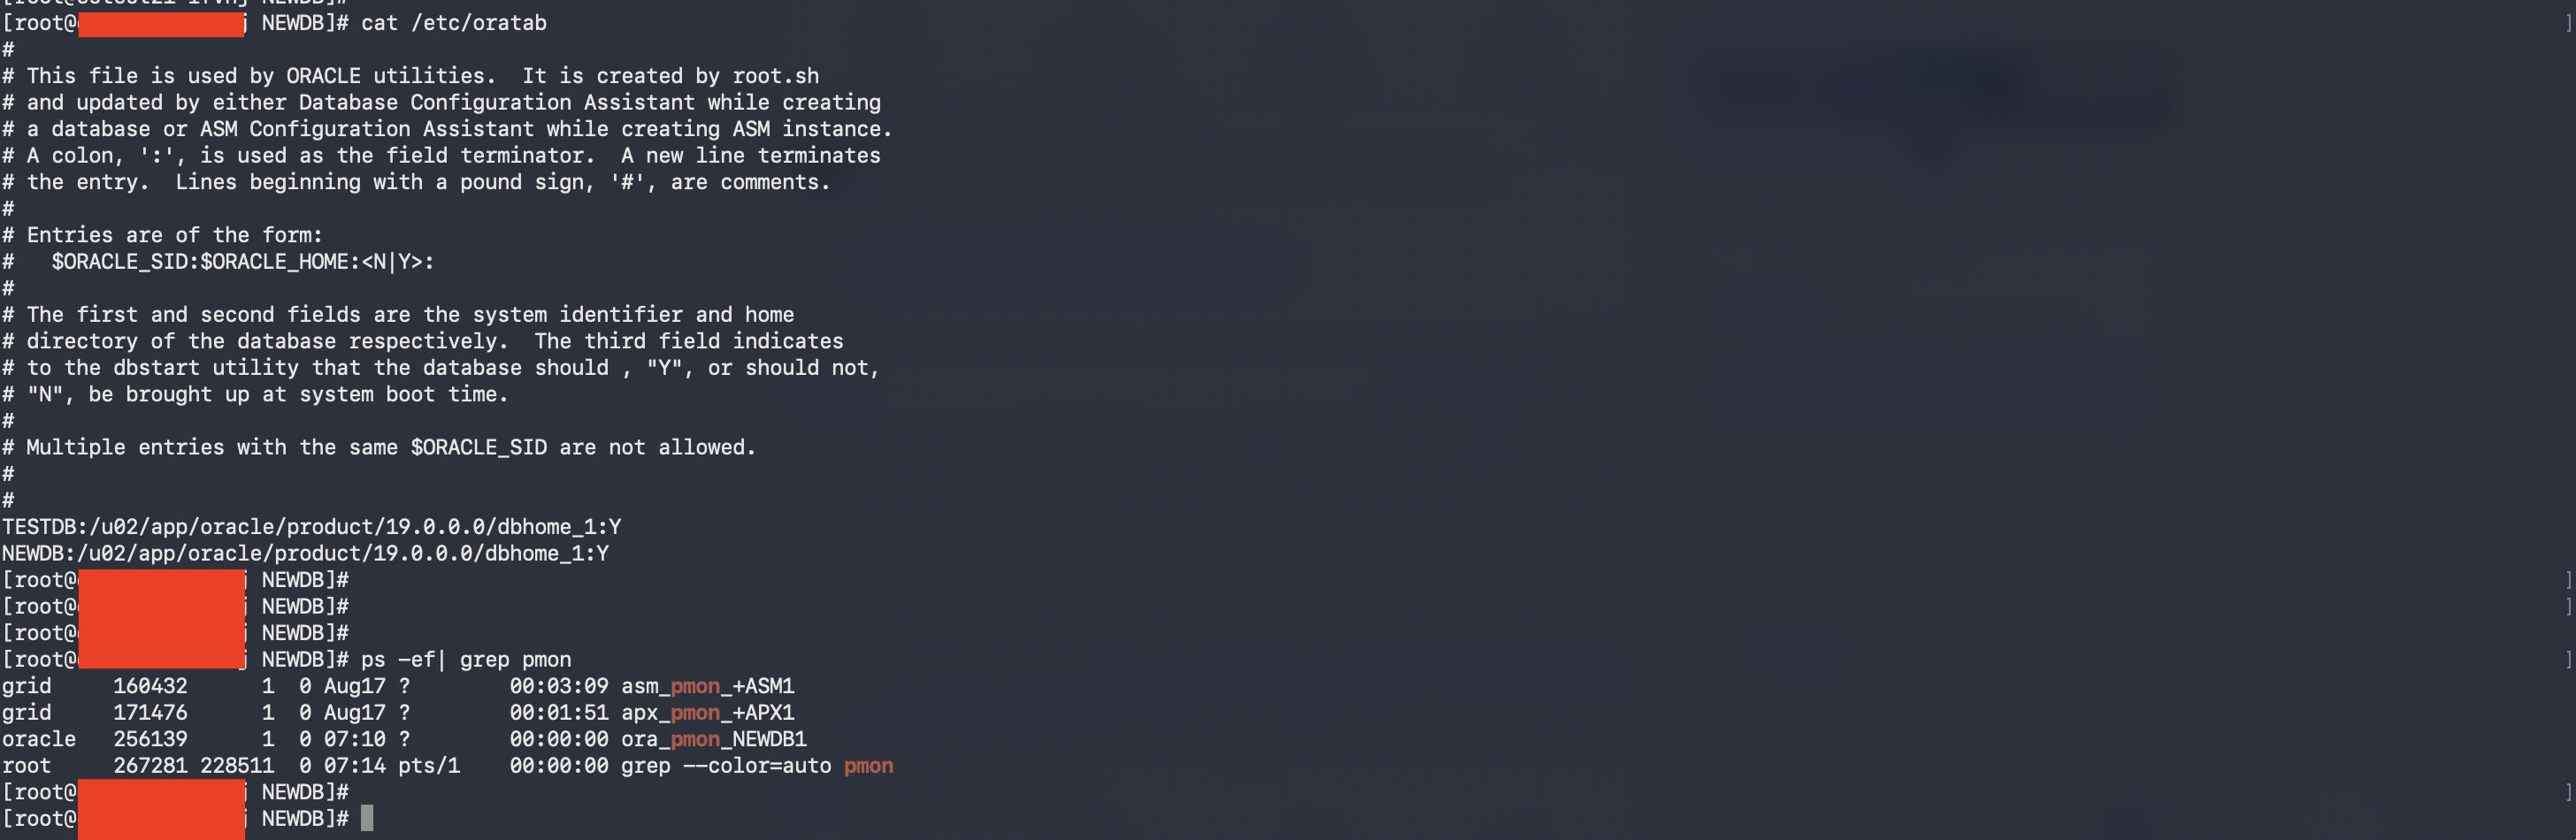
10. After “dbaascli” completes, verify database availability using “srvctl“, Oracle Inventory (“oratab”), and other standard validation commands.
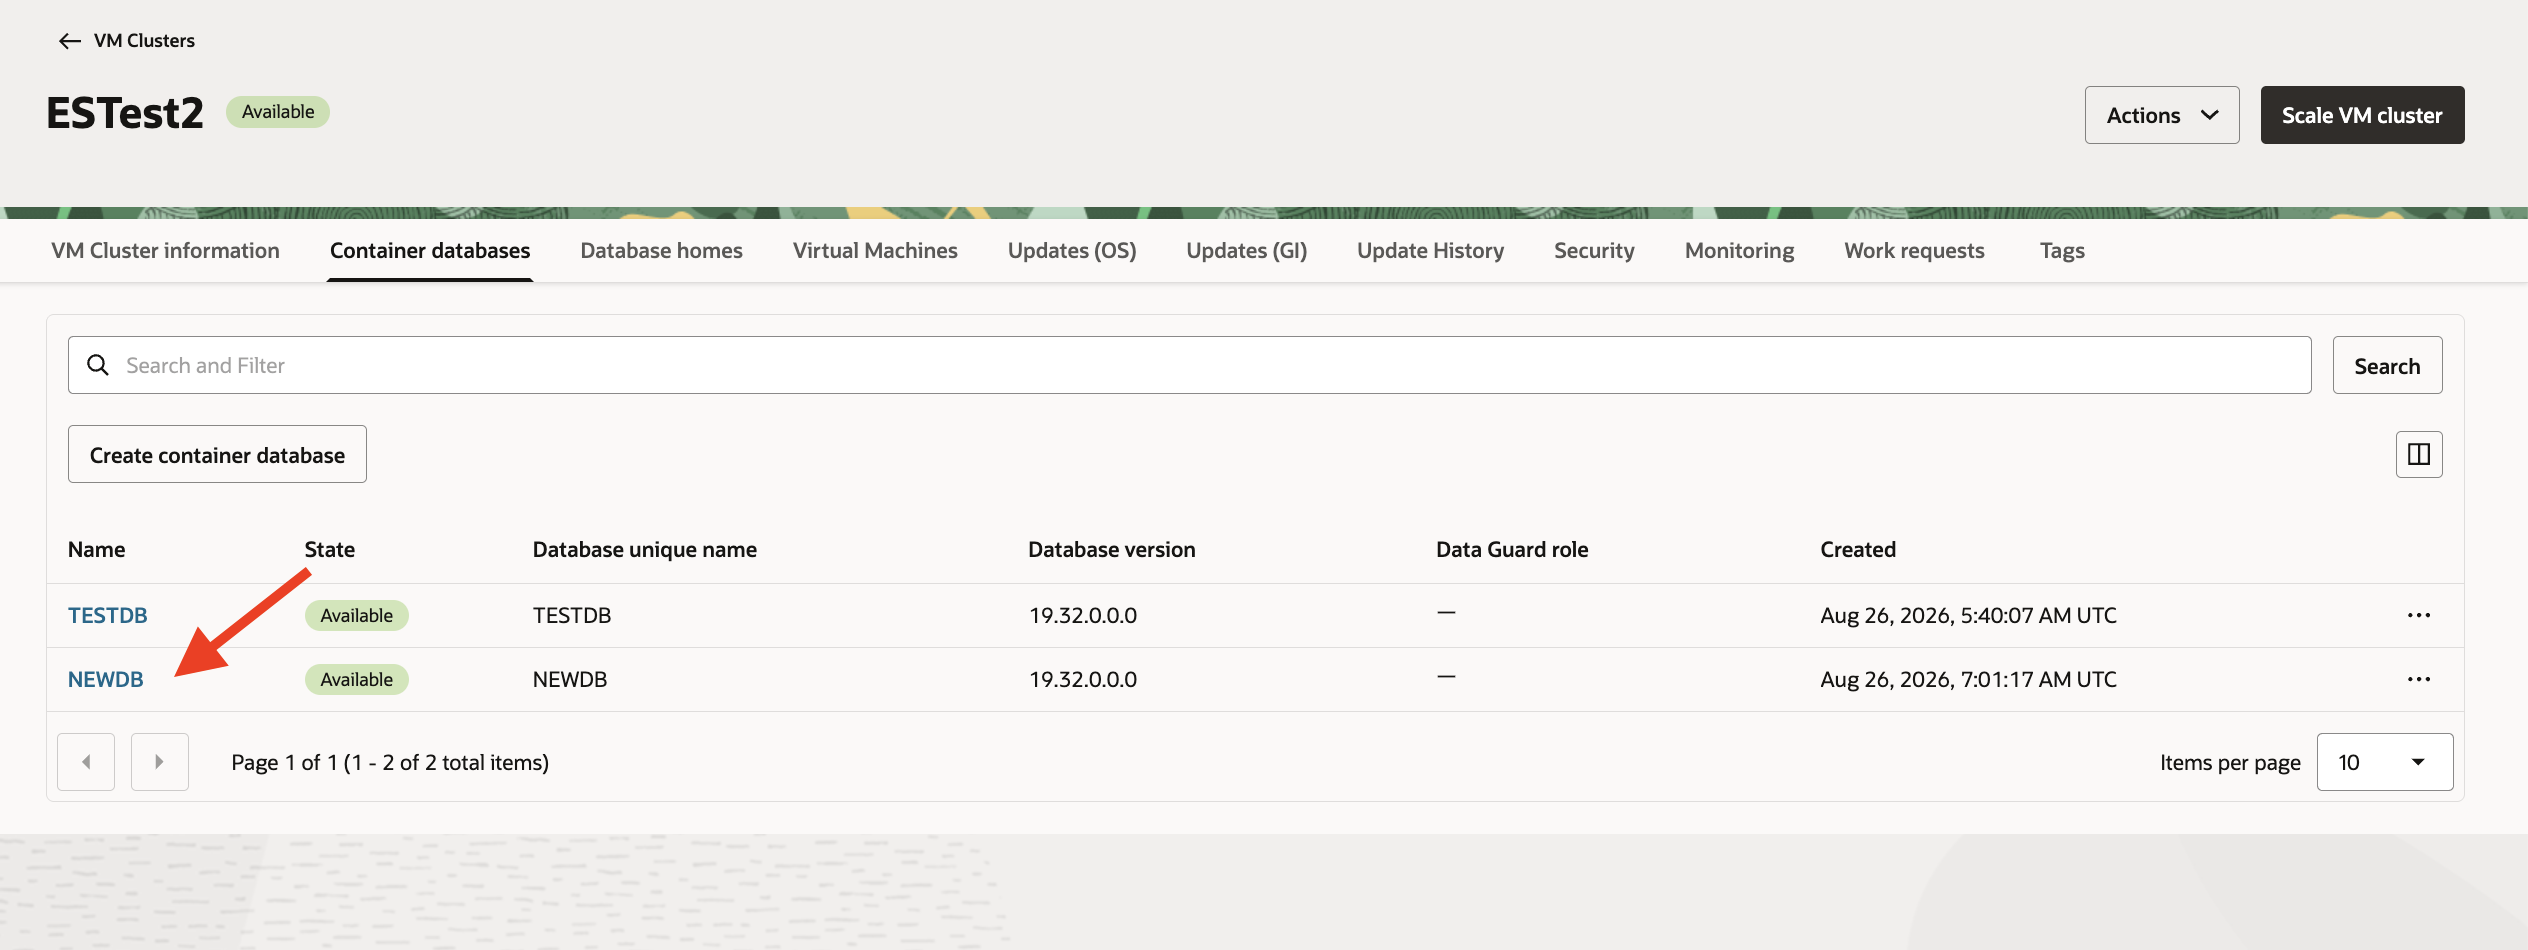
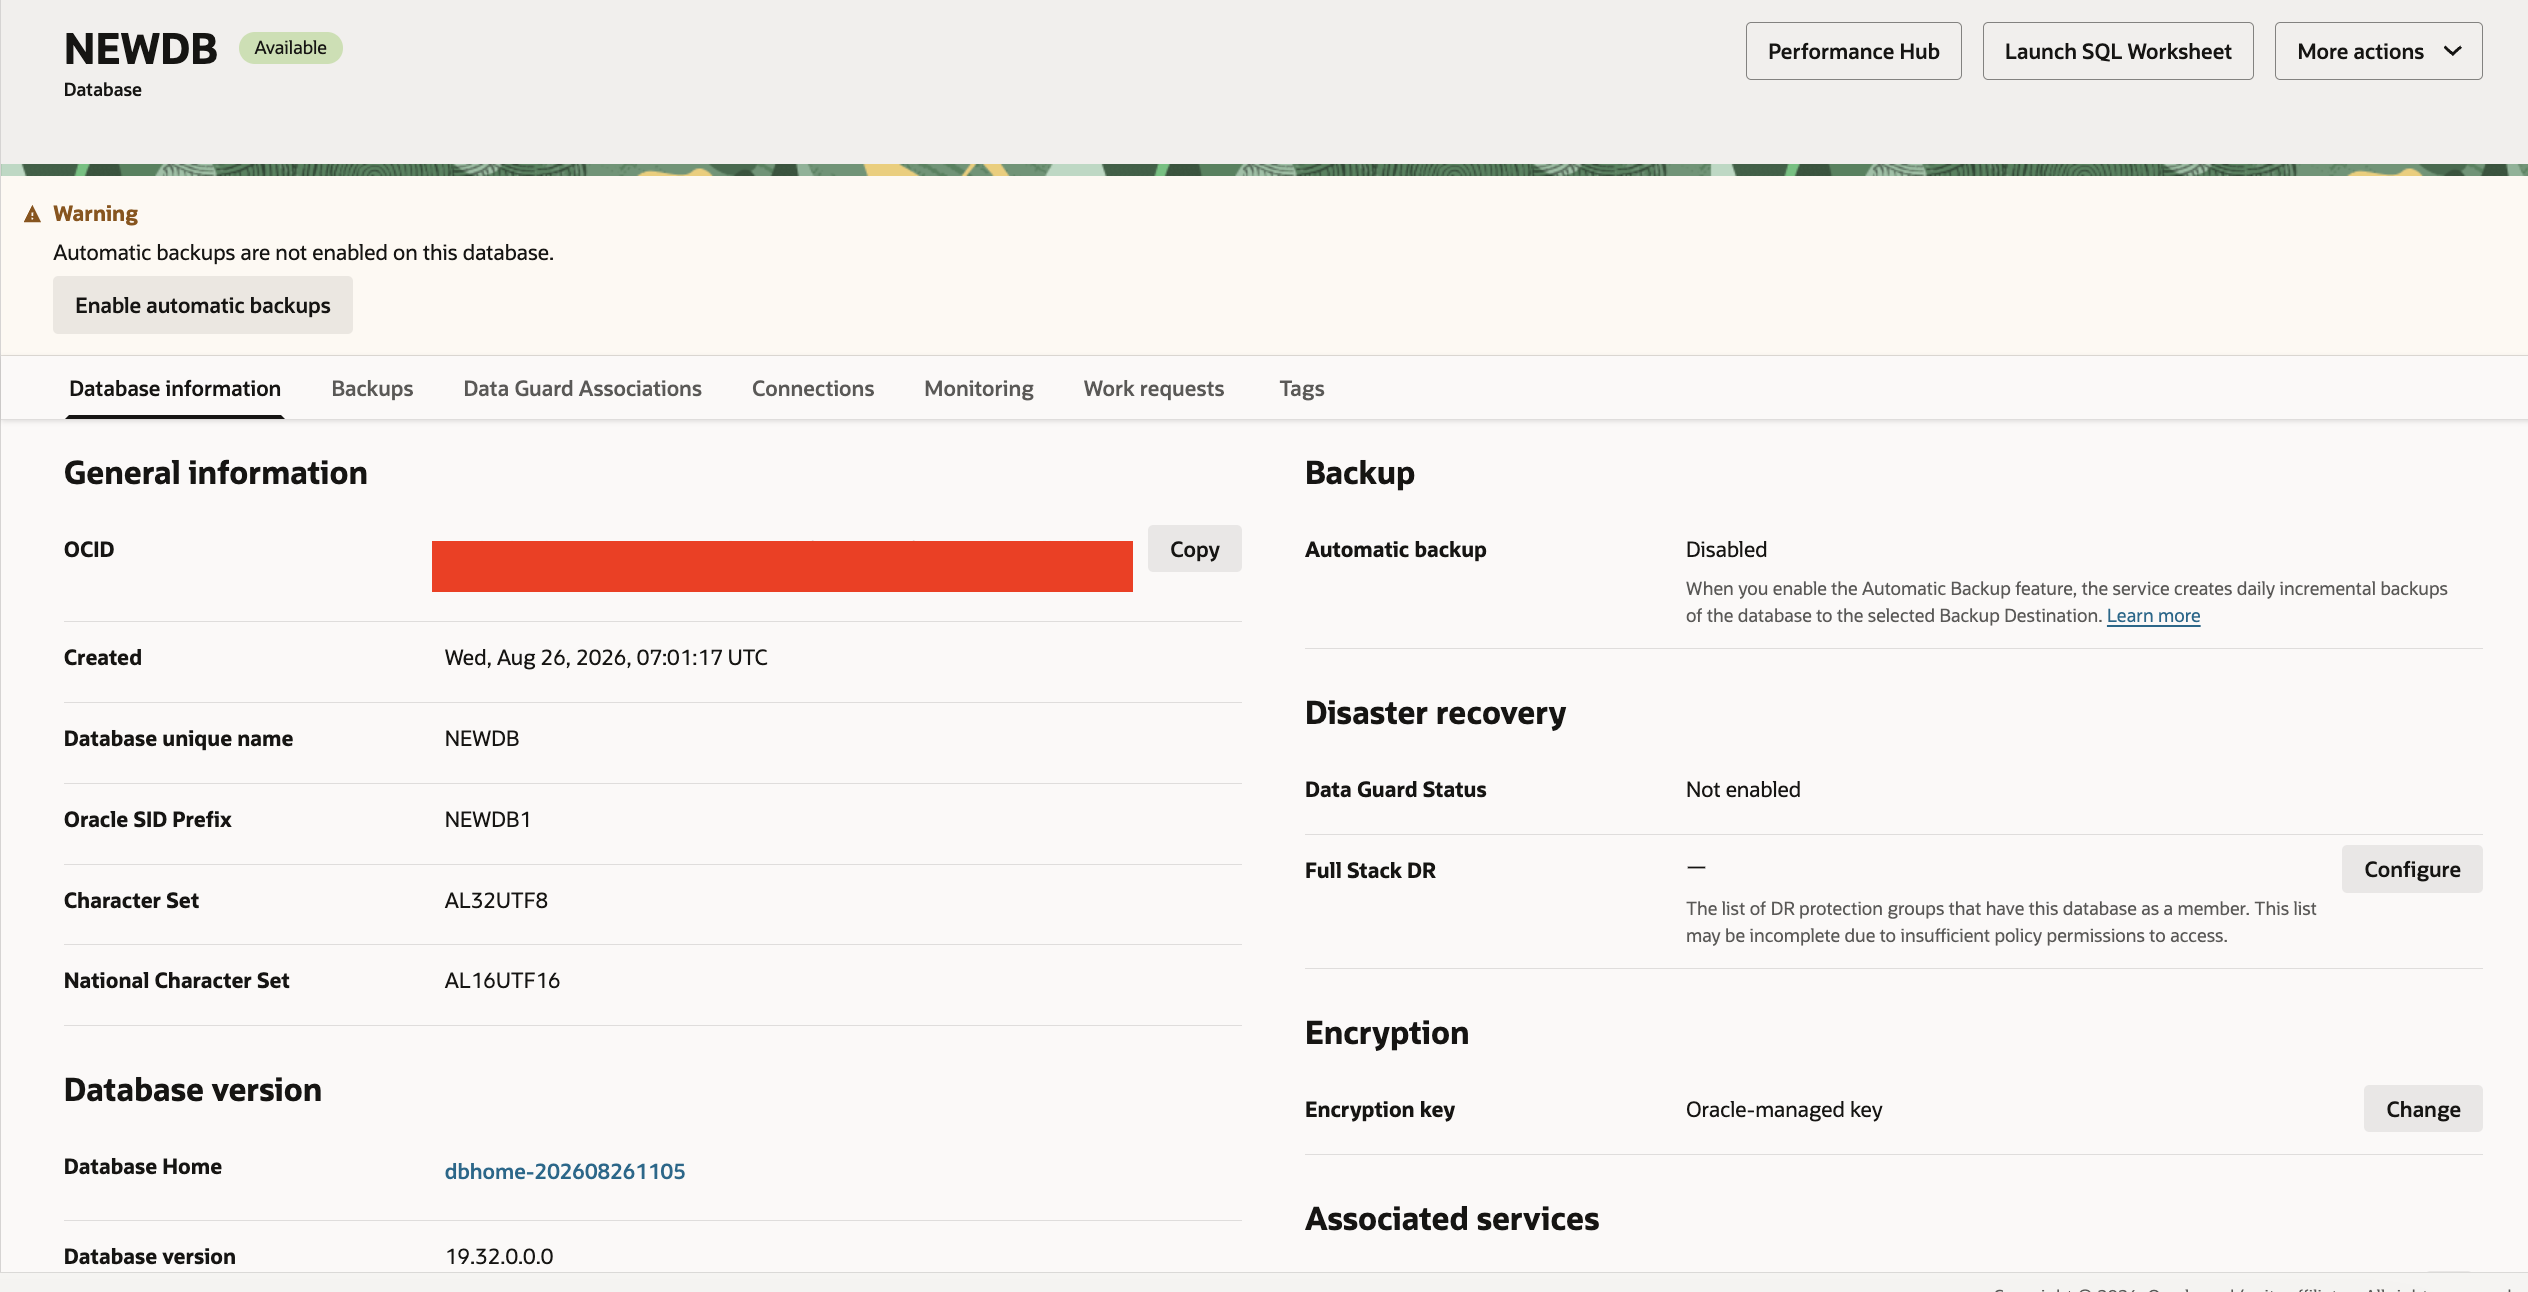
11. The “NEWDB” database should now also be visible in the OCI Console under the Exascale VM Cluster.
Important caution
This is a workaround because there is currently no independent method to provision the required ASM disk groups for this non-CDB creation flow. Kindly validate these steps with Oracle Support before using it in live environment.
The temporary CDB database must be retained for as long as “NEWDB” is required. Do not terminate or delete the temporary database. Doing so can clean up and drop the associated ASM disk groups, which would also make “NEWDB” termination which is non recoverable.
Where possible, use the CDB architecture. Oracle Database 26ai supports CDB architecture only, and adopting CDB helps avoid the operational risks associated with this workaround in Exascale environments. Using 26ai also help you leverage benefits of Exadata smart scan.
Hope you will find this post very useful!!
Let me know for any questions and any further information in comments or LinkedIn.
Regards,
Adi


Leave a comment